Wednesday, 29 April 2009

Silver Touch Sigtag

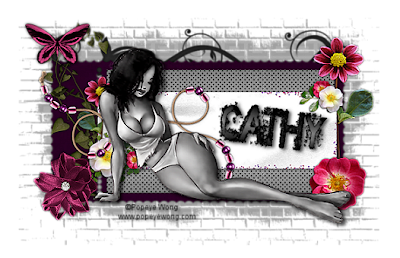
I recently lost everything on my PC including all my tubes, some I was able to get back, others not - so I was on the look out for new tubes and came across PopeyeWong who I forgot how amazing his tubes were!!! So here is another of his tubes 'Silver Touch' check out his site HERE
Scrapkit - 'Ale Capeilero' friendship collection by Bel Vidotti HERE
Thanks for the beautiful kit!
Mura's Meister Tone
Mask - wg-mask-ed-24 HERE
Font of choice
OK - Open a new image in PSP 700x600 floodfill white
Open Frame3 copy & paste as a new layer, resize - selections, select all, float, defloat
copy Paper4 and paste as a new layer, selections, invert, delete, select none
delete original frame and drop shadow 0 0 70 5
select inside frame with magic wand, expand by 7 and add a new raster layer
floodfill with a gradient of choice that matches your tube, do not deselect yet, apply Murameister tone:
300
50
10
45
0
0
select none and move below frame layer
Copy Tag1 and Paste as a new layer, position in middle of frame
Copy leaves 3, resize & paste as a new layer on side of frame
Add some flowers and a butterfly and a beadstring, sharpen all elements and drop shadow
0 0 70 5
Paste your main tube and drop shadow 5 5 70 9
Add a doodle from the kit and paste below the frame
Add a paper of choice as a new layer above the white background layer and apply mask
merge group and lower opacity slightly
Add your name & copyright info
Save as a jpeg or delete white background layer & save as a Png!


Natural Beauty


Supplies
Tube of choice - I am using the beautiful work of Brian Rood which can be purchased from CILM
Scrapkit - 'Naturally Gorgeous' by Seachell which you can download HERE
Thank you Seachell!
Mask - I am using WSL 221 you can find HERE
Font of choice
Xero soft mood (optional)
OK - Open new image in PSP 600x600 floodfill white
Open Frame 37 from the kit & paste as a new layer, resize & sharpen
Click in centre of frame with magic wand and expand by 5
Copy Paper8 and paste as a new layer, resize by 80%, selections, invert, delete and move below frame layer, now paste a close up of your tube, position and delete, select none
Apply Xero soft mood to the tube, default settings, drop shadow frame 0 0 70 5
Copy wrap 9 from the kit, resize and position over frame, I used the raster deform tool to push it in at the sides and up from the bottom as well, sharpen & drop shadow as above
Copy Rose 8 and paste as a new layer, resize and position over the bow on the wrap, sharpen and drop shadow then merge down
Copy corner 26, paste as a new layer, resize & position on top left corner, sharpen & drop shadow, you may need to use your deform tool to turn it slightly!
Now copy some leaves and position them on the frame under the wrap layer
I used elements 10, 28 and 32, resize all, sharpen & drop shadow
paste one of the butterflies as a new layer, resize and position on the leaves
Copy element 45 paste as a new layer, resize & mirror and place at side of frame on bottom
Paste a flower at opposite side
hide white background layer and merge visible, resize by 85%
unhide white background and add a new layer above it, select all
Copy Paper 4 and paste into selection, select none and apply mask
Merge group
Add your main tube and position at side, add a heavy drop shadow
I also added the sticks 47, resize, drop shadow, duplicate & mirror
Position at bottom of tag just above mask layer
Now add your name & copyright information
Save as a jpeg!

Tuesday, 28 April 2009

Receptive

Supplies
Tube of choice -I am using this amazing FTU tube by PopeyeWong called 'Receptive'
Scrapkit - 'Lilac Dreams' from SimplySensationalScraps HERE
Thanks for the gorgeous kit!
Mask of choice - I am using WSL 226 which you can get HERE
Font of choice
Xero Radiance (optional)
OK - Open a new image 600x600 floodfill white
Copy & paste Frame2 from the kit as a new layer
Click inside both frames with magic wand, holding down your shift key, be sure to click in the shadowed bits at the tops of the frames as well, selections, modify, expand by 5
Copy Paper7 and paste as a new layer, selections, invert, delete, move below frame layer
before you deselect copy and paste sparklerain2, resize, delete then paste a close up of your tube and paste into the right frame, delete, select none - apply xero radiance to the tube
128
50
128
255
Add a drop shadow to the frames of 0 0 70 5
Resize foliage 2 and paste as a new layer in middle of frames, sharpen - copy a wrap of choice, resize and paste over the frames, sharpen & drop shadow
Copy lace bow2 and paste at top left of frame, resize and sharpen
Copy a few flowers of choice from the kit, resize & position at bottom of frame
Add your main tube, position & drop shadow 5 5 70 9
Resize scroll 2 and place at bottom right of tag, use your deform tool to tilt it slightly, sharpen & drop shadow
You can add any elements from the kit, I added a butterfly and bow6
Type some words of choice onto the scroll
copy & paste bling doodle2, resize and move to the bottom, sharpen, duplicate, mirror and flip
See my tag above for placement
Hide the white background and merge visible, resize if necessary and crop
unhide white background and add new raster layer above it, select all,
Copy Paper15 and paste into selection, select none and apply mask
I duplicated the mask and merged down
Now add your name & copyright information
Save as a jpeg or delete white background layer and save as a Png!

Monday, 27 April 2009

Booty Call

Supplies
Pirate tube of choice -I am using the artwork of Michael Landefeld which can be purchased from CILM
Scrapkit - 'Sexy Pirate' by Lacarolita you can download HERE
Thank you!
Masks - Vix mask 151 and 161 HERE
Font - Fancy Pens HERE
OK - open a new image in PSP 600x600 floodfill white
Add a new layer and floodfill black, apply mask 161, merge group
Add another new layer above this layer, select all
Copy Paper3 from the kit and paste into selection, select none
Apply mask 151 to this layer and merge group
I lowered the opacity slightly on the bottom mask layer
Copy the wheel 12 and paste as a new layer, position in centre
The tube I am using has a barrel but if yours doesn't, copy the barrel from the kit (3), resize and paste as a new layer to the side, paste your tube so it looks like she is sitting or leaning against the barrel - copy & paste the chest 11, resize and position, add the flag 1, resize and use your deform tool to tilt it slightly, add a parrot to sit on top of chest, I used Parrot 9
Copy String 2, resize & paste as a new layer, mirror and position it in fron of chest
Now add one of the skulls, resize and position where it looks best
I sharpened all elements and added a drop shadow of 0 0 70 5
Drop shadow tube 5 5 70 9
Add your name and copyright information
Hide the white background, resize & crop your tag to your liking
Save as a jpeg or delete the white background layer & save as a Png!

Sunday, 26 April 2009

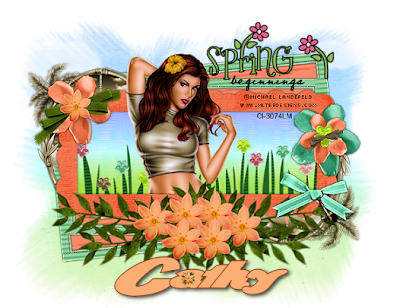
Spring Beginnings


Another one for you today
Supplies
Tube of choice - I am using the beautiful artwork of Michael Landefeld which can be purchased from CILM
Scrapkit - 'Summerbreeze' by Vaybs which you can download HERE
Thanks Vaybs for another great kit!
Mask - WSL116 HERE
Wordart by Lori which you can find HERE
Font - Wild Ride backfill HERE
OK - Open a new image 700x600 floodfill white
Open Frame27 from the kit, image free rotate 90, resize to suit
selections, select all, float, defloat, copy Paper9 and paste as a new layer, selections, invert, delete and select none, merge down
Click inside the frames with magic wand and expand by 3
copy & paste Paper8 as a new layer, selections, invert, delete, select none
Move this below the frame layer, drop shadow the frame then merge down
Duplicate, flip and mirror and arrange into position, merge down
Now open Frame29, resize and position over the merged frames
Click inside the frame with magic wand, selections, modify, expand by 5
Add a new raster layer, copy Paper 12 and paste into selection, select none
Move the paper layer below the frame and drop shadow the frame layer
Copy the flowers 40, resize and paste below the frame layer, resize and erase any overhang with your eraser tool
Open element 31 and position along the bottom of the frame, resize and sharpen
Resize some flowers and bows from the kit and place on frame
Add your tube and position, erase any overhang at bottom of frame
Open your wordart and paste as a new layer, position on top of tag
Copy Paper13 and paste as a new layer above the white background layer
Apply mask 116 and merge group, lower the opacity of the mask layer slightly
Add your name and coyright information
resize and crop your tag, save as a jpeg!

Sun Lover

Supplies
Tube of choice - I am using Pinuptoons which can be purchased from CILM
Scrapkit -'Helen Moore Friendship collection' by Bel Vidotti HERE
Thank you!
Masks - WSL 81 and 22o HERE
Wordart by Lori HERE
Font of choice
OK - this is really quick
Open a new image in PSP 600x600 floodfill white
Add a new raster layer, select all and paste Paper 11 into selection, select none
Apply WSL mask 220 and merge group
Using your raster deform tool drag the top of thr mask down so it only takes up half the image - see my tag for reference
Copy & paste Paper4 as a new layer below the mask layer and apply mask 81
merge group
Copy the coconut palm, paste as a new layer and resize
Paste your tube as a new layerto the side of the palm, resize if necessary
Copy the sun and position
Add any elements from the kit you like, I just added a crap, hat & sandals
resize all elements and sharpen
Open the wordart & position on your tag
Add your name & copyright information
Resize and crop your tag to your liking
Save as a jpeg!

Saturday, 25 April 2009

Chasing Dreams


Supplies
Tube of choice - I am using the artwork of Pinuptoons which can be purchased from CILM
Scrapkit - 'Finding the Fairies' by Tamie which you can download HERE
Thanks for the beautiful kit!
Wordart by Lori HERE
Mask of choice
Font of choice
OK - Open a new image 600x600 floodfill white
Add a new raster layer, select all and copy a blue paper from the kit into selection, select none
Apply your mask and merge group
Resize the clouds from the kit and paste as a new layer, position
Open one of the Fairy houses, resize, copy & paste as a new layer, position to the side
Copy & paste the 3 toadstools, resize and position
Now open the grass, I used both of them, resize & duplicate a few times, merge visible all the grass layers
Resize the pond and paste on top of the grass layer, paste the fairy dust as a new layer, resize & sharpen and position so it looks like it is coming from the pond
Paste your tube as a new layer and position to side of pond
Resize one of the jars and paste as a new layer in front of pond, copy a fairy of choice, resize and place below the jar so it looks like she is inside it
Resize the tulips and position below the grass layer behind your tube
Add a bow to the fairy house
Resize the wings and position where you think they look best
Open the wordart and draw around the 'chasing dreams' with your freehand selection tool
copy & paste as a new layer, resize and position
Now add your name & copyright information
I animated the fairydust by adjusting brightness and contrast by 5 and then 10
(click on tag to see animation)
resize and crop your tag and save!

Friday, 24 April 2009

Love or Money?


Supplies
Tube of choice - I am using the artwork of Michael Landefeld which can be purchased from CILM
Template - 'Love or Money' by Chica HERE
Thank you!
Mask - WSL 98 HERE
Font of choice
Xenofex constellation
OK - Open the template in PSP, delete the copyright layer, resize all layers by 85% twice
Add a new raster layer and bring it to the bottom, image, canvas size 700x700
floodfill the bottom layer white
Pick 2 colours from your tube and make a gradient using foreground background
I used 2 shades of blue and 2 shades of pink from her eyes and lips
Click on the large circle layer, select all, float, defloat add a new layer and floodfill with your first gradient - select none and delete the original layer
Using the same gradient repeat above steps with 2 of the small white squares, diagonally, the large heart and the word 'or'
Now change your colours to the other colour you have selected from your tube and make a gradient - repeat on the rectangular band layer, the doodle layer and the other 2 white squares
On the stitches layer, floodfill black
Hide all layers apart from the 4 black frames and merge these visible
click inside the four frames with your magic wand, holding down your shift key, expand by 3
Copy a close up of your tube and paste as a new layer, position over the frames, selections, invert, delete and move below the frame layer, lower the opacity slightly
Choose 2 darker colours from your tube and make a gradient
use this to floodfill the money signs and the other words
Now add your main tube and position, drop shadow 7 7 70 11
Add a new layer above the white background layer and floodfill with same gradient
Apply mask and merge group, duplicate, merge down
Apply xenofex constellation to the mask layer - settings
2
6
1
1
100
55
Keep original image
Hide white background and merge visible, resize & crop your tag to the desired size
Save as a jpeg or delete white background and save as a Png

Wednesday, 22 April 2009

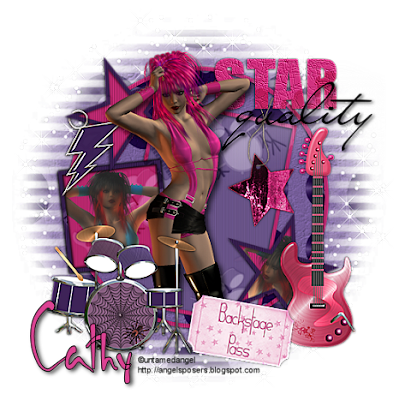
Backstage Pass

I don't often use PTU kits in my tuts but I won this kit in a competition and it has so many possibilities that I had to write a tut with it!!
Supplies - Scrapkit - 'Rock it Like a Wench' by Vella from Wench Designs HERE the kit is currently on sale for $1 and includes the posers by Untamed Angel (whose blog is unavailable at the moment)
Template32 by Melissa which you can download from her site HERE
Mask WSL98 which you can download HERE
Thanks for the freebies ladies!
Font of choice
Xenofex constellation
OK - Open your template in PSP, delete the copyright layer and unhide the white background layer - on each layer of the template, selections, select all, float, defloat and paste a paper of choice from the kit as a new layer, selections, invert, delete and select none. Add a drop shadow to your paper layers of
-1 1 70 5
delete the original template layer. Do the same on all layers apart from the 'quality' layer - select all and add a new layer, floodfill black
Copy one of the posers and paste as a new layer over the middle frame, erase any overhang at bottom of frame and drop shadow
5 5 70 11.
Click inside the small frame with magic wand and expand by 3, paste another poser as a new layer and position, selections, invert, delete - repeat this step with the stars
Now add any embellishments from the kit and position where desired
Add a new layer above the white background layer and select all, copy & paste a paper of choice into selection and apply the mask, delete & merge group, duplicate and merge down
Resize the mask layer by 105%
Apply xenofex constellation - settings - small star constellation, keep original image
Add your name & copyright information
Save as a jpeg or delete white background layer & save as a Png!

Tuesday, 21 April 2009

Music of the Night


Supplies
Tube of choice - I am using the artwork of Michael Landefeld which can be purchased from CILM
Scrapkit - 'Music of the Night' by Jamie Dell which you can download HERE
Thanks Jamie!!
Mask of choice
Font of choice
Open a new image in PSP - 650x550 floodfill white
Open Frame3 from the kit, resize & paste as a new layer
Click inside the frame with magic wand & expand by 5
Copy Paper7, resize by 30% and paste as a new layer, selections, invert, delete and move below frame layer, now paste a close up of your tube and position then hit delete again, select none
Lower the opacity of your tube to about 40
Resize both the sax and violin and paste as new layers either side of the frame
Sharpen & drop shadow 0 0 70 5 all elements
Copy & paste the notes along top of frame, resize and drop shadow
Paste your tube, position & drop shadow 5 5 70 9
I added a bird and positioned it on top of sax, and the teddy behind my main tube
Resize some hearts and paste below the paper layer
Add the Music sign on top of frame
when happy with how your tag looks, hide white background layer and merge visible
Resize & crop then add a new raster layer above the background layer
select all and paste a paper of choice into selection, apply mask and merge group
Add your name & copyright information and save as a jpeg!

Saturday, 18 April 2009

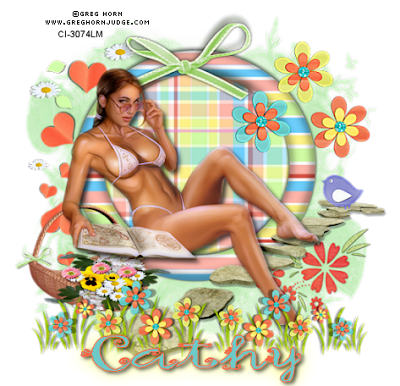
My Spring Garden


Supplies
Tube of choice -I am using the artwork of Greg Horn which can be purchased from CILM
Scrapkit -'Spring Fever' by Chingjp you can download HERE
Thanks for this beautiful kit!
Mask - The other world of Fae Mask1 by Sabre HERE
Font of choice
OK - Open a new image 600x600 floodfill white
Add a new RasterLayer and select all
Open Paper2, resize by 30% , copy & paste into selection, select none
Apply your mask and merge group
Open Frame35 and paste as a new layer, resize and sharpen
Click inside the frame with magic wand and expand by 5
Open Paper12, resize by 25% and paste as a new layer, selections, invert, delete and move below frame, select none
Open element32, resize and position above the mask layer to the side
Copy the stepping stones32, paste as a new layer above the frame layer, resize and position
Copy & paste flowers39, resize and position over the frame
Add bow10, and basket1, resize and position, I also placed the bird on top of the stepping stones
Copy element38, resize and position along the bottom
Add any other elements from the kit you like
Now copy & paste your tube, position where it looks best and add a drop shadow
Add your name and any copyright information
Resize and crop your tag and save as a jpeg!

Friday, 17 April 2009

I've got the keys!


Supplies
Tube of choice - I am using the artwork of Michael Landefeld which can be purchased from CILM
Scrapkit - 'Living Memories' by Vaybs which you can download HERE
Thanks Vaybs!!
Mask - wg_mask_ed_24 HERE
Font - BeautySchoolDropout HERE
OK - Open a new image 600x600 floodfill white
Copy & Paste Frame4 as a new layer
Click inside frame with magic and and expand by 5
Copy & paste Paper30 as a new layer, selections, invert, delete and move below frame
Now paste a close up of your tube and delete again, select none, change the opacity layer to screen - add a drop shadow to frame layer
Copy & paste flowers19 as a new layer above the frame layer, resize & use the raster deform tool to turn slightly, see my tag above, duplicate & flip
Copy & paste the leaves8, resize by 80% and position the paste the roses13, resize & position
sharpen & drop shadow all elements 0 0 70 5
Paste the keys27, resize & position on top of frame, resize a bow and paste over the keys
Now add your main tube, position to the side and drop shadow 5 5 70 10
Hide white background & merge visible, resize & crop to your liking
Add a new raster layer above white background layer and select all
Copy Paper18 and paste into selection, select none and apply mask, merge group
Add your name and drop shadow 2 3 69 7
Add your copyright information and save as a jpeg
Or delete white background layer and save as a Png!

Thursday, 16 April 2009

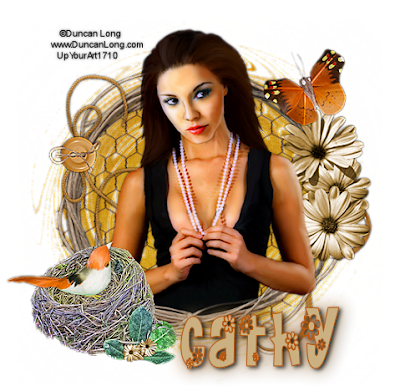
Beautiful Spring


Supplies
Tube of choice - I am using the artwork of Duncan Long which can be purchased from UpYourArt
Scrapkit - 'Tatiana' by Bel Vidotti which you can download here
Thank you for another beautiful kit!
Mask - WSL 73 which you can find here
Font of choice
OK - Open a new image in PSP 600x600 floodfill white
Copy & paste Frame2 from the kit and resize by 85%
Add a new raster layer above the white background layer and select all
Copy Paper1 and paste into selection, select none
Apply the mask and merge group
Copy & paste the wire as a new layer above the mask layer, resize by 85%
Open flower2 copy and paste as a new layer above the frame layer, resize to your liking and using your raster deform tool, turn it around so it sits nicely on side of frame
Sharpen and drop shadow 0 0 60 5
Resize the butterly and paste above the flowers, sharpen and apply same drop shadow
Copy & paste string1 as a new layer, resize and position at opposite side of frame
Copy the button, resize and position on the string
Now paste your tube and erase any overhang from the bottom
Add the nest and one of the birds, position and resize
Add your name and any copyright information
Save as a jpeg or delete white background and save as a Png

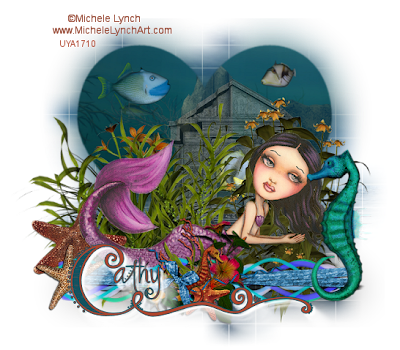
Under the Sea


Supplies
Tube of choice - I'm using the artwork of Michelle Lynch which you can purchase from UpYourArt
Scrapkit - 'Deep Blue Sea' by Sabre which you can download Here
Thank you Sabre!!
Masks - 122-Kris HERE and WSL 84 or mask of choice
Font of choice
OK -Open a new image in PSP 600x500 floodfill white, add a new raster layer, select all
Open seafloor from the kit and paste into selection, select none
Apply 122 Kris mask and merge group, resize by 85%
Copy seafloral2, resize and paste as a new layer
Copy Hibicus6 & 4 resize and position
Copy and paste one of the temples, resize & position above the mask layer, lower opacity
Paste your tube as a new layer and position where it looks best
add some fish, starfish & a seahorse - resize & paste as new layers
Copy & paste the cluster bow, resize and position at bottom, erase the sides that are visible
Add any other elements from the kit you like
Hide white background & merge visible, duplicate and on original layer adjust blur, gaussian blur 30 - unhide white background & add a new raster layer above it, select all
Copy SabreRender and paste into selection, select none
Apply mask of choice - I used WSL 84 and merge group
Add your name & copyright info
Save as a jpeg or delete white background and save as a Png

Monday, 13 April 2009

Rock Me Baby!!

Supplies
Tube of choice - I am using the artwork of Brian Rood available from CILM
Scrapkit - 'Rock Me' by Seachell which you can download from her site HERE
Template 199 by Missy which you can find HERE
Thanks ladies for these wonderful freebies!
VM natural - weave distortion
Font - Wild Ride here
OK - open the template in PSP, click on the bottom white background layer and image, canvas size 600x600 - floodfill white again, delete the copyright layer
Click on the large circle layer, selections, select all, float, defloat and paste Paper4 as a new layer, selections, invert delete, select none, drop shadow 0 0 70 5
You can now delete the original layer
Repeat this step for all layers using different papers from the kit
Copy & paste the motorcycle and position
add a guitar & some music notes and any elements of choice
Paste your tube in front of the motorcycle, drop shadow 5 7 70 11
Add the Rock me tag and erase part of the chain so it looks like it is hanging from her arm, sharpen & drop shadow 1 -1 70 5
Merge down
Hide the white background layer & your tube layer
Merge visible the remaining layers and duplicate
On the original tag layer,adjust blur agussian blur 20, select all, float, defloat and apply weave distortion:
25
200
1
0
0
255
50
select none and adjust add noise at 50
unhide the closed layers, add your name - foreground black, background a red colour from the tag, drop shadow 2 3 67 7
Add any copyright information and save as a jpeg

Praise Me

Supplies
Tube of choice - I am using the artwork of Abranda Icle which can be purchased from UpYourArt
Scrapkit - 'Praise the Lord' by Jaelop which you can download from her site here
Thank you Jaelop!
Mask of choice
Font of choice
OK - Open a new image 600x500 floodfill white
Open Frame 23 from the kit and resize, copy & paste as a new layer, drop shadow 0 0 70 5
Click inside the frame a few times, holding down your shift key until it is all selected
Selections, modify, expand by 4
Copy a paper from the kit, resize and paste as a new layer
Selections, invert, delete and move below the frame layer
select none - paste your tube and position and erase any hanging over the frame at bottom
Open the feathers 24 resize and paste as a new layer at side of frame, sharpen
Copy element 15, resize and paste at top of frame over the feathers
Copy & paste button 28, resize and paste over element 15, sharpen and drop shadow
0 0 70 5
Copy & paste the tree 39, resize and paste below the frame at the side, erase any overhang
Copy some flowers or any other elements from the kit, resize and position
Add a new raster layer above the white background layer and select all
Apply mask of choice and merge group
Add your name and any copyright information
Save as a jpeg

Saturday, 11 April 2009

Easter Blessings

Happy Easter everyone !!!
Supplies
Tube of choice - I am using the artwork of Ching-Chou Kuik which can be purchased from UpYourArt
Scrapkit - 'Easter Parade' freebie by Bel Vidotti which you can find here
Thank you!!
Mask of choice
Font of choice
OK - Open a new image 600x600 floodfill white
Open Frame1, copy & paste as a new layer, resize 85%
Click inside all the frames with magic wand and expand by 5
Copy Paper8 & paste as a new layer, selections, invert, delete, move below frame layer
select none
Add a drop shadow to frame 0 0 70 5
Copy & paste the cloud as a new layer above paper layer, position
Paste one of the bunnies above the cloud layer
Copy the ivy, resize by 65% and paste below bunny
Resize a flower and paste on top left of frame
Now paste your tube, resize if necessary and position
Erase any overhang from the bottom
Copy the grass, resize and paste along the bottom
Use your freehand selection tool with feather at 20 and draw along the bottom of the grass then hit delete, this takes away the straight edge
Add any elements of choice, resize, sharpen & drop shadow
Paste a doodle below the frame layers
At this stage, hide white background and merge visible
unhide white background and add a new raster layer, select all
Copy a paper and paste into selection, select none
Apply mask of choice and merge group
Resize and crop your tag to your liking
Add your name and any copyright information
Save as a jpeg or delete white background layer & save as a Png

Friday, 10 April 2009

Star Bright

Supplies
Tube of choice - I am using the artwork of Brian Rood which can be purchased from CILM
Scrapkit - 'Diamonds R' 4ever' by Chingjp here
Thanks for this awesome kit!!
Mask of choice
Eye Candy HSB Noise
OK - Open a new image 600x600 floodfill white
Copy ClusterFrame3 and resize, paste as a new layer
Click inside the frames with magic wand and expand by 6
Copy & paste a Paper from the kit as a new layer, selections, invert, delete
Move the paper layer below frames now copy your tube and position in the top frame, delete
Select none
Add a drop shadow to your frame and tube
Copy & paste a butterfly from the kit, resize and position on the frame
Copy a Paper of choice, paste as a new layer above white background layer and apply a mask
Merge group and lower the opacity slightly
Paste your tube again at side of frames and drop shadow
Open the pink glitter, resize and paste as a new layer - position over the bottom frame
Open the sparkles and select one using your selection tool, paste as a new layer, resize and duplicate and position them over the frame
Using the alphas from the kit add your name
Add any copyright information
Merge the 2 sparkles together
Resize all layers by 85%
Animation
Copy merged your tag into animation shop as a new image
Back to PSP and click on the sparkle layer, apply HSB Noise
Hue - 25
Saturation - 30
Brightness - 40
Opacity - 0
Lump width & height - 28
Random seed - 10
Copy merged into animation shop after current frame
Back to PSP, edit, undo - and apply HSB Noise again, same settings but with Random Seed at 15
Copy merged into ani shop after current frame
Save as a gif

Thursday, 9 April 2009

Peace

Supplies
Tube of choice - I am using artwork by Michael Landefeld which can be purchased from CILM
Scrapkit - 'Peace & Love' by Jaelop which you can download here
Thank you Jaelop!!
Mask of choice
Font of choice
OK - Open a new image 600x600 floodfill white
Open element 40 copy & paste as a new layer, resize, sharpen & drop shadow
Copy element 32, resize & paste as a new layer, position over the clip and erase part of the hanger so it looks like it is hanging over the clip, drop shadow
Copy element 21, resize and duplicate, position one above the other
Copy some flowers and paste as new layers, I used 15 & 33, sharpen & drop shadow
Click inside the heart frame and expand by 6, paste a paper as a new layer, selections, invert, delete and move below the frame, now paste your tube, resize to fit and delete again
Copy bow25, resize & position at bottom of frame
Paste a butterfly of choice, I used 39 and position on top left
Copy the word Peace - element 6 resize and position on your tag, sharpen & drop shadow
Open doodle 42, resize & position below all your layers, sharpen more
Now add a paper of choice above white background and apply a mask
Merge group
Add your tube again and position to the side of tag, drop shadow
Add your name & copyright information
resize & crop your tag to your liking
Save as a jpeg or delete white background & save as a Png

Saturday, 4 April 2009

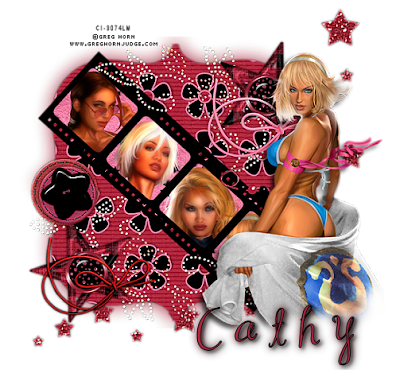
Glamour


Supplies
A few tubes of choice by the same artist - I am using the gorgeous artwork of Greg Horn which can be purchased from CILM
Scrapkit - 'Beautiful Emotion' by Lacarolita which you can download from her site here
Template#17 by Lacarolita which you can also download from her site
Thank you so much for your fabulous freebies!!
Plugins - Xero soft mood
Font of choice
OK - Open the template in PSP, resize all layers by 85%
Delete the ©layer and change the pink background to white
On Raster1 layer, selections, select all, float defloat, copy Paper6, paste as a new layer
Selections, invert, delete - select none - drop shadow 0 0 70 5
You can now delete the original layer
Click on raster 2 layer and repeat the above but use Paper1
Repeat on Raster 4 layer using Paper3 and add an inner bevel of choice before drop shadow
Make sure you are on Raster3 and click inside one of the film frames with your magic wand
Selections, modify, expand by 4
Copy one of your tubes and paste as a new layer, resize if necessary and position, selections, invert, delete and move below frame layer, select none
Repeat this step with the other 3 frames
Hide everything apart from your tubes and merge visible
Apply xero soft mood to the tube layers - settings:
Haziness and glow red 50
Brighness & contrast 0
Duplicate your raster1 layer and on the bottom layer adjust blur, gaussian blur 15
Open Bling1 from the kit resize and paste as a new layer below the stars layer, sharpen and position, duplicate, flip and mirror
Add a few buttons and bows from the kit & position
Now add your main tube, position to the side and drop shadow 5 5 70 9
Copy & paste templante2 above the white background layer, resize and sharpen more
Add your name and copyright information
Resize & crop your tag to your liking
Save as a jpeg or delete white background layer & save as a Png

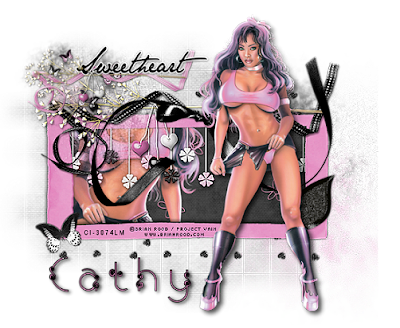
Sweetheart


Supplies

Tube of choice -I am using the artwork of Brian Rood which you can purchase from CILM
Scrapkit - 'My Sweetheart' by Jaelop can be downloaded from her site HERE
Thanks for this beautiful kit!
Mask of choice
Font of choice

OK - Open a new image in PSP 650x500 floodfill white
Open Frame13 resize by 25% copy & paste as a new layer
click inside frame with magic wand and expand by 7
Copy Paper1 and paste as a new layer, selection, invert, delete and move down below frame
Now paste your tube, position and delete again
Copy and paste element28 resize by 25%, sharpen more and hit delete
Open element51 resize by 25% copy & paste as a new layer & position along top of frame, sharpen - copy & paste 7a, resize and paste as a new layer, position, drop shadow 0 0 70 5
also drop shadow your frame the same
Copy & paste element 22, resize & position on bottom of frame
Resize butterfly48 and place at opposite side of frame
Copy & paste the hearts37, resize and duplicate a few times and position below the paper layer
Copy & paste element 52, resize and position
Now paste your tube again as a new layer on top, drop shadow 5 5 70 11
Hide white background and merge visible
resize by 85% and crop
Open Paper6 resize by 25% add a new raster layer above white background
Select all and paste paper into selection, select none
Apply mask of choice and merge group
Copy one of the Wordart from the kit, resize and paste as a new layer
Add your name & copyright information
Save as a jpeg or delete white background layer and save as a Png


Wednesday, 1 April 2009

Rocker Chick

Supplies
Tube of choice - I am using the artwork of Brian Rood which can be purchased from CILM
Scrapkit -'Rock Revolution' by Yvette at Misfits Scrapz can be downloaded here
Thanks for this gorgeous kit!
Mask of choice
Font of choice
OK - Open a new image 600x600 floodfill white
Copy & paste Frame4 as a new layer, click inside the frame with magic wand, expand by 5
Copy & paste Paper15 as a new layer, selections, invert, delete & move below frame layer
select none
Paste your tube as a new layer, position, drop shadow and erase any overhang
Paste some elements from the kit around the frame, resize & position
Use my tag as a reference or do your own thing
Paste Paper9 as a new layer above the white background and apply mask of choice
merge group
Add your name and any copyright information
Resize & crop your tag to your liking
Save as a jpeg or delete white background layer & save as a Png