Monday 26 April 2010

Shut up & kiss me!

Supplies
Some tubes of choice from the same artist - I am using Pinuptoons which may be purchased from CILM
Template - 164 by Beth here
Thanks Beth!
No scraps for this
Mask of choice - I am using Artmama mask 11 here
Font I am using is Romance Fatal
Eye candy Gradient Glow
OK - Open the template, delete the copyright layer & the silver layer
add a new raster layer, bring to the bottom & floodfill white
click on one of the black rectangles, select all, float, defloat
copy & paste one of your tubes and position within the rectangle, invert & delete, select none
lower the opacity of the tube layer to around 40
repeat this step for the other 2 rectangles
now click on one of the grey frames, select all, float, defloat, add a new raster layer, floodfill black -copy & paste another tube of choice as a new layer, invert & delete, select none
lower the opacity of the tube layer again, add a drop shadow to the white frame:
0 0 70 7
repeat this step with the other small frame
Copy & paste your main tube, position & drop shadow 5 5 70 11
resize the wordart & position where you like on the tag
hide background layer & merge visible all layers
resize & crop your tag
unhide background & add a new raster layer above it
floodfill with a colour or gradient of choice
apply mask,delete & merge group, duplicate & merge down
Now add your name using black and apply a pink gradient glow followed by a black gradient glow
add your copyright info
delete background layer & save as a Png

Friday 23 April 2010

The Tea Party

Supplies
Tube of choice - I am using the artwork of Michelle Lynch which is available to purchase from UpYourArt
Scrapkit - a fabulous freebie kit from Vaybs called 'Alice in Wonderland' here
Mask - I am using DBV Mask 89 here
Thanks again Vaybs for sharing your talent with us!
Font of choice - I am using heart emboss
Xero porcelain
Eye Candy gradient glow
OK - Open a new image in PSP 600x600 floodfill white
Add a new raster layer & select all
Copy & paste Paper 5 into selection, select none
apply mask, delete & merge group, duplicate & mirror, merge down
Copy & paste element 23 as a new layer
resize slightly & apply xero porcelain at default settings
copy element 16, resize and position along the side, apply porcelain again
paste element 14 at opposite side and resize
resize the toadstools 26 and position as above
copy the cup 29 and paste as a new layer, resize and apply porcelain
add your tube, resize if necessary and position to the side
apply porcelain to your tube
copy element 30 and paste as a new layer above the mask layer
resize slightly and position along the bottom
copy & paste element 17 as a new layer above this layer, resize slightly and position
add the keyhole & key 24 & 25, resize both & position on tag
the clock I used came with the tube
Add your name and apply a black gradient glow
copy the hat 15, resize & place beside your name
Hide background layer & merge visible all layers
resize & crop to your liking
add your copyright info
delete background layer & save as a Png

Sunday 18 April 2010

Taurus

For all you Taureans!!
Supplies
Tube of choice - I am using an image by Dominic Marco which is available to purchase from CILM
Scrapkit- a great ptu art kit from KatNKDA called 'Taurus' which is available to purchase from NKArt Shop
Mask of choice - I am using WSL 105 here
The aplhas are supplies in the kit
OK - Open a new image in PSP 600x600 floodfill white
Copy & paste Frame 63 as a new layer, resize and sharpen
click in center of frame with magic wand & expand by 8
copy & paste paper 17 as a new layer, resize, invert & delete
select none and drag paper below frame layer
add a drop shadow to the frame 0 0 70 5
copy element 2, resize and paste as a new layer over the frame, sharpen
resize flower 9 and paste at bottom of frame to the side
add your tube and position
resize element 45 and position below the tube so the horns look like they are coming from your tube, sharpen twice and drop shadow
copy & paste element 4, resize, sharpen & drop shadow
position to the side, add a bow from the kit and place on top
resize element 52, paste as a new layer, image mirror
position and sharpen
hide background layer & merge visible all layers
resize by 85% and crop
unhide background & add a new raster layer above it, select all
copy & paste Paper 15 into selection, select none
apply your mask, delete & merge group, duplicate, merge down
Use the alphas from the kit to add your name
add your copyright info
delete background layer & save as a Png

Playtime!

Supplies
Tube of choice - I am using a tube by BamBam which is available to purchase from MPT
Scrapkit - a freebie kit from Lacarolita called 'Playboy Bunny' here
Mask of choice - I am using DBV Mask 89 here
Thanks ladies for the fab freebies
Font of choice - I am using Fiolex girls
Plugins - Xero porcelain and eye candy gradient glow (both optional)
OK - Open a new image 600x600 floodfill white
Copy & paste a frame of choice from the kit, resize and sharpen
click inside the frame with magic wand & expand by 5
copy & paste a paper from the kit as a new layer, resize by 80%, invert & delete
drag the paper layer below the frame
add a drop shadow to frame 0 0 70 5
paste your tube a a new layer and erase any overhang at bottom
apply xero porcelain default settings and drop shadow
resize the hearts from the kit and position to the side, sharpen & duplicate, mirror
add the stars buttons & bows of choice
resize all elements to suit and sharpen
drop shadow as above
hide background layer & merge visible all layers
resize by 85% and crop
unhide background & add a new raster layer above it, select all
Copy Paper 4 and paste into selection, select none
apply mask, delete & merge group, duplicate & merge down
copy the diamond spiral, resize and paste as a new layer above mask layer
sharpen twice
add your name and apply a gradient glow
add any copyright info
delete background layer & save as a Png

Sunday 11 April 2010

Angel in blue

Supplies
Tube of choice - the tube I am using is by Ismael Rac and is available to purchase from AMI
Scrapkit - a beautiful freebie kit from Karla called 'My little Angel' which you can download from her site here
Thank you Karla!
Mask of choice
Font of choice
eye candy gradient glow
xero porcelain
OK - open a new image 600x 600 floodfill white
copy & paste the metal frame and resize by 65%, sharpen
click in centre of frame with magic and & expand by 5
copy paper 2 and paste as a new layer, resize by 80%, invert & delete
drag below frame layer
copy the blue branch and paste as a new layer, position within the frame and delete
now copy the starry sky and paste as a new layer, resize by around 65% and delete
select none and apply a drop shadow to frame layer 0 0 45 5
Paste your tube as a new layer, resize if necessary and erase any overhang at bottom of frame
apply a drop shadow to tube and apply xero porcelain default settings
copy the angel wings, resize and position behind your tube
resize the blue ribbon wrap and position along bottom of frame
add the bag and candle and a few butterlies, resize all and sharpen
copy the paloma, resize & position at top of frame
copy a flower of choice, resize & sharpen and place at bottom of frame
add the angel wordart and use a blue colour from your tube to type the word 'blue'
add your name and apply a gradient glow
hide background layer & merge visible all layers
resize by 85% and crop
unhide background and add a new raster layer above it, select all
copy & paste Paper 12 into selection, select none
Apply a mask of choice, delete & merge group
add any copyright info, delete background layer & save as a Png

Saturday 10 April 2010

Once Upon a Time......

Supplies
Tube of choice - I am using a tube by Keith Garvey which is available to purchase from MPT
Scrapkit - a great freebie kit from Jamie Dell called 'Ever ever after' here
Thanks Jamie!
Mask - I am using Vix mask 431 which you can find here
Font of choice
Eye candy gradient glow
OK - open a new image 650x600 floodfill white
add a new raster layer, select all and copy Paper 12, paste into selection
select none, apply mask, delete & merge group
duplicate the mask and flip, merge down
add another raster layer above the mask layer
floodfill with a gold gradient and apply mask again
resize this mask layer by 60%
copy & paste the carriage as a new layer, resize to fit and sharpen
apply a drop shadow -I used 0 0 50 5 black
resize the castle and paste as a new layer below the carriage
use your deform tool to turn it slightly, duplicate and merge down, sharpen
copy the bushes, resize and position to the side
add your tube, position and drop shadow 5 5 70 9
resize the glass slipper and position
add any other elements from the kit to decorate your tag
place the wordart along the top
Add your name in black and apply a gold gradient glow
resize & crop, add copyright info
delete background layer & save as a Png

Wednesday 7 April 2010

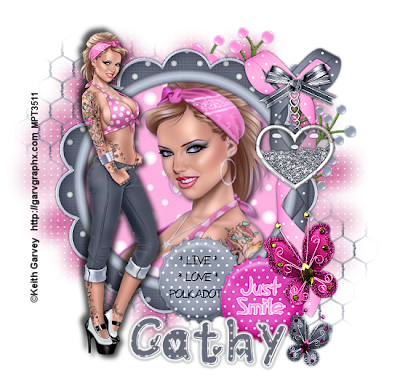
Polkadots

Supplies

Tube of choice - I am using a tube by Keith Garvey which is available to purchase from MPT
Scrapkit - a fantastic freebie kit from Vaybs called 'polkadot' which you can download from her blog here
Mask -also by Vaybs - dbv mask 89 here
thanks Vaybs for the fab freebies!
Font of choice -I am using heart emboss here
plugins - xero porcelain

OK - Open a new image 600x600 floodfill white
Copy & paste Frame 3 as a new layer, resize by 80% and sharpen
click in the centre of frame with your magic wand & expand by 6
Copy Paper 5 and paste as a new layer
seections, invert, delete and drag below frame
now paste a close up of your tube, position and delete
select none
apply a drop shadow to the frame layer 0 0 70 5
drop shadow the tube 5 5 70 9 and apply xero porcelain at default
Paste your main tube as a new layer & position to side of tag
apply drop shadow -7 -7 70 11
copy & paste some brads of choice, resize & sharpen, drop shadow 0 0 70 5
copy ribbon 2 & 5, resize and rotate 90 degrees
position to the side, sharpen & drop shadow
copy element 2, resize and position on ribbons
now paste some butterflies or other elements of choice from the kit
hide background layer & merge visible all layers
resize by 85%, sharpen & crop
unhide background and add a new raster layer above it, select all
copy Paper 18 and paste into selection, select none
apply mask, delete & merge group
copy the wire and paste as a new layer above the mask layer
resize, duplicate & move into position
Copy bubblebranch 2 and 3, resize both and position behind the frame
Add your name using Paper 10 for the background colour, foreground nul
apply a white gradient glow and drop shadow 0 0 70 5
add your copyright info
delete background layer & save as a Png
Tuesday 6 April 2010

Coffee Surprise

Supplies
Tube of choice - I am using a tube by Jose Cano which you may purchase from MPT
Scrapkit - a beautiful freebie kit from Seachell Srapz called 'Chocolate Mocha' here
Mask - I am using DBV mask 89 again which you can find here
Thanks ladies for the fab freebies!
wordart by me here
Font of choice - I am using wild ride
plugins - Cybia screenworks here (optional)
OK - Open a new image in PSP 650x600 floodfill white
Copy the brick wall element 35, resize and paste as a new layer
duplicate and on the bottom layer adjust blur, gaussian blur 20
apply cybia screenworks settings regular glyph at zero
(you could also use penta colour dot...similar effect)
Resize the elements you are going to use
I used the clock (30) gifts (18 &3) pillows (17) coffee cup (10) and cake plate(4)
position around the tag, sharpen all and drop shadow 5 5 70 11
add your tube, resize if necessary and apply same drop shadow
resize element 27 and paste as a new layer above the background layer, move into position
duplicate, image flip and move into position again
hide background layer & merge visible all layers
resize by around 85% and crop
unhide background and add a new raster layer above it, select all
resize Paper 10 from the kit and paste into selection, select none
apply your mask, delete & merge group
add the wordart, your name and copyright info
delete bacground layer & save as a Png

Monday 5 April 2010

Mary had a litle lamb....

Supplies
Tube of choice - I am using a tube by Ismael Rac which you may purchase from AMI
Scrapkit - a gorgeous spring ptu Art kit from Kat called 'Spring Awakes' which can be purchased from NK Art Shop
Mask of choice - I am using DBV 89 which you can find here
Thanks Vaybs
Font of choice - I am using leaf
OK - a quick and simple tut with the right tube will look great!
Open a new image in PSP 600x600 floodfill white
Copy & paste Frame 21, resize and sharpen
click inside the frame with magic wand & expand by 5
copy Paper 5 & paste as a new layer - resize by 75%
selections, invert, delete and drag below frame layer
select none and apply a drop shadow to the frame 0 0 70 5 black
Copy flowers 3 & 4 - resize both and sharpen, position as above
resize the grass 39 and position along bottom
paste your tube as a new layer, drop shadow 5 5 70 11 black
copy the lamb(19) resize and position, sharpen
add flowers 01 and the chick (41)
resize both and sharpen
hide background layer & merge visible all layers
unhide background layer, add a new raster layer above it, select all
Copy & paste Paper2 into selection, select none
Apply mask, delete & merge group
duplicate your mask layer a few times, merge down each time you duplicate
add your name and duplicate - on the bottom layer adjust blur, motion blur:
settings - angle 90 strength 100
add your copyright info
delete background layer & save as a png

Sunday 4 April 2010

Bunnylicious

Happy Easter everyone !!!
Sorry I have been lacking in creativity lately, can't seem to get inspired at all!!
Supplies
Tube of choice - I am using a tube by Keith Garvey which may be purchased from MPT
Scrapkit - a freebie kit from HezaScraps 'Goth Chick' part of a blog train - you can download Heza's kit here
Thanks!
Mask - I am using WSL mask 121 here
Fonts of choice -I am using Kingthings wrote and Fiolex girls
eye candy gradient glow (optional)
OK -Open a new image in PSP 600x600 floodfill white
copy & paste frame 1 from the kit as a new layer
colourise to suit your tube if necessary using the hue & saturation tool
I used settings 254 & 92
click inside the frame with magic wand & expand by 6
copy a paper of choice from the kit as a new layer
selections, invert, delete and select none
drag the paper layer below the frame and colourise
drop shadow frame layer 0 0 70 5
copy bow&egg 2, resize and paste as a new layer
position to side of frame
drop shadow 5 5 70 5
copy the bunneh2 , resize, position & drop shadow
add your tube and apply same drop shadow
hide background layer & merge visible all layers
resize by 85% and crop
unhide background & add a new raster layer above it
floodfill black and apply your mask
delete & merge group
add your words of choice
add your name using a colour from the tube & apply a black gradient glow
add your copyright info
delete background layer & save as a Png