Sunday 6 March 2011

♣Twice as Lucky ♣


Supplies

Tube of choice - I am using the artwork of Deacon Black which I purchased from CILM before it closed but am still trying to find out where his tubes are available at the moment!
Scrapkit I am using is by Gothic Inspirations called 'Feeling Lucky' which you can find here
Fonts - 'Kells Uncial' and 'Celtic' for the wordart, 'Cupiedoll' for your name
all are available to downlaod from free font sites if you google them!
Plugins - eye candy gradient glow
A little quickie
Open a new image 650x600 floodfill white
Copy & paste the frame from the kit as a new layer
using your selection tool set to rectangle, draw around the frame just slightly smaller
add a new raster layer and floodfill black, drag below the frame layer
copy the crystal curtain and paste as a new layer, position at top of frame, invert and delete
select none
Now paste your tube of choice as a new layer, position and drop shadow
copy the doodle from the kit, resize by 65% and position above the black floodfilled layer, move to the side, duplicate and merge down, duplicate again and flip
Copy the charmchain and paste as a new layer above the frame layer, resize and position along top of frame, sharpen & drop shadow, duplicate & flip, move into position at bottom of frame
resize the clover1, copy & paste as a new layer, position at bottom of tag below the charm chain and use your deform tool to turn it slightly, sharpen & drop shadow, duplicate, image mirror
copy the clover2, resize and position on the cauldron, change the opacity to screen
Hide background layer & merge visible all layers, resize by 90% and crop
Using the Kells font and dark green as background colour, type the word 'Twice' apply a yellow or orange gradient glow and add noise at uniform 30
now change to the celtic font and type 'as Lucky' apply same gradient glow and noise and move below the first word (see tag above)
resize the pipe from the kit and position below your words, sharpen & drop shadow
add your name using cupiedoll font and apply a white gradient glow and a drop shadow
add any copyright info and save as a Png!

Saturday 12 February 2011

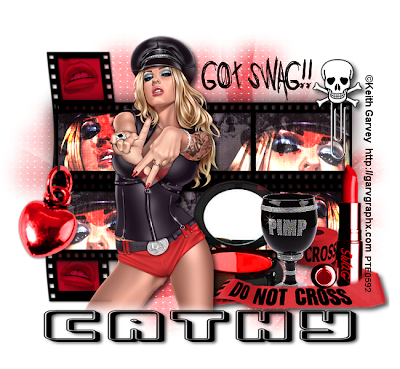
Got Swag!


Supplies
Tube of choice - I am using the artwork of Keith Garvey which is now available to purchase from Psp Tubes Emporium
Scrapkit - a fabulous freebie kit from Vaybs called 'Pimp my Swag' which you can find on her blog here
Thanks Vaybs!
Mask of choice - I am using DBV mask 89 here
Font of choice - I am using 'Jo wrote a lovesong' and 'Urban Constructed'

Open a new image in PSP and floodfill white
copy & paste element 37 as a new layer
using your selection tool set on rectangle, draw a rectangle around the frames
copy paper12 and paste as a new layer, drag below the frame layer and position
selection invert and delete, do not deselect yet
copy a close-up of your tube and paste as a new layer, position how you want it to appear within the frame and then hit delete again, go back to your tube image and mirror it, copy and paste as a new layer, position again within the frames and hit delete, select none
merge down the 2 tube layers and change the opacity to dodge
add a drop shadow to the frame 1 1 70 5 black
hide the background layer and merge visible all layers, duplicate,
unhide background and move the duplicate layer below the first one, mirror,
merge these 2 layers and duplicate
on the bottom layer apply a gaussian blur at 15 and merge these 2 layers
Copy & paste element 46, using your magic wand click inside all the frames and expand by 7
add a new raster layer & floodfill with a colour from your tube
drag below frame layer, paste some close-up images of your tube again, invert and delete
change the opacity of the tube layers to multiply, apply above drop shadow to frame
merge these layers together and move below the main frame layer to the side
merge down these layers
Add your main tube and drop shadow 5 5 70 11 black
add some elements from the kit and colourise to match your tube using the hue & saturation tool
apply a new raster layer above the background layer, select all
copy & paste Paper5 into selection, colourise and select none
apply your mask to the paper layer, delete & merge group
hide background and merge visible
resize and crop your tag
add your name & copyright info
delete the background layer & save as a Png!


Wednesday 9 February 2011

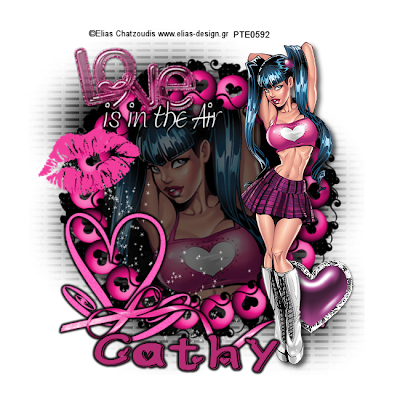
Love is in the air


Supplies
Tube of choice - I am using a tube by Elias Chatzoudis which is available to purchase fom PTE
Scrapkit - a freebie kit from Mythical which you can download at Creative Misfits here
Thank you!
Masks of choice and font of choice
Eye candy gradient glow

OK - open a new image in PSP 650x650 floodfill white
copy & paste element 11
click in the centre of the frame and expand by 10
add a new raster layer & floodfill black, drag below the frame layer
now copy & paste your tube as a new layer, invert & delete, select none
lower the opacity of your tube layer
copy & paste the sparkles, 18 and place over your tube layer, resize to suit
resize element 5 and position at bottom, apply a black gradient glow
copy & paste the bow, 12, resize and apply same gradient glow, position
resize element 31 and colourise to suit your tube using the hue & saturation tool, sharpen more
position at top of frame
using white as your background colour, foreground nul, type the words 'in the Air' and apply a black gradient glow again, position below the wordart
you can use any element of choice from the kit to decorate your tag
when happy, hide background layer & merge visible, resize by 85% and sharpen
unhide background layer & crop
paste your tube again and position to the side, drop shadow 5 5 70 11 black
Apply a mask using a paper from the kit or floodfill a new raster layer
Type your name and add your copyright info
delete background layer & save as a Png

Monday 31 January 2011

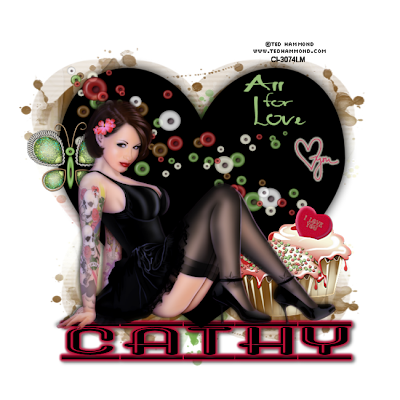
All For Love


Supplies
Tube of choice - I am using the artwork of Ted Hammond which may be purchased from CDO
Scrapkit - a little freebie kit from Ellanoir which is part of BNB blog train'All for love' you can find her part here
Thank you!
Mask I am using is WSL 86 which you can find here
Heart 1 preset shape
Fonts of choice - I am using schneller & beautyschool dropout
eyecandy gradient glow

OK - Open a new image 650x650 floodfill white
set your preset shape to heart 1 and draw a heart, convert to raster layer
duplicate and adjust blur, gaussian blur 10
Paste your tube as a new layer drop shadow 3 3 70 9
resize element 1 from the kit and paste as a new layer above the heart layer
resize the cupcakes, sharpen and position
copy & paste the butterfly, resize & sharpen
Using a colour of choice type your words of choice and position them on the heart
add a new raster layer above the background layer, select all
Copy & paste paper 10 into selection, select none
Apply your mask, delete & merge group
duplicate & flip, use your deform tool to position the mask layer
type your name and apply a gradient glow
resize & crop
add your copyright info and save as a Png

Sunday 23 January 2011

True Blood

I've been sucked into the Vampire world!!!!


Supplies


Tube of choice - I am using the artwork of Anna Marine which is now available to purchase from CDO

Scrapkit - a beautiful ptu kit from Katnkda called Heart2heart which may be purchased from NKArtShop
Mask of choice - there are a few masks in the kit but I am using Vix mask 431 here
Fonts I am using are 'bloody' and 'romerati' which are both available from free font sites
OK - this is a quick and easy tut
Open a new image in PSP 650x650 floodfill white
Open element 37 from the kit, resize by 50% and copy & paste as a new layer
copy & paste your tube, position and drop shadow
5 5 70 11 black
resize element 63, paste as a new layer above the heart layer and sharpen more
drop shadow 0 0 50 5
duplicate and mirror
copy the red and black roses, 10 & 15, resize to suit and position at bottom, see tag above
Type the words True Blood, or your words of choice using the 'bloody' font
apply a light gradient glow & drop shadow 2 3 67 7 black
Copy element 81, paste as a new layer above the background layer
resize so it sits nicely around tour heart frame
use your eraser frame to erase the bottom of the heart
apply a new raster layer above background layer, select all
copy & paste Paper 08 into selection, select none
apply your mask - delete and merge group
add your name using the romerati font and drop shadow as before
I used my paint brush to apply some red splodges over the tag
Resize and crop your tagadd your copyright info and save as a Png

Monday 3 January 2011

New Beginnings!

Supplies
Tube of choice - I am using a tube by Jennifer Janesko which is now available to purchase from the new CDO Store
Scrapkit - a lovely ftu kit from Ellanoir which is part of a blogtrain called 'new beginnings' you can get Ellanoir's kit from her blog here
Thank you!
Mask of choice - I am using Vix Mask 431 which you can find here
Font I am using is Cocktail bubbly which you can download here
eye candy gradient glow
OK- Open a new image 650x650 floodfill white
Copy & paste element 29, resize and sharpen more
paste your tube as a new layer & drop shadow 5 5 70 7 black
I changed the hue & saturation of the clock element to match the tube
add a new raster layer above background & select all
copy & paste a paper of choice into selection, select none
apply your mask, delete & merge group
now add some of the doodle elements above the mask layer
resize and position
add your saying using the cocktail bubbly font
apply a light gradient glow and drop shadow 2 3 67 7 black
add your name - I used the plain cocktail font
apply same gradient glow and drop shadow
resize & crop the tag
add your copyright info
delete background layer & save as a Png

Tuesday 28 December 2010

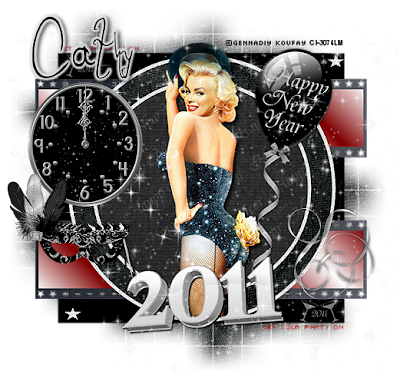
Welcome 2011


Supplies
Tube of choice - I am using the artwork of Gennadiy Koufay which is available at the moment from Cilm
Template 60 by Sapphy which you can grab at her blog Demented Hallucinationz here
Thank you!
Scraps of choice - I am using a ptu kit by Digimania called '2011 wishes' which you can purchase here but any New Year scraps will do (I couldn't find any freebie kits so far this year)
Mask of choice - I am using WSL 84 here
Font of choice - I am using 'Romance Fatal'
eye candy gradient glow (optional)
OK - Open the template in PSP, delete the copyright layer and the wordart layer
click on the circle layer, selections, select all, float, defloat
copy a paper of choice, paste as a new layer, invert and delete.
delete the original layer, repeat this step with the outer circle layer
Copy & paste your tube as a new layer, add a drop shadow 5 5 70 7 black
erase any overhang at the bottom
resize and add elements of choice to decorate the tag
add a paper above the background layer and apply your mask
add your name and apply a white gradient glow
resize and crop, add your copyright info
save as a Png!