Sunday 31 May 2009

Sepia Dreams

Supplies
3 tubes of choice fromthe same artist - I am using the beautiful free art of Zindy which you can find HERE
Scrapkit - 'Basically Sepia' by Vaybs which you can download from her blog HERE
Thanks Vaybs!
Mask of choice - I am using WSL 84
Font of choice
OK - Open a new image in PSP 600x600 floodfill white
Add a new raster layer and select all, copy Paper3 and paste into selection
select none and apply mask, merge group
Copy Frame10 and paste as a new layer, resize by 80% and sharpen
Click inside both frames with magic wand, selections, modify, expand by 5
Paste a paper of choice as a new layer, selections, invert, delete and move below frame layer
select none
Click inside the top frame with magic wand again and expand by 5, copy your tube of choice, resize and position in the frame, move below frame layer and select none
Do the same with your bottom frame and second tube
Add a drop shadow to your frame layer 0 0 70 5
Hide your white background and mask layer and merge visible
Unhide the closed layers again
Copy flower13 and paste as a new layer, resize and position behind the frames, sharpen
Duplicate and flip
Copy and paste element34 and position behind the fames also, sharpen
Resize element 18 and position on top of the frames at the side, sharpen and drop shadow
Copy element16 and paste as a new layer, resize, image mirror and position to the side
Now paste your main tube as a new layer
Go to effects, photo effects, sepia toning at 45
Copy some butterflies and a bow from the kit, resize, sharpen and position
Add your name and copyright information
Resize and crop your tag if necessary
Save as a jpeg!

Monday 25 May 2009

Parisienne Nights

Supplies
Tube of choice - I am using the artwork of Jessica Dougherty which can be purchased from CILM
Scrapkit - 'La Parisienne' add on from KatNDKA which you can download HERE
Thank you!
Mask of choice - I am using Babes Mask 7 which you can find HERE
Font of choice
DSB Flux bright noise
Click on the tag to see animation
OK- Open a new image in PSP 600x600 floodfill white
Open the Frames 011, copy merged and paste as a new layer
resize by 85% and position
Using your freehand selection tool set at point to point draw around the inside of top frame
Copy element 08 paste as a new layer and resize, position so the tower is showing in the frame
selections, invert, delete and select none
Do the same on the bottom frame using element 07
Copy element02, resize and position over the top frame
Hide white background and merge visible
Unhide background layer
Copy element 27, resize and position along the bottom
Paste your tube as a new layer, resize if necessary and drop shadow
Add a new raster layer above the background layer and select all
Paste Paper20 into selection, select none and apply mask, merge group
Open the diamonds04 and paste below the frame layer, resize and duplicate, mirror, flip
Position on the tag and merge these 2 layers together
Add your name & copyright info
resize to your liking
If you wish to animate the diamonds, click on the diamnond layer and apply bright noise at 35, tick mix once, copy merged into ani shop as a new image
Back to PSP, edit, undo - apply bright noise again same settings but click mix twice
Copy merged into ani shop after current frame
repeat this step clicking mix three times
Save as a gif!

Sunday 24 May 2009

Penthouse Babe

Supplies
Tube of choice - I am using the stunning artwork of Greg Horn which may be purchased from CILM
Scrapkit - 'Tania Mendes' by Bel Vidotti HERE
Thank you for this gorgeous kit!
Mask - Babes mask 16 HERE
Thanks!
Font of choice - I am using Scriptina
OK - Open a new image in PSP 600x600 floodfill white
Copy & paste Frame2 as a new layer, resize by 85%, rotate 90 right
Click inside the frame with magic wand, selections, modify, expand by 5
Copy & paste a paper of choice from the kit as a new layer,selections, invert, delete - drag this below the frame layer -now paste your tube as a new layer and position, hit delete again
select none and add a drop shadow to frame 0 0 70 5
Copy & paste the lace as a new layer above frame- use your deform tool to push it in so it sits nicely around the fame, sharpen
Copy & paste the pin as a new layer and position on top corner of frame
apply the same drop shadow and erase part of the pin so it looks like it is going through the frame - copy ribbon 3 and paste as a new layer below the pin layer, resize by 75%, sharpen and drop shadow, position on opposite corner
Copy and paste leaves2, rotate 90 left, resize and position behind the frame, turn slightly using deform tool - resize leaves1 and paste as a new layer above leaves 2
Copy and paste flowers1 above the leaves, duplicate and flip, position both towards the bottom on top of leaves and behind the frame
Resize butterfly2 and position on the leaves, turn slightly with deform tool, sharpen more
Resize flowers6 and 2 and position at bottom of frame, sharpen both
Copy leaves3, resize and position on bottom corner of frame, sharpen & drop shadow
Hide white background and merge visible all layers
Unhide whitebackground and copy a paper of choice as a new layer above it
Apply mask and merge group
Add your name and copyright information
Resize & crop tag to your desired size
save as a jpeg or delete white background layer & save as a Png!

Saturday 23 May 2009

Armed and Dangerous

Supplies
Tube of choice - I am using the artwork of Greg Horn which can be purchased from CILM
Mask - cubes - which is supplied with PSP
Plugins - Cybia Screenworks
Eye Candy Impact - perspective shadow & gradient glow
Arrow preset shape
Font of choice
OK - Open a new image 700x500 floodfill white
Make a foreground/background gradient using 2 colours from your tube
Have the gradient in the background fill box & close off the foreground box
Using a fat font - I used impact - type out the word ARMED and stretch out to the desired size
Add a black gradient glow
Apply cybia screenworks - point array at 0
Using your preset tool draw an arrow or a shape of choice and apply same cybia setting and same gradient glow - the noose came with the tube I am using but you could add an element of choice
Change your background colour to black and type out the words AND DANGEROUS
position over the large word and apply a white gradient glow, drop shadow 2 3 69 7
Copy & paste your tube as a new layer, resize and position to the side
Drop shadow 5 5 70 9 then apply perspective shadow default settings
Choose a light colour from your tube, add a new raster layer above the white background layer and floodfill with your colour, apply mask & merge group
I lowered the opacity on my mask layer slightly
Add your name & copyright info
Save as a jpeg or delete background layer and save as a Png

Friday 22 May 2009

Seduction

Supplies
Tube of choice - I am using a free tube from Ismael Rac which you can download HERE
Template - #31 by Lacarolita HERE
Scrapkit - 'Seduction' by Lacarolita which you can get at above link
Thank you!
Plugins - Cybia Screenworks
Penta.com colour dot
Font of choice
OK - Open the template in PSP
delete the copyright & the bottom layer
Add a new raster layer, bring to the bottom & floodfill white
Make a foreground/background gradient with 2 colours from your tube
Click on each rectangle one at a time and select all, float, defloat add a new layer and floodfill with the gradient, drop shadow & delete the original layer
On the 2 verticle rectangles apply cybia screenworks - chainlink set at 0
Do the same on the circle
Hide white background & merge visible all layers, duplicate
on the bottom layer adjust blur, gaussian blur 30
Apply penta colour dot at default settings
Add your tube as a new layer, resize, position & drop shadow
Add a few elements from the kit and position where you like on the tag
Now add your name & copyright info
Save as a jpeg or delete background layer & save as a Png

Thursday 21 May 2009

Temptress

Supplies
Tube of choice - I am using the artwork of Brian Rood which can be purchased from CILM
Scrapkit - 'BiaFran' by Bel Vidotti which you can download HERE
Thanks for another beautiful kit!
Mask of choice
Font of choice
A quickie this evening !!
OK - Open a new image in PSP 600x600 floodfill white
Copy Frame6 from the kit and paste as a new layer, resize by 85%
Click inside frame with magic wand, selections, modify, expand by 6
Copy & paste Paper1 as a new layer, selections, invert, delete and drag below frame
do not deselect yet, copy the wire and paste above paper layer, delete
copy the sparkle and paste above the wire, position
select none and drop shadow frame 0 0 70 5
Add your tube and drop shadow 5 5 70 11
erase any overhang at the bottom of the frame with eraser tool
Copy Wrap4, resize by 85% and paste as a new layer below your tube
Position and sharpen, add a drop shadow
duplicate the wrap layer and move one layer below the frame
on the top wrap layer use your eraser tool to erase the side where the flowers are
Copy & paste butterly5, resize, sharpen more and position on the tag
Copy doodle2, resize by 75%, sharpen and drop shadow, position below paper layer
duplicate, mirror and flip
Now copy paper 2 and paste as a new layer above white background layer
Apply a mask of choice and merge group
Add your name & copyright information
Save as a jpeg or delete the background layer & save as a Png

Tuesday 19 May 2009

Happy Day


Supplies
Tube of choice - I am using the artwork of Ching-Chou Kuik which can be purchased from UpYourArt
Scrapkit - 'Happy Day' by Jaelop which you can find HERE
Thanks Jaelop!
Mask of choice
Font of choice
OK - Open a new image in PSP 600x600 floodfill white
Copy Paper5 from the kit - add a new raster layer and select all
Paste the paper into selection, select none
Apply mask and merge group
I duplicated my mask layer twice and merged down
Copy and paste Frame27 as a new layer, resize
Click in the centre of the frame with magic wand and expand by 6
Copy paper3, resize by about 20% and paste as a new layer, selections, invert, delete
move this layer below your frame then paste your tube as a new layer, position and delete, select none
Drop shadow the frame and tube 0 0 70 5
resize cloud 43 and paste above the paper layer
resize element 25 and paste above the cloud layer
Copy flowers23, resize and paste as a new layer at side of frame
Copy and paste leaves 5 and 11 and position
Resize Bow33 and paste as a new layer on side of frame
Add a button of choice - I used button 40
Copy the wordart4, resize and paste as a new layer on top of frame
Now add your name & copyright info
Hide the white background layer and merge visible all layers
resize and crop your tag to your liking
Save as a jpeg or delete background layer & save as a Png!

Sunday 17 May 2009

Sweet Esmeralda

Supplies
Tube of choice - I am using the beautiful artwork of Candice Dillhoff which you can purchase from UpYourArt
Scrapkit - 'Esmeralda' by Lacarolita which you can download HERE
Thanks for another beautiful kit!
Mask - I am using Babes Mask 16 which you will find HERE
Font of choice
Plugins - Xero porcelain and Eye Candy Gradient Glow
(both optional)
OK - Open a new image 600x500 floodfill white
Add a new raster layer, select all and copy Paper10, paste into selection
Select none and apply the mask, merge group, duplicate & merge down
Copy Bow2 and paste as a new layer, resize & position to side
Copy tag element 10, paste as a new layer, resize and mirror
position over the bow and erase part of the pin using your eraser tool
Resize a couple of buttons and a flower and position
Paste your tube as a new layer apply porcelain at default settings
Resize element 1 and position below your tube layer to the side
Copy and paste the little Esmeralda, resize & position so it looks like she is standing on this element -sharpen and apply porcelain again
Copy one of the sequin flowers, resize & position and add one of the butterflies
Sharpen all elements and drop shadow
Hide your mask layer and white background layer and merge visible
unhide all layers
Resize your merged layer by 85% and sharpen
Resize mask layer by 90% and sharpen
Add the green splat above the mask layer, resize, mirror & flip
Add your name to the tag
I typed the words Good Morning & added a gradient glow using a green colour from the tag
Now add your copyright information and save as a jpeg!

Saturday 16 May 2009

Beach Fun

Supplies
Tube of choice - I am using Pinuptoons which can be purchased from CILM
Scrapkit - 'Beach Fun' by Lacarolita which you can grab HERE
Thanks!
Mask of choice
Font of choice
Animated crab you can get HERE
Click on the tag to see the animation
OK - Open a new image 600x600 floodfill white
Copy & paste Paper6 as a new layer
apply mask, any round mask will do, and merge group
Now using your deform tool pull the top of the mask down so that it is around half the original size
Copy the Beach fun water and paste as a new layer below this layer
Apply the mask again, merge group and resize by 60%
Position so that it is showing behind the sand layer, duplicate, mirror and move this layer up slightly
Now copy the palm trees, paste as a new layer above the sand layer and resize
Copy & paste the surfboard, resize and turn it slightly using deform tool
Resize the basket, beachball, starfish and octopus and paste as new layers, position
Add your tube, position & drop shadow
I also added the sun and clouds and placed one of the macaws in the trees
Sharpen all elements and give a light drop shadow
Hide white background and merge visible, duplicate your tag
On the bottom layer adjust blur, gaussian blur 12 and merge these 2 layers together
unhide white background layer
Add your name & copyright info
Open the crab in animation shop
Copy merged your tag as a new image in animation shop
Duplicate until you have 19 layers
Click on the crab and edit, select all, edit, copy
Click on your tag, select all and paste into selected frame
Position the crab on the tag
View your animation and if happy, save as a gif!

Thursday 14 May 2009

Chocoholic

Supplies
Tube of choice - I am using the artwork of Steve Baier which may be purchased from UpYourArt
Scrapkit - 'Chocolaty Pink' by Vaybs which you can get HERE
Thanks Vaybs!
Mask of choice
Font of choice
OK - Open a new image in PSP 600x600 floodfill white
Open Frame 21, copy & paste as a new layer, resize
with your selection tool draw a rectangle around the frame
copy the chocolate (8) and paste as a new layer - selections, invert, delete
move this layer below the frame layer, select none
Paste your tube as a new layer above the chocolate layer but below the frame
Position and then duplicate, move the top tube layer above the frame and erase the bottom part
copy the chocoholic word art, resize & position along the bottom
Add some elements from the kit & position around the frame
Copy a paper of choice as a new layer above the background layer and apply a mask, merge group - add your name & copyright info
save as a jpeg or delete the white background layer & save as a Png!

Sunday 10 May 2009

Sweet Euphoria

Supplies
Tube of choice -I am using artwork of Steve Baier which may be purchased from UpYourArt
Scrapkit - Sweet Euphoria by Bel Vidotti HERE
Thanks for the beautiful kit!
Mask of choice
Font of choice
OK - Open a new image in PSP 650x550 floodfill white
Copy & paste Frame3 as a new layer
click inside the frame with magic wand & expand by 7
copy one of the green papers from the kit & paste as a new layer
Selections, invert, delete, move below frame layer
Paste a wrap as a new layer above the frame layer, resize by 85%
Use your raster deform tool to push it in at the sides
Add some leaves to one side and flowers to the opposite side
copy & paste the butterfly and position on the frame
Copy the corner and position below the leaves, add a bow and a ribbon
Sharpen all elements and drop shadow
Add your tube & position
Copy a paper of choice as a new layer above white background layer and apply mask
Merge group
Resize your tag by 85%, sharpen & crop
Add your name & copyright information
Save as a jpeg or delete the white background layer & save as a Png!

Friday 8 May 2009

Perfect Timing

Supplies
Tube of choice - I am using the artworkof Brian Rood which may be purchased from CILM
Scrapkit - 'Sabrina'by Bel Vidotti which you can download from her site HERE
Thank you for this beautiful kit!
Template - Missy Template 195 you can download HERE
Mask - Babes Mask 16 HERE
Thanks Ladies!
Fonts of choice
OK - Open the template in PSP, delete the copyright info layer
Click on the large circle layer, selections, select all, float, defloat
Copy Paper 10 and paste as a new layer, resize by 80%
Selections, invert, delete, select none and delete the original layer
Click on the circle frame layer, select all, float defloat and add a new raster layer
Floodfill with black, select none and delete original layer
Select the rectangle layer, float, defloat and paste Paper 5 as a new layer, invert, delete
Select the dotted lines, float, defloat, add a new layer and use your airbrush tool to colour black
Copy & paste Bow 8 as a new layer, resize and position on the round circle
Sharpen & drop shadow
Copy the clock, resize & position, copy one of the jewels, resize & paste as a new layer on the clock hanger, sharpen both & drop shadow - copy Satin Bow1 and paste over the jewel, resize
Copy & paste Flower 7 as a new layer, resize, sharpen & drop shadow, duplicate and move down
Paste one of the hearts as a new layer & position between the 2 flowers
Add your tube & position
Copy leaves1, resize and position below the flowers, duplicate & flip, duplicate & mirror
Type your words of choice in the rectangle using font of choice
Copy & paste Doodle 1, resize & position below the template layers, duplicate & flip
Hide the white background layer & merge visible
unhide background layer & add a new layer above it, select all
Copy Paper9 and paste into selection, apply mask & merge group
Add your name & copyright info
Resize and crop your tag, save as a jpeg!

Wednesday 6 May 2009

Extreme Chic

Supplies
Tube of choice - I am using artwork by Brian Rood which can be purchased from CILM
Scrapkit - 'Extreme Biker Chic' by Doris at Scraps Dimensions which you can download HERE
Thanks!
Mask -WSL mask232 HERE
Font - BeautySchoolDropout HERE
OK - Open a new image 600x600 floodfill white
Copy Frame 4, resize & paste as a new layer, rotate 90 degrees
Click inside the frame with magic wand & expand by 8
Copy a paper of choice, resize & paste as a new layer, selections, invert delete. move below the frame layer
Do not deselect yet
Copy the motorcycle, resize and paste as a new layer, delete
Copy the fence, resize and paste as a new layer, delete & select none
Sharpen more the motorcycle & fence and drop shadow both plus the frame
Resize the buckle and paste as a new layer on the frame, sharpen more & drop shadow
copy the T-shirt, resize and position using your deform tool to turn it slightly
Copy & paste tape 3 as new layer, resize and turn with your deform tool, position on top corner of frame, sharpen and drop shadow then resize a button from the kit, paste over the tape
Resize the string and place along the bottom of frame
Now add your tube and position, drop shadow
Open the ipod, resize and turn slightly with your deform tool
Click inside the frame of the ipod with magic wand & expand by 5
Add a new raster layer and floodfill black, drag below the frame, copy your tube again and resize, position in the frame of the ipod, selections, invert, delete
merge these 3 layers together
Add a new raster layer above white background and select all
Resize a paper from the kit & paste into selection, select none
Apply your mask & merge group, resize by 90%
Add noise to the mask layer at random 11, monochrome checked
Now add your name and drop shadow
Duplicate name layer and on the bottom one adjust blur, gaussian blur 6
Resize & crop your tag
Add your copyright info and save as a jpeg!

Monday 4 May 2009

Heavens Child

zzt free art

Supplies
Tube of choice - I am using a FTU tube by Zindy which you can find HERE
Scrapkit - 'Thanks Mom' by Jaelop which you can download HERE
Thanks for the beautiful kit!
Mask of choice
Font of choice
Xenofex constellation if you wish to animate
OK- Open a new image 600x600 floodfill white
Copy element 15 from the kit, resize and paste as a new layer
Copy & paste element1 as a new layer, resize and position over the frame
Now paste your tube as a new layer, effects, photo effects, sepia at 45
Copy element 52, resize and position along the side, duplicate & mirror, sharpen
Resize some flowers and foliage from the kit and paste along the bottom
Add some buttons & bows to top of frame and the butterfly5
Open element 53, resize and position along the top, duplicate & flip, duplicate again and rotate 90, position along the side, duplicate & mirror, sharpen more these layers
Copy doodle9, resize and paste above white background, position, duplicate & mirror
Add Paper7 as a new layer at the bottom and apply mask of choice, merge group
Hide the white background layer & mask layer & merge visible all other layers
You can now resize & crop your tag
Add your name & copyright information
If you wish to animate
Click on the mask layer and apply constellation
Settings - small star constellation - keep original image checked
Copy merged into animation shop as a new image
Back to PSP, undo constellation and reapply hitting the random seed button
Copy merged into animation shop after current frame
Repeat above step once more
Save as a gif

Watermelon Delight

Supplies
Tube of choice - I am using the artwork of Katherine Barber which can be purchased from UpYourArt
Scrapkit - 'Watermelon' by Bel Vidotti which you can download HERE
Thank you!
Mask of choice
Font of choice
OK - Open a new image in PSP 600x600 floodfill white
Copy Watermelon01 and paste as a new layer, resize by 85%
Copy leaves02, paste as a new layer, resize by 80% and position on the side
Copy Bow4, paste as a new layer on top of the leaves, resize, sharpen & drop shadow
Resize String2 and paste over the bow, use your deform tool to turn it slightly
sharpen & drop shadow
Copy & paste the tag as a new layer, resize & position on opposite side
Paste your tube as a new layer & position, drop shadow
Copy & paste the buttons, position on the tag
Resize one of the butterflies and place on the tag
Copy flower3 and position, duplicate a few times and resize each and place on the leaves
Add a paper of choice as a new layer above white background layer and apply a round mask
merge group
Add some doodles above the mask layer
Add your name & copyright information
Save as a jpeg or delete white background layer & save as a Png

Saturday 2 May 2009

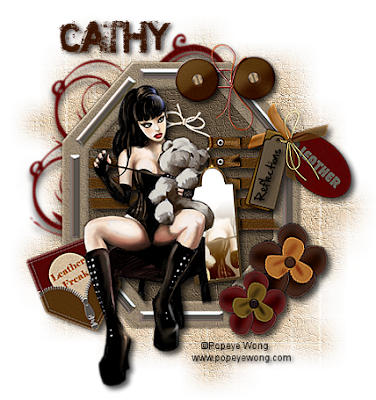
Reflections


Supplies
Tube of choice - I am using another FTU tube from PopeyeWong called 'past is behind' which you can find HERE
Scrapkit - 'Leather Obsession' by Doris of Scraps Dimensions HERE
Thank you for the beautiful kit!
Mask of choice
Font of choice
OK - this will be a quickie this evening
Open a new image in PSP 600x600 floodfill white
Copy & paste Frame3 as a new layer, resize and sharpen
Click inside frame with magic wand, selections, modify, expand by 5
Copy & paste a Paper of choice from the kit as a new layer, selections, invert, delete,
move the paper below the frame layer, copy the tied stripes, paste as a new layer, resize and position then hit delete again - select none
Drop shadow your frame layer 0 0 70 5
Click on the tied stripes layer - sharpen more & drop shadow
Copy the fastener, resize & paste as a new layer, position on top of frame
resize some flowers and position, copy tag 4, resize & position at side of Frame
copy the zipper pocket, resize & place at bottom of frame on the left, use your deform tool to turn it slightly - sharpen all elements and drop shadow
Add a saying of choice on the tag
Paste your tube as a new layer, resize if necessary & position, drop shadow
Copy a paper of choice from kit and paste as a new layer above the white background layer
Apply mask of choice and merge group
Add some doodles above the mask layer
Add your name & copyright info, save as a jpeg!

Friday 1 May 2009

Rock Melody

Supplies
Tubes of choice - I am using Pinuptoons which can be purchased from CILM
Scrapkit - 'Melody to you' by Lacarolita
Template - template24 by Lacarolita - you can download both HERE
Thanks for the gorgeous freebies!
Mask - WSL 98 you can get from her site HERE
Font - Musicals HERE
Mura Meister Copies (optional)
Xero Radiance (optional)
OK - Open the template in PSP, delete the copyright info layer
Using papers from the kit, select each layer, float, defloat & paste the paper as a new layer, selections, invert, delete, select none - drop shadow the paper layer 0 0 70 5
delete the original layer
On the frames and the middle circle layer follow the above steps but add a new raster layer & floodfill with black
Click inside the frames and paste your tubes as new layers, selections, invert, delete, move below frame layers - apply xero radiance at default settings to the tubes
Copy the musical notes1 from the kit, resize and paste as a new layer along the bottom, sharpen & drop shadow 2 3 70 7
Click on the black circle in the middle & type the words Lets Rock! convert to raster layer
Apply mura meister copies 'Tiling'
default settings but change tile gap to 2
click back on the black circle, select all, float, defloat, invert
click back on the font layer and hit delete
(alternatively you can just type the words and duplicate until they fill up the circle)
Add your main tube and position, add a heavy drop shadow
Add any elements from the kit you want - I just added a tag
Hide the white background layer and merge visible
unhide background layer, resize & crop your tag
Add a new raster layer above the white background layer & select all
Copy paper2 & paste into selection, select none
Apply the mask & merge group, duplicate & merge down
resize the mask layer by 120%
Add your name & copyright information & save as a jpeg!