Tuesday, 28 December 2010

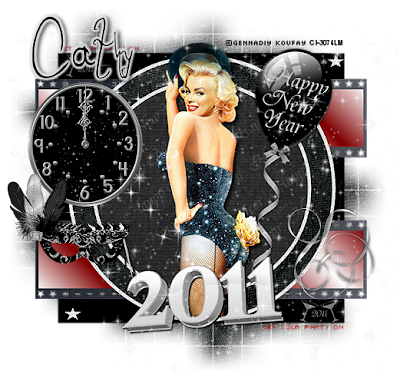
Welcome 2011


Supplies
Tube of choice - I am using the artwork of Gennadiy Koufay which is available at the moment from Cilm
Template 60 by Sapphy which you can grab at her blog Demented Hallucinationz here
Thank you!
Scraps of choice - I am using a ptu kit by Digimania called '2011 wishes' which you can purchase here but any New Year scraps will do (I couldn't find any freebie kits so far this year)
Mask of choice - I am using WSL 84 here
Font of choice - I am using 'Romance Fatal'
eye candy gradient glow (optional)
OK - Open the template in PSP, delete the copyright layer and the wordart layer
click on the circle layer, selections, select all, float, defloat
copy a paper of choice, paste as a new layer, invert and delete.
delete the original layer, repeat this step with the outer circle layer
Copy & paste your tube as a new layer, add a drop shadow 5 5 70 7 black
erase any overhang at the bottom
resize and add elements of choice to decorate the tag
add a paper above the background layer and apply your mask
add your name and apply a white gradient glow
resize and crop, add your copyright info
save as a Png!


Happy New Year 2011

I would like to take this opportunity to wish everyone who visits my blog a Happy and prosperous New Year for 2011 ♥♥♥

Supplies

Tube of choice - I am using the artwork of Jennifer Janesko which at the time of writing is available to purchase from CILM

Scrapkit - a beautiful ptu kit from designs by Stina called 'New Years Lullaby', you can view her blog here and purchase her kit from several stores - Twilight Scraps has the kit at 50% off until 31st Dec

Masks of choice - I am using DBV mask 89 here and Vix mask 2 xmas 2010 here
Thank you ladies!
Fonts I am using are 'Musicals' and 'Bickham Script Fancy'
Plugins - Xero porcelain and eye candy gradient glow

OK- open a new image in PSP 650x650 floodfill white
Copy & paste the clock5 from the kit, resize by 80% and duplicate, merge down
copy & paste your tube, position and duplicate
hide the top tube layer and bring the bottom tube layer below the clock layer
erase any overhang at the bottom
unhide the top layer and erase the overhang again
apply a drop shadow to bottom tube layer
apply xero porcelain at default
hide background layer & merge visible
unhide background layer
resize your tag layer by 80% and sharpen
move to the side
copy & paste the piano, resize & sharpen
place to the side, drop shadow
copy & paste the xmas tree, resize & sharpen and position below the piano layer, add a light drop shadow
resize the hat, shoe & champagne bucket and position along the bottom, duplicate the shoe and position like in my tag above
copy & paste the 2011a element, resize and sharpen
position above the other elements
copy & paste the confetti trumpet
if you are using the same tube as me, position over the glass, resize to fit and erase the trumpet, otherwise position where it looks best on tag
add a new raster layer above background and select all
copy and paste one of the gold papers from the kit into selection, select none
apply the Vix mask, delete & merge group, duplicate twice, merging down after duplicating
copy & paste the confetti 01 below this mask layer, resize by 85% and sharpen more
add another new raster layer above background layer and select all
copy & paste Paper 20 into selection, select none
apply DBV mask 89, delete and merge group
duplicate and merge down
set Paper 20 as your background pattern in the palette, change angle to 0 and scale to 75
type 'Happy New Year' and drop shdow 2 3 67 7 black
add your name using the Bickham script font and apply a gold gradient glow
resize and crop your tag, add your copyright info and save as a Png


Monday, 20 December 2010

Dreaming of a White Christmas

Suplies
Tube I am using is by PinupToons which is currently available to purchase from CILM
Scrapkit - another great freebie from Vaybs called 'Northern Light' which you can download from her blog here
Masks - DBV Xmas Mask 03 and 13 here
Wordart is by Cupcake Sprinkles here
Thank you ladies for the great freebies!
Font of choice - I am using Kingthings Christmas2
OK - open a new image 650x650 floodfill white
Copy & paste the fireplace from the kit as a new layer
Place the tree to the side and add a present
resize the reindeer and place at opposite side
sharpen and drop shadow 0 0 70 5 black
resize a flower and position below the reindeer layer
Paste your tube as a new layer & position
drop shadow 5 5 70 9
decorate with any other elements from the kit you like
add a new raster layer above background layer & select all
copy and paste Paper 2 into selection, select none
apply DBV mask13, delete and merge group
add another raster layer and repeat above steps using the other mask
resize the wordart and position on your tag
resize and crop
add your name & copyright info
delete background layer & save as a Png

Sunday, 19 December 2010

Ho Ho Ho

Supplies
Tube of choice - I am using the artwork of Anthony Guerra which at the time of writing is available from CILM
Scrapkit - A great freebie kit from HezaScraps 'Pimpin ho ho ho' which you can find here
Thank you!
Mask of choice - I am using WSL 84 here
Eye candy gradient glow and Xero porcelain (both optional)
Font I am using is AC1-ornament
OK - open a new image in PSP 650x650 floodfill white
Copy and paste the Pimp my ride element as a new layer
resize the presents, the cup and the candy cane duo
position as above, sharpen and drop shadow 0 0 70 5 black
resize the sleigh and position
add your tube and place to the side
copy and paste the pimp cane and use your deform tool to turn it slightly
position as above
hide background layer and merge visible all other layers
apply xero porcelain at default setting
Add a new raster layer above background layer, select all
Copy & paste Paper 11 into selection, select none
apply your mask, delete & merge group
add the Ho Ho Ho word art, resize and sharpen more
resize the star and duplicate a few times and position above the mask layer
sharpen more the stars
Now add your name and apply a white gradient glow and then a red one
Resize and crop your tag
add your copyright info
delete background layer & save as a Png

Saturday, 18 December 2010

Christmas Wishes

Supplies
Tube of choice - I am using a tube by Anna Marine which at the time of writing this tut is available to purchase from CILM
Scrapkit - another gorgeous freebie kit from Vaybs called 'Silent Night' which you can download from her blog here
I am also using a mask by Vaybs - DBV Xmas Mask 05 which you can also get at above link
Thanks Vaybs!
Font of choice - I am using Santa's Sleighful and Al Sandra
Eye Candy Gradient Glow
Xero Porcelain
OK - open a new image in PSP 650x650 floodfill white
Copy and paste the window frame (40)from the kit as a new layer
decorate the window with some elements of choice from the kit
Copy & paste the xmas tree (21) and position to the side
Copy & paste some of the presents and position at opposite side
resize and sharpen all elements
add a drop shadow to the window frame 0 0 70 5 black
now copy & paste your tube and position so she is sitting on the presents
drop shadow 5 5 70 9 black
resize element 68 and position beside the tree, sharpen
resize element 39 and position
hide background layer and merge visible all layers
resize by 85% and sharpen
apply xero porcelain at default settings
unhide background & add a new raster layer above it, select all
copy & paste Paper 17 into selection, select none
apply your mask, delete & merge group
use your deform tool to push in the mask layer so it just shows behind the tag
copy & paste the gold stars (78)above mask layer, resize & sharpen
Add your words and name. apply a white gradient glow and drop shadow:
2 3 67 7 green
add your copyright info
delete background layer, crop and save as a Png

Friday, 17 December 2010

All I want for Xmas...

Photobucket


Supplies
Tube of choice - I am using a tube by Joan Pelaez which at the time of writing is available from CILM
Scrapkit - a gorgeous PTU kit from KatNKDA called 'Xmas Joy' which is available from NKArtshop
Snow animation here
Mask DBV Xmas Mask 07 here
Font I am using is Snowdrift
eye candy gradient glow
Animation shop

OK - Open a new image in PSP 650x650 floodfill white
Copy & paste a frame of choice from the kit, resize to fit and sharpen
click inside the frame with magic wand & expand by 6
resize a paper of choice from the kit and paste as a new layer
selection, invert, delete and select none
drag below the frame layer
add a drop shadow to frame layer 0 0 70 5 black
Add your tube and position where it looks best, drop shadow 5 5 70 9 black
now decorate your frame using elements from the kit
resize and sharpen the elements you use
Add a new raster layer above background layer & select all
copy & paste a paper from the kit into selection, select none
Apply your mask, delete & merge group, duplicate & merge down
Add your name and words using foreground white, background red
apply an inner bevel - width 6, depth 20 and others at 0
angle 315, intensity 25, elevation 90
apply a white gradient glow and drop shadow 2 3 67 7 black
resize all layers and add your copyright info
If you wish to animate...
there's probably an easier way to do this but this is how I do it
merge visible all layers below the frame and hide
now merge visible all layers above the frame
unhide the bottom layer and copy & paste into animation shop as a new animation
duplicate until you have 10 layers
open the snow animation & resize by 80%
click on your original animation and select all
click on the snow, select all & copy
click back on the original animation and paste into selected frame
position the snow in centre and then release your mouse
go back to PSP and copy merged the top layers - back to ani shop
paste as a new animation, duplicate until you have 10 layers, select all, copy
go to main animation and paste into selected frame
move into position and release the mouse
view your animation so you can see what it looks like
if happy save as a gif

Saturday, 4 December 2010

Red Hot Xmas

Supplies
Tube of choice - the tube I am using is by Jessica Dougherty and is available from CILM
Scrapkit - 'Ho Ho Ho' sampler from Gothic Inspirations Blog Train which you can grab here
Thank you!
Mask - I am using DBV xmas mask07 which you can find here
Thanks Vaybs!
Fonts of choice -I am using Kingthings wrote for my name and Santa's sleighfull for the words
eye candy gradient glow
OK - open new image in PSP 650x650 floodfill white
Copy & paste the Frame2, resize by 80% twice and image mirror
click inside centre of frame with magic wand & expand by 4
copy and paste Paper2 as a new layer
invert & delete - drag below frame layer & select none
drop shadow frame 0 0 70 5 black
paste the glitter from the kit as a new layer above the paper layer
resize & sharpen more, erase any overhang
Copy & paste the doodle cluster, resize by 80% and position on side of frame, sharpen & drop shadow as above
Now paste your tube and position to sit on the balls
drop shadow 5 5 70 9 black
resize the little voodoo doll and position where you like on the tag
you can add any other elements you like from the kit to decorate your tag
I resized and duplicated the tree a few times and positioned behind the tag, sharpened
Now add a new raster layer above background layer and select all
copy & paste Paper 5 into selection, select none
apply your mask, delete & merge group, duplicate & merge down
duplicate again and mirror
type your words of choice and apply a gradient glow
add your name & copyright info
delete background layer & save as a Png