Wednesday, 30 December 2009

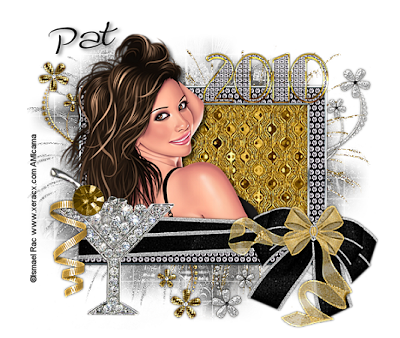
Bling in the New Year


OK - here is my last tut of the year!!
I have put your name on it Pat, for all the nice comments you have posted on my blog
Hope you like it!!
Supplies
Tube of choice - I am using the beautiful artwork of Ismael Rac available to purchase from AMI
Scrapkit - fantastic freebie kit from Toni Scraparoni 'Bling in the New Year' here
Thank you!
Mask of choice and font of choice
OK- Open a new image 600x600 floodfill white
Copy & paste Frame 01 as a new layer, resize and sharpen
with your selection tool set on rectangle, draw a selection around the inner frame
Copy Paper 10, resize by 75% and paste as a new layer
selections, invert, delete and drag below the frame
Do not deselect yet
Copy your tube and position above the paper, resize if necessary
duplicate your tube layer and move this above the frame layer
on the original tube layer hit delete
select none
erase any overhang on the top tube layer
add a drop shadow to the bottom tube layer 5 5 70 9
drop shdow frame layer 0 0 70 5
hide background layer & merge visible all other layers
unhide background
Copy the 2010 element, resize and sharpen more
place at top of tag
resize bow 03, mirror, sharpen & drop shadow and position over the bow on the frame
copy & paste martini glass and position at the bottom, resize and sharpen
copy & paste doodle 04 & doodle 06
resize both and place above the background layer, sharpen & drop shadow
copy ribbon 03, resize and place beside the martini glass
erase a bit of the ribbon so it looks like it is attached to the glass
add a new raster layer above background layer & select all
Copy & paste Paper 01 into selection, select none
Apply mask of choice, delete and merge group
Copy fireworks 01 and 02 and position above the mask layer, sharpen
Hide background layer, resize and crop your tag to your desired size
Add your name & copyright info
delete background layer & save as a Png

Monday, 28 December 2009

Auld Lang Syne

Supplies
Tube of choice - I am using another xmas free tube from CILM from Jamie Kidd - hope you all got your xmas freebies!!!
Scrapkit - a gorgeous ptu kit from KarlaScrapz called 'Happy New Year' which is available in red or purple and has so many fabulous elements to choose from!!!
Mask of choice -I am using wsl 84 here
Fonts of choice - I am using Al Sandra and Lounge Bait
Plugins - xero porcelain (optional)
Eye Candy - Gradiet Glow (optional)
OK - Open a new image 700x600 floodfill white
Copy & paste the New Year element 73, resize and sharpen
Copy the music lines 23, resize and place along the bottom
Resize the champers bottle, sharpen & drop shadow 0 0 55 5
position to the side
Copy & paste the glasses 28, resize and sharpen more
resize the bubbles, position in the glass, duplicate & mirror
bring back into position in the other glass, merge down and sharpen more
Copy Balloon 70 and paste to side of tag, resize and sharpen more
Paste your tube as a new layer, resize to suit, add drop shadow
5 5 60 9
apply xero porcelain at default settings
hide background layer & merge visible all other layers
resize by 85% and crop
unhide background and add a new raster layer above it, select all
Copy & paste the bonus Paper into selection, select noneApply mask, delete and merge group
Use your raster deform tool to pull out at sides, top & bottom
Open the patterns in the kit and use them as background colours to add your words of choice and name - I used the purple background to type the 'Auld Lang Syne' and the gold one for my name - Apply a fat white gradient glow and drop shadow
Add your copyright info
delete background layer & save as a PNG

Celebrate the New Year

Another New Year tut!!
Supplies
Tube of choice - I am using the artwork of PinupToons which may be purchased from CILM
Scrapkit - a fab kit by Dee from ScrapsbyDmg which is free for one week only so go grab it while you can!!!! 'Happy New Year 2010'
Thanks Dee
Mask of choice - I am using WSL 62 here
Font of choice - I am using Twilight
OK - Open a new image in PSP 600x600 floodfill white
Copy & paste Frame 6 as a new layer, resize by 85%, duplicate and merge down
Add a drop shadow - I used 0 0 70 5
add a new raster layer above the background layer & select all
Copy & paste Paper 12 into selection, select none
Apply mask, delete & merge group, duplicate & merge down
Copy firework 4 and paste as a new layer above the mask layer
resize so it fits inside the frame, sharpen more
copy clock 2 and paste as a new layer, resize & position in centre of frame
sharpen more
Copy & paste doodle 1 as a new layer below the clock layer
resize slightly and position, drop shadow as before
paste balloons 3 as a new layer above frame layer & place to the top
Paste your tube and apply drop shadow 5 5 70 9
Add any elements from the kit you like
I used shooting stars 2, startrail, flower 7 and wineglass 2
resize all elements to suit, sharpen & drop shadow
Use the wordart from the kit to place inside the clock and on the balloon or you can type your own words
Add your name using foreground #ba9157 and background black
apply drop shadow 2 3 67 7
add any copyright info
delete background layer & save as a Png

Friday, 25 December 2009

Bring on the New Year

Supplies
Tube of choice - I am using the awesome artwork of Ismael Rac which is available to purchase from AMI
Scrapkit - another fab freebie kit from Lacarolita 'Freebie New Year 2010' here
eye candy gradient glow
Mask I am using is wsl 218 here
Font of choice
Ok - Open a new image in PSP 600x600 floodfill white
Copy & paste the clock from the kit as a new layer, resize to fit
add the shoe, handbag and balloon
resize all elements, sharpen & drop shadow 0 0 70 5
Add your tube and apply a drop shadow 5 5 70 9
Add the 2010 wordart, resize and sharpen
Type your words of choice and apply a gradient glow using
#e1d39f
add a new raster layer above background layer and select all
Copy & paste Paper 5 into selection, select none
apply mask, delete and merge group
resize and crop
Add your name and apply same gradient glow
add any copyright info
delete background layer & save as a Png

Happy New Year


Supplies

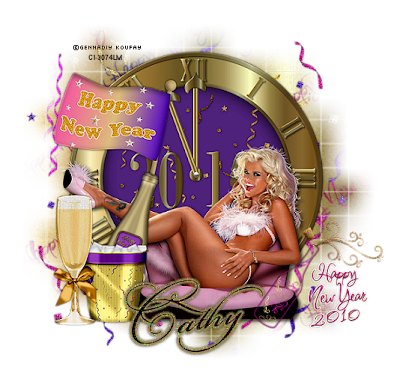
Tube of choice - I am using one of Cilms xmas freebie tubes by Gennadiy Koufay
Scrapkit - a fab freebie kit from Scraps Dimensions 'Happy New Year' here
Thank you
Mask of choice - I am using the old faithful wsl 84
Font of choice - any scripty font
eye candy gradient glow

OK -open a new image 600x600 floodfill white
copy & paste the clock, resize
paste your tube as a new layer, resize if necessary
add the champagne bottle & one of the glasses
position the flag behind the bottle
drop shadow all elements 0 0 70 5
add a new raster layer above the background layer, select all
copy & paste paper 4 into selection. select none
apply mask, delete and merge group
copy the confetti and paste as a new layer above mask layer, resize
add wordart 2, resize and sharpen, position to the side
hide background layer and merge visible all other layers
resize and crop
add your name and apply a gradient glow using #a08d52
add any copyright info
delete background and save as a Png

Tuesday, 22 December 2009

Merry Christmas


Supplies

Tube of choice - I am using the awesome artwork of KatNKDA which may be purchased from NK Art Shop
Scrapkit of choice - I am using a few elements from a fab ptu kit from Kat called 'Pete's Christmas Box' which you can purchase here
Mask - DBV Xmas Mask 03 by Vaybs here
Thanks Vaybs :)
Font of choice - I am using Christmas Card

OK - Open a new image in PSP 600x600 floodfill white
Add a new raster layer & select all
Copy a Paper of choice & paste into selection - I am using the background that comes with the tube for the mask layer - select none
Apply mask, delete & merge group
Add noise at uniform 40
Copy & paste element 48 as a new layer, resize and duplicate & move into position, merge down and sharpen
Copy & paste element 8 as a new layer, duplicate, mirror & flip
move into position and merge down, sharpen & drop shadow 0 0 55 5
Copy & paste element 15 as a new layer, position in centre of tag
Resize element 51 and position along the top of the tag, sharpen more & drop shadow as above
copy bow 39, resize and position on corner of tag, sharpen & drop shadow
Resize flower 18, position in bottom corner, sharpen & drop shadow
Add your tube, resize if necessary and sharpen
add a drop shadow 5 5 70 9
Copy & paste element 6 as a new layer
position to the top, sharpen more & drop shadow
Type your words in middle of the tag
drop shadow 2 3 67 7
Add any other elements from the kit you like
Add your name & copyright info
delete background layer & save as a Png
Sunday, 20 December 2009

Santa is Coming!!

Supplies
Tube of choice - I am using the artwork of Elias Chatzoudis which may be purchased from MPT
Scrapkit -a great freebie from Bea called 'Santa is coming' here
Thanks Bea
Mask of choice - again I am using WSL84
Font of choice - I am using Santa's Sleighful
OK - open a new image in PSP 600x600 floodfill white
Copy Frame3 from the kit & paste as a new layer
resize by 85% and sharpen
click in the middle lines of the frame with magic wand
add a new raster layer and floodfill with #123400
add a drop shadow 0 0 70 5 to this layer and the original frame layer
using your selection tool set on rectangle
draw a rectangle around the inner frames
Copy Paper 10 and paste as a new layer, resize & position
selections, invert, delete, select none
drag the paper layer below the frame
copy garland 01, resize & position along centre of frame
Copy xmas ribbon1 and paste as a new layer, image mirror, resize, sharpen
position to the right of the frame
Copy & paste candle 01, resize, sharpen and drop shadow as above
paste flower04 as a new layer, position to top left of frame
add your tube and apply a drop shadow 5 5 70 9
copy the wordart 02, resize and place at bottom of tag
add a gradient glow using #123400
hide background layer & merge visible all other layers
resize by 85% and crop
unhide background layer & add a new raster layer above it, select all
copy & paste Paper 25 into selection, select none
apply mask, delete & merge group
Copy xmas tree 01, resize and paste as a new layer
position at side of frame
Add your name & copyright info
delete background layer & save as a Png
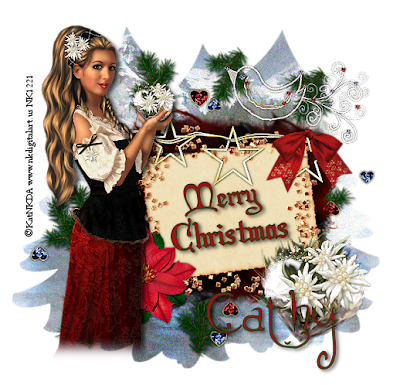
Saturday, 19 December 2009

Joy to the World

Supplies
Tube of choice - I am using the artwork of Steve Baier available to purchase from UpYourArt
Scrapkit - a beautiful ptu kit from Kat called 'Dragonfly' which may be purchased from NK Art Shop
Mask - 0mask046 here
Wordart by Cupcake Sprinkles here
Thank you!
Font of choice - i am using TKdoodle
Eye candy gradient glow
OK - Open a new image in PSP 600x600 floodfill white
Copy & paste the double frame 52 as a new layer, resize slightly
click inside both frames with magic wand & expand by 5
Copy & paste Paper 14 as a new layer, selections, invert, delete
drag below frame layer & select none
Paste your tube as a new layer, position within the frame, below the frame layer and erase any ovverhang using your eraser tool, mirror your tube and resize and paste as a new layer in the other frame, erase any overhang again
sharpen both tube layers
add a drop shadow to frame layer 0 0 70 5
Resize bow 43 and position in centre of frames
sharpen & drop shadow
Copy element 50, resize and sharpen, position at top of frames
Copy & paste leaves 18, resize and sharpen more, position
Add some flowers of choice from the kit and position around frame
add dragonfly 29, resize, sharpen and place on tag
Copy element 54, free rotate 90 degrees and position along bottom
Copy element 41, resize and paste as a new layer above background layer
duplicate, image mirror, image flip
move into position, merge down & sharpen
add a new layer above background layer & select all
Copy & paste Paper 12 into selection, select none
Apply mask, delete & merge group
Add another new raster layer below this layer & select all
Copy & paste Paper 7 into selection, select none
Apply mask, delete & merge group and mirror
Hide background layer & merge visible all other layers
resize by 85% and crop
unhide background
Copy & paste the wordart as a new layer, resize & position
add a gradient glow using #b36b2d
adjust, add noise at random 11
Add your name and apply same gradient glow and noise
Add any copyright info
delete background layer & save as a Png

Friday, 18 December 2009

Winter Memories


Supplies
Tube of choice - I am using the artwork of Ismael Rac which may be purchased from AMI
Scrapkit - a fab freebie by Ellanoir 'BnB blog train Winter Wonderland' which you can find here
Thank you!
Mask of choice - I am using wsl 84
Wordart by Lori here
Font of choice -I am using Santa's Sleigh
Xero porcelain (optional)
OK - Open a new image 700x600 floodfill white
Add a new raster layer & select all
Copy & paste Paper 5 into selection, select none
Apply mask, delete & merge group
Copy element 7, resize and paste as a new layer, sharpen
position in centre, copy snowman 64, paste as a new layer
resize and sharpen, position to the side
Copy & paste tree 61, resize and mirror and position
sharpen & add noise at uniform 40
resize element 42, position & sharpen
Copy a snowflake, I used element 31, resize and place on tag
sharpen and add noise as before
Copy & paste element 9 as a new layer, position over the tag
Add your tube, resize if necessary and drop shadow 0 0 70 9
apply xero porcelain at default settings
Add wordart & colourize to suit using hue & saturation tool
my settings: 139 255
Hide bakcground layer & merge visible all other layers
resize and crop to desired height
unhide background
add your name & copyright info
delete background layer & save as a Png

Wednesday, 16 December 2009

Ice Maiden

Supplies
Tube of choice - I am using the artwork ok KatNKDA which may be purchased from NK Art Shop
Scrapkit - a beautiful ptu kit by Karla Scrapz called 'Ice Queen' which you can purchase from her site here
Mask of choice - I am using wsl 84 here
Font of choice 
Plugins - Xero porcelain
OK - Open a new image in PSP 600x600 floodfill white
Copy & paste Frame2 from the kit as a new layer
click inside the frame with magic wand & expand by 6
Copy Paper4 and paste as a new layer, resize & position
selections, invert, delete and drag below frame, select none
colourise using your hue & saturation tool - my settings 148 61
Resize element 53, sharpen & position at top of frame
Copy & paste element 72 as a new layer, resize & sharpen
position to bottom of frame
Copy element 20 and paste as a new layer, resize and place over the frame
sharpen more
Add your tube, resize if necessary and apply xero porcelain at default settings
add a drop shadow 0 0 50 5
Add some elements from the kit and position on tag, there are lots to choose from in the kit, I just used butterfly16 and bird 10
Hide background layer and merge visible all other layers
resize by 85% and crop
unhide background and add a new raster layer above it, select all
Copy & paste Paper 10 into selection, select none
apply mask, delete & merge group
Copy element 27, paste as a new layer above mask layer
resize, duplicate and position - merge these 2 layers together & sharpen
Add your name & copyright info
delete background layer & save as a Png
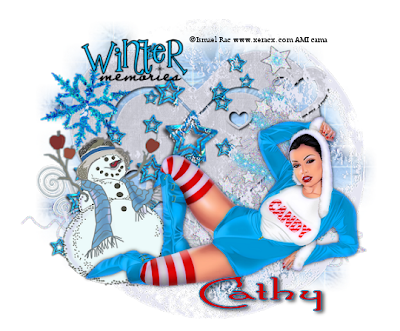
Tuesday, 15 December 2009

Dear Santa

Supplies
Tube of choice - I am using the artwork of Keith Garvey which is available from MPT
Scrapkit - a beautiful freebie kit called 'Mr & Mrs Claus' from Karla Scrapz here
Thank you Karla
Mask - DBV Xmas Mask 09 here
thanks Vaybs
Wordart by Cupcake Sprinkles here
Thanks Caitlin
Font of choice - I am using Kingthings Christmas
A little quickie tut
OK - Open a new image in PSP 600x600 floodfill white
add a new raster layer & select all
Copy & paste Paper8 into selection, select none
Copy the fireplace 6 and paste as a new layer
resize & sharpen
copy & paste the tree 30,resize & sharpen and position to the side
resize presents 31 & 33, position to the other side
sharpen & drop shadow 0 0 50 5
Add your tube and position, add a drop shadow 5 5 50 9
Copy & paste bauble 10 as a new layer, resize & sharpen
position on side of fireplace & drop shadow 0 0 50 5
add bow 23, resize, sharpen more & position above the bauble
Resize the wordart and place on the tag
Add your name & copyright info
delete background layer & save as a Png

Sunday, 13 December 2009

Shining Star

Supplies
Tube of choice -I am using the fab artwork of KatNKDA which may be purchased from NK Art Shop
Scrapkit - a gorgeous ptu kit from KatNKDA also available from NK Art Shop
Masks of choice - I am using Mask3 by Kat which is available from the kit and also wsl mask84
Font of choice - I am using Santa's sleighful
OK - Open a new image 600x600 floodfill white
add a new raster layer & select all
Open the background image from the tube, copy and paste into selection
select none and apply mask3 from the kit, delete & merge group
add another new raster layer above background layer & select all
Copy & paste Paper15 into selection
apply wsl mask 84, delete & merge group
Resize roundframe1 from the kit & paste as a new layer, sharpen more
Copy & paste element3, resize & sharpen
position to the bottom left, duplicate, image mirror, image flip
bring into position
Copy & paste element8, resize & sharpen
resize element21 and paste as a new layer, sharpen and bring below the round frame layer
copy & paste element 31, resize and position in centre of element 8
sharpen more
copy star 42, resize & paste as a new layer, sharpen more
duplicate this layer & move into position as tag above
Add your tube, resize if necessary, sharpen
hide background layer & merge visible all other layers
unhide background
copy element 37 from the kit
resize and position at bottom of tag, duplicate image mirror
position just below and to the side of the original
merge down and sharpen more, duplicate & image flip
move into position (see tag as guidance)
add a new raster layer above background & select all
Copy & paste Paper4 into selection
select none & apply wsl mask 84
delete & merge group
add noise at uniform 45
add the wordart, element 66, resize & sharpen more
add your name & copyright info
delete background layer & save as a Png

Saturday, 12 December 2009

Let it Snow

Supplies
Tube of choice - I am using the artwork of Ismael Rac which may be purchased from AMI
Scrapkit - another fab freebie from Vaybs called 'Snowflake Xmas' here
Mask - I am using Vaybs Xmasmask 14 which you can download here
Thanks Vaybs for the great freebies
Font - I am using Flakes
Xero porcelain
Ok - Open a new imge 700x600 floodfill white
Copy & paste frame2 from the kit as a new layer, resize by 85% & sharpen
click inside the 3 frames with magic wand & expand by 7
Copy & paste Paper9 as a new layer, resize by 65%
selections, invert, delete & drag below frames, select none
drop shadow frames 0 0 55 5
copy & paste tree7 as a new layer, sharpen & drop shadow
position to side of frames
copy let it snow tag 12 and position at bottom of frames
paste present 20 as a new layer
copy snowman 53, resize and position
copy & paste element 24, resize, mirror and position
add one of the baubles and use your eraser tool to erase the top of the hook
sharpen & drop shadow all elements as above
Add your tube and position, resize if necessary
drop shadow tube 5 5 70 9
hide background layer & merge visible all other layers
resize by 85% and crop
apply xero porcelain at default settings
unhide background & add a new raster layer above it, select all
copy & paste Paper 5 into selection, select none
apply mask, delete & merge group
add noise to mask layer uniform 45
add your name & copyright info
delete background layer & save as a Png

Honest Scrap


Kathy from Kathy's Place gave me this award

As part of the terms, I have to list 10 things about myself and then pass it on to 10 people !!
10 things about me
1. I'm Irish
2. I have 4 sisters and 3 brothers
3. I have 2 grown-up sons
4. I have a Jack Russell pup called Ozzy who I adore
5. I collect elephants
6. My tipple is rum & coke or red wine
7. My fav food is shellfish
8. I am a huge fan of 50 Cent
9. I record all the UK soaps & watch them when I get home from work...lol
10. I am addicted to farming on facebook!
I will pass this on to people when I get a chance to ......


Thursday, 10 December 2009

Deck the Halls

Supplies
Tube of choice - I am using the gorgeous artwork of KatNKDA which may be purchased from NK ART SHOP
Scrapkit - a fab freebie by Doris of Scraps Dimensions called 'Deck the Halls' here
Thank you
Mask of choice - I am using wsl 84
Font of choice - I am using Christmas Card
OK - Open a new image in PSP 600x60 floodfill white
Copy & paste the ribbon with poinsettas as a new layer
resize by about 60% and duplicate, move beside each other and merge down
duplicate & flip and move into position, merge down again
free rotate 90 degrees and sharpen
click inside the frame now with magic wand and expand by 10
copy & paste Paper 8 as a new layer, resize by 65%
selections, invert, delete and drag below frame layer, select none
add a drop shadow to frame 0 0 55 5
Copy & paste the white poinsetta as a new layer, resize and duplicate
position them at side of frame and merge down, sharpen & drop shadow
duplicate and mirror and place the duplicate layer at opposite side of frame
copy & paste the sled with snow, resize and position at bottom
sharpen and drop shadow
add your tube as a new layer and drop shadow
position the presents along the bottom
add any elements of choice from the kit, I just added some bows, holly and flowers
when you are happy with your tag, hide background layer & merge visible all other layers
resize and crop
unhide background & add a new raster layer above it, select all
copy & paste Paper 3 into selection, select none
apply mask of choice, delete and merge group
duplicate the mask layer & merge down
Add your name and add noise at random 21
add your copyright info
delete background layer & save as a Png

Sunday, 6 December 2009

Santa Baby!


Supplies
Tube of choice - I am using the artwork of Ismael Rac which may be purchased from AMI
Scrapkit - a great freebie kit from Vaybs 'Waiting 4 Santa' here
wordart also by Vaybs here
Thank you Vaybs.....love your art!!
Mask of choice - again I am using WSL #84
Font of choice - I am using Snowdrift which you can find here
Xero porcelain - (optional)
OK - open a new image in PSP 600x600 floodfill white
Open one of the frames from the kit and colourise to suit your tube using the hue & saturation tool
Draw a rectangle around the frame using your selection tool
Copy & paste paper 14 as a new layer, resize and position, selection, invert, delete and select none, drag below the frame layer and sharpen
Add your tube, apply xero porcelain at default settings and drop shadow 5 5 70 9
Add any elements from the kit you like and position, resize & sharpen
drop shadow all elements 0 0 55 5
Resize the wordart & place at bottom
Add your name & drop shadow 2 3 65 7
Add any copyright info
Add a new raster layer above background & select all
Copy & paste paper 11 into selection
apply mask, delete & merge group
delete the background layer, resize & crop & save as a Png

Saturday, 5 December 2009

Waiting for Santa

Supplies
Tube of choice - I am using artwork by Al Rio available to purchase from CILM
Scrapkit - fab ptu kit from KatNKDA called 'Heartland Holidays' which you can purcase from NK ART SHOP
Mask of choice - I am using WSL 84
Font of choice
OK - Open a new image in PSP 600x600 floodfill white
Copy & paste frame 47, resize & sharpen
with your selection tool draw a rectangle around the inner frames
copy & paste paper 12 as a new layer, resize to fit
selections, invert, delete & drag below frame layer
copy element 28, paste as new layer, resize and position
delete again, do not deselect yet
copy element overlaysnow, paste as a new layer and resize, sharpen, delete
now you can select none
Add your tube, position & drop shadow 5 5 70 9
Copy gift boxes 20 & 21, resize and position at bottom
sharpen & drop shadow 0 0 70 5
resize the wreath 30, sharpen and place at top
resize and position cracker 11 at bottom of gifts
coy & paste santa 31 at side of frame, resize & sharpen
add a bow of choice at top
hide background layer & merge visible all other layers
resize and crop
unhide background and add a new raster layer above it, select all
copy & paste a paper of choice into selection, select none
apply mask, delete & merge group
add your name & copyright info
save as a Png

Thursday, 3 December 2009

I've got chills......

Supplies
Tube of choice - I am using the artwork of Jessica Dougherty which may be purchased from CILM
Scrapkit -another fab freebie from Artmama called 'Winter Wonderland' which is part of a great blog train which you can find here
Thank you!
Mask - I am using Vix Mask 431 here
thanks!
Font of choice - I am using Wild Ride
eye candy gradient glow
OK - Open a new image in PSP 600x600 floodfill white
Copy & Paste element 30 from the kit as a new layer
(I colourised all the elements to match the tube using the hue & saturation tool)
click inside the inner frame with magic wand and expand by 6
Copy Paper 8 and paste as a new layer, resize by 75%, selection, invert, delete
drag the paper layer below the frame
copy & paste element 1 as a new layer, resize and hit delete again, select none & sharpen
Paste your tube as a new layer & position, add a drop shadow 5 5 70 9
Copy element 13, resize and position below the tube layer to the right
copy & paste element 28, resize & position to the left side
sharpen both elements & drop shadow 0 0 50 5
Resize the star 11 and paste as a new layer, position at top and duplicate
move into position, sharpen & merge down
add noise to the stars layer at uniform 40
Add a new raster layer above background layer & select all
copy & paste Paper 7 into selection, select none
apply mask, delete & merge group
add noise at uniform 40
Add your name & apply a white gradient glow
drop shadow 0 0 50 5
resize & crop your tag to your liking
add any copyright information
delete background layer & save as a Png

Monday, 30 November 2009

Vintage Rose Red

Supplies
Tube of choice - I am using the artwork of KatNKDA which is available to purchase from NK Art Shop
Scrapkit - a beautiful ptu kit also by Kat called 'Vintage Christmas' which you can purchase here
Mask - Babes Mask 16 here
Font of choice - I am using Bickham Script Fancy
Plugins - Xero porcelain
Eye Candy gradient glow
OK - Open a new image in PSP 600x600 floodfill white
Copy & paste element 49 as a new layer, resize & sharpen
Paste a close up of your tube inside the small frame and erase any overhang outside the frame
lower the opacity on the tube layer slightly
Paste your tube again as a new layer and mirror
add drop shadow 5 5 70 9
Resize element 42, sharpen and position over the frame
copy & paste element 33, resize & sharpen and position
add a bow of choice and place at the top
Copy & paste some roses from the kit, resize & position at bottom
sharpen and drop shadow elements 0 0 50 5
Hide white background layer & merge visible all other layers
resize by 85%, sharpen and apply xero porcelain at default settings
crop your tag & unhide background
Add a new raster layer above background layer and select all
Copy Paper 9 and paste into selection, select none
Apply mask, delete & merge group
Copy element 37 and paste as a new layer above background layer, resize and sharpen
duplicate , mirror and flip and position
Add your name & apply a gradient glow using #b28b61
add any copyright information
delete background layer & save as a Png!

Saturday, 28 November 2009

Winter Wonderland

Supplies
Tube of choice - I am using the artwork of Steve Baier which may be purchased from UpYourArt
Scrapkit - a great freebie add-on kit called 'winter wonderland' from Raspberry Road Designs which you can find here - you need to register with the site to download the freebie but it is well worth it as they have some fabulous goodies!
Mask - Vix Mask 431 which you can download here
Wintery wordart also from Vix here
Thank you!
Font of choice - I am using wild ride
OK - Open a new image in psp 600x600 floodfill white
Add a new raster layer and select all
Copy Paper2 and paste into selection, select none
Apply mask, delete & merge group, add noise at uniform 45
Copy & paste the parcels, 11 & 12, resize & duplicate a few times, resizing again
position along the bottom, overlapping eachother, merge the parcels together, sharpen & drop shadow 0 0 50 5
Copy element 13, resize and sharpen and position above the parcels, duplicate & mirror
Resize element 9 and position at the top, sharpen more
paste your tube as a new layer and position so it looks like she is laying on the parcels
add a drop shadow of choice - I used 5 5 70 9
resize the ribbon 17 and place on the parcels layer, sharpen & drop shadow
copy element 7, rezize and paste as a new layer above the mask layer
resize element 19 and position above this layer, sharpen
Add the bauble (14) and the moon (21), resize and position
sharpen both elements and drop shadow 0 0 35 5
Resize the snowflake 18 sharpen & duplicate a few times, position around the tag
Add the wordart and your name
resize tag & crop to your liking
add any copyright info, delete background layer & save as a Png!

Sunday, 22 November 2009

Fantasy in red

Supplies
Tube of choice - I am using the artwork of Jose Cano which may be purchased from MPT
Scrapkit - a fabulous ptu kit from KatNKDA called 'Anne Boleyn' which you can purchase from NK Art Shop
Mask - Babes Mask 32 here
Font of choice
OK - Open a new image in PSP 600x600 floodfill white
Copy element 7 from the kit, paste as a new layer and resize by 85%
click inside frame with magic wand & expand by 6
copy & paste Paper 13 as a new layer, selections, invert, delete and drag below frame layer
select none - drop shadow frame 0 0 70 5
copy element 28, paste as a new layer, rotate 90 degrees right, sharpen
resize and position along side of frame
copy leaves 52, resize rotate and position at opposite side
duplicate and image mirror, move ito position
resize roses 50 and 51, position, sharpen & drop shadow
copy elements 36 & 37, resize both and sharpen
position on the tag and drop shadow
add your tube, drop shadow 5 5 70 11 and erase any overhang at bottom
add a new raster layer above background layer & select all
copy & paste Paper 1 into selection, select none
apply mask, delete & merge group
Copy elemnt 4, paste as a new layer above mask layer, resize and sharpen
duplicate, image mirror - merge down, duplicate, image flip
add your name & copyright info
delete background layer & save as a Png!

Saturday, 21 November 2009

Hot Stuff

Supplies
Tube of choice - I am using the gorgeous artwork of Ismael Rac which may be purchased from AMI
Scrapkit - a fab freebie from MaryPop Designs 'Winter Time' which you can find here
thank you!
Mask I am using is OMask 046 here
Font of choice - I am using Lounge Bait and Jilly Bean
OK - Open a new image 600x600 floodfill white
Add a new raster layer and select all
copy element 13 and paste into selection, select none
resize by 85%
Copy & paste element5 as a new layer, resize by 50% and duplicate
move the duplicate layer so it sits on top, merge down and sharpen
use your deform tool to turn so it is almost vertical, duplicate
on the bottom layer turn slightly to the left using deform tool
merge down
Copy element8, resize, sharpen and position
add a light drop shadow 0 0 50 5
resize element1 and position, sharpen
copy & paste element3, resize and place at top
sharpen and dropshadow as above
resize element 7, shrpen and place at side
add your tube and drop shadow 5 5 70 11
type your words of choice using the Jilly Bean font and position on tag
add a new raster layer above the background layer, select all
copy Paper 12 from the kit and paste into selection
select none and apply mask, delete and merge group
add noise to the mask layer at uniform 40
hide background layer & merge visible all other layers
resize & crop to your liking
add your name & copyright info
delete background layer & save as a Png!

Monday, 16 November 2009

Some bunny loves you

Supplies
Tube of choice -I am using the artwork of Keith Garvey which you may purchase from MPT
Scrapkit - a beautiful ptu kit from KatNKDA which is available to purhase from NK ART SHOP
Mask of choice - I am using WSL 84
Font of choice - I am using Curlz MT
OK - Open a new image in PSP 600x600 pixels floodfill white
Copy & paste Frame 01 from the kit, resize to fit and sharpen
click inside the frame with magic wand and expand by 5
Copy & paste Paper 15 as a new layer, resize, selections, invert, delete and drag below the frame layer, copy the lace element 10, position above the paper layer, resize and hit delete again, select none, sharpen the lace layer and add a drop shadow to frame 0 0 50 5
Add your tube and drop shadow, erase any overhang at bottom of frame
copy & paste element 20, resize and flip, mirror and position to the side, behind your tube
sharpen more
copy & paste element 19, resize, sharpen & drop shadow as above
place at top of tag behind your tube layer
Resize element 32, position at bottom of tag, sharpen twice
resize bow 29 and place to the side of frame, sharpen & drop shadow
Add the bunny 51, resize and sharpen, place at bottom
Hide background layer & merge visible all other layers
unhide background and add a new raster layer above it, select all
copy & paste Paper1 into selection, select none
Apply mask, delete and merge group
copy element 34, resize and paste as a new layer above the mask layer, duplicate, image mirror, image flip - move into position and sharpen both layers
Add your name to the tag at the top
resize and crop to your liking
add any copyright info, delete background layer & save as a Png!

Winter Angel

Supplies
Tube of choice - I am using a beautiful angel by Steve Baier which may be purchased from UpYourArt
Scrapkit - a gorgeous freebie kit called 'Winter Angels' by Artmama which you can find here
Thank you!
Mask of choice
Font of choice
Xero porcelain
OK - open a new image in PSP 600x600 floodfill white
Copy Frame3 from the kit, paste as a new layer, click inside the centre of frame with magic wand, selections, modify, expand by 5
copy paper13, resize and paste as a new layer, drag below the frame layer, selections, invert and delete - copy & paste element 30 as a new layer above the paper layer, resize, position & hit delete again, select none
Paste your tube as a new layer, position and erase any overhang
apply xero porcelain default settings to your tube
Copy & paste ribbon 25, resize by 80% and position along the bottom below your tube
copy & paste feathers 39 & 40, resize slightly & position to the side
sharpen both and drop shadow 0 0 50 5
copy & paste element 9, resize and sharpen and position at bottom of feathers
Copy elements 31 and 32 and paste as new layers above the white background layer
resize and position and sharpen both layers
add a new raster layer above the background layer and select all
copy Paper1 and paste into selection, select none
apply mask of choice, delete and merge group
Copy embellishment 43, paste as a new layer above mask layer, resize and position, duplicate, image mirror, image flip
Add your name using a scripty font and add noise at uniform 40
Resize and crop your tag to your liking
add any copyright information
delete background layer & save as a Png!

Wednesday, 11 November 2009

Feelin' Lucky


Supplies
Tube of choice - I am using the artwork of Jose Cano which may be purchased from MPT
Scrapkit - a beautiful ptu kit from KatNKDA called 'Black Cat' which is available to purchase from NK Art Shop
Mask of choice - I am using Becky Mask 038 here
Font I am using is BeautySchool Dropout
OK - Open a new image in PSP 650x550 floodfill white
Copy & paste the frames 08, resize to fit
Click inside each frame with magic wand, selections, modify, expand by 5
copy paper8, resize and paste as a new layer
selections, invert, delete and drag below frames, select none
add a drop shadow to frame layer 0 0 70 5
Copy playing card 42, resize & paste as a new layer, position and turn slightly using your raster deform tool, sharpen & apply same drop shadow, duplicate
on the bottom layer use your deform tool to turn it slightly in the opposite direction
Add your tube, position in the middle of frames and drop shadow 5 5 70 9
copy the glass 2, resize and sharpen, position
copy & paste one of the hats,I used 07, resize and place to the side of the glass
turn slightly with the deform tool, sharpen & drop shadow
resize the dice 40 and place at bottom of playing cards, sharpen twice and drop shadow
Add the black cat 25, resize and position on corner of frames, sharpen
resize the roses 46 and 47 , sharpen more, drop shadow & position at bottom of frame
I also added the heart 36 and positioned behind the playing cards
Hide white background layer and merge visible all other layers
resize by 85% and crop
unhide background and add a new raster layer above it, select all
Copy Paper 6 and paste into selection, select none
apply mask, delete and merge group, duplicate and mirror, flip
merge these 2 mask layers together, add noise at uniform 40
Copy element 45, resize by 50% and position above mask layer, sharpen & duplicate
image mirror, image flip and move into position
Add your name & copyright info
delete background layer & save as a Png!


Sunday, 8 November 2009

Remembrance Day


In honour of all our fallen troops who have been killed or maimed in Afghanistan


Lest we forget
They shall grow not old, as we that are left grow old: Age shall not weary them, nor the years condemn. At the going down of the sun and in the morning We will remember them.


Remember me

Supplies
Tube of choice - I am using artwork by Keith Garvey which may be purchased from MPT
Fab freebie tag template by KatNKDA which is only available for a short time so go grab it quick! here
thanks Kat !
Font-Kingthings wrote and Murro
plugins - Xero porcelain & radiance
This is a real quickie tut
open Kat's template, change the background colour to white
click on the purple frame backgrounds and select all, float, defloat
copy your tube of choice and paste as a new layer
position in the top frame then selections, invert, delete
paste your tube again and resize, position in the other top frame, hit delete
mirror your tube and paste as a new layer - position in bottom frame, delete
in the top tube layers, change one of them to screen
on the other top tube layer apply xero porcelain at default settings
on bottom tube layer apply xero radiance default settings
using the murro font - type out 'and don't you forget it'
position in the tag box and rotate using your deform tool
using the kingthings font, type the word Remember
position at top of tag to the left
then type 'my name' and apply a white gradient glow
add your name and apply a gradient glow
hide background and resize to your liking
add any copyright info
delete bakground layer & save as a png!

Saturday, 7 November 2009

Give Thanks!

Supplies
Tube of choice - I am using the artwork of Jose Cano available to purchase from MPT
Scrapkit - a beautiful freebie from Seachell 'Thankful Blessings' here
Thanks Seachell
Mask of choice or the one I am using can be found here
Fonts I used are Leaf1, Autumn Nights and Murro
eye candy gradient glow
xero porcelain
Ok - open a new image in PSP 600x600 floodfill white
Add a new raster layer and select all
copy Paper2 and paste into selection, select none
apply mask, delete and merge group
Copy element 35, resize and paste as a new layer
click inside the 3 frames and expand by 6
copy Paper 1, resize by 25% and paste as a new layer
selections, invert, delete and drag below frame layer, select none
drop shadow frame 0 0 70 5
Copy element 36, resize and sharpen, paste as a new layer
position at side of frames and apply same drop shadow
resize element5 and position in middle frame, below the frame layer
sharpen more and erase any overhang at sides
copy element 33, resize and position along the bottom, sharpen & drop shadow
copy & paste element 29, resize, sharpen & drop shadow
Add your tube and position - apply xero porcelain default settings and apply a heavier drop shadow, I used 5 5 70 11
add any elements from the kit you like and position on the tag
Add your words and name and give a gradient glow using colours from the tag
Hide the background layer & mask layer & merge visible all other layers
unhide the hidden layers, resize the tag layer by 85% and sharpen
Resize element2 and position above the mask layer, sharpen & duplicate a few times, mirror or flip and position how it looks best
add your copyright information
delete background layer & save as a Png

Monday, 2 November 2009

Bling

Supplies
Tube of choice - I am using the artwork of Ismael Rac available to purchase from AMI
Scrapkit - 'Bling Bling Baby' by AquaRebel315 which you can download here at Creative Misfits, it's the last one
Thank you!
Mask -Omask046 here
Font - AlSandra here
Plugins - xero porcelain and radiance
eye candy gradient glow
OK - Open a new image in PSP 600x600 floodfill white
Copy & paste double frame01 from the kit, resize by 80%, sharpen
click inside both frames with magic wand, expand by 6
add a new raster layer and floodfill black, select none
move this layer below the frame layer
drop shadow frame 0 0 70 5
On the frame layer, click inside one frame with magic wand, expand by 6
paste your tube as a new layer, resize & position, selections, invert, delete
move your tube layer below frame layer, select none
apply xero porcelain default settings
Back on your frame layer, click inside the other frame & expand by 6
mirror your tube, copy & paste as a new layer
invert & delete, select none and drag below frame layer
apply xero radiance at 128 50 128 255
Add your elements of choice from the kit, resize to fit, sharpen more & drop shadow all elements 0 0 70 5
Copy chainlink01 and paste as a new layer above background layer
resize by 65%, positionto the side, duplicate & mirror
move into position, merge down and sharpen
Add a new raster layer above background layer & floodfill black
Apply the mask, delete & merge group
Hide background layer & merge visible all other layers
resize & crop your tag to your liking
remember to sharpen when you resize
Type your words of choice along the top of tag
Add your name & copyright info
delete background layer and save as a Png!

Sunday, 25 October 2009

Witches Brew

Supplies
Tube of choice - I am using the artwork of David Boller which may be purchased from UpYourArt
Scrapkit - a gorgeous ptu kit from KatNKDA which you may purchase from NK Art Shop
Mask - I using VixMask Halloween01 here
Thanks
Font of choice
OK - Open a new image 700x600 floodfill white
Copy element 38, paste as a new layer & resize to fit
click in centre of frame and expand by 8
Copy one of the purple papers from the kit, resize & paste as a new layer
selections, invert, delete & drag below frame layer, select none
Using your preset shape tool set on elipse, foreground nil, background white
draw a circle the same size as a the frame
use your deform tool to pull it into shape and position below the paper layer
convert to raster layer
(this is to keep the mask from showing through the frame)
merge these 3 layers together
Add your tube & position, drop shadow 5 5 70 9
Copy the flowers, element 10, resize and sharpen
position above the frame but below the tube layer
Resize elements 7, 5 and 20
position them to the side of the frame, sharpen all and drop shadow
0 0 70 5
Copy element 24, resize and paste as a new layer on the other side
sharpen and apply same drop shadow
Copy the book, element 25, resize and sharpen
click inside both page with magic wand and expand by 5
copy one of the black papers from the kit, resize and paste as a new layer
selections, invert, delete and drag below the book layer, select none
drop shadow the book as above
set you font background to a light colour and type some words
I typed the poem
'eye of newt, toe of frog, wool of bat, tongue of dog
double double, toil and trouble, fire burn & cauldron bubble'
copy element41, reize & flip and position in the centre of book
sharpen more
Copy element 18 & paste as a new layer above the background layer
resize so it fits nicely around the frame
Hide background layer & merge visible all other layers
resize by 85% , sharpen & crop
Add a new raster layer above background layer, select all
Resize paper10 and paste into selection, select none
apply mask, delete & merge group
Add your name and apply noise at random 20
add your copyright info, delete background layer
save as a Png!

Drama Queen

Supplies
Tube of choice -I am using a tube by Elias Chatzoudis which you can purchase from MPT
Scrapkit - a freebie kit from Bea called 'Drama Queen' here
Thank you
Mask of choice - I am using WSL 84
Font of choice - I am using 2 peas Drama Queen
OK -open a new image 600x600 floodfill white
Copy & paste frame 3 from the kit
click inside the frame with magic wand & expand by 6
Copy Paper11 and paste as a new layer, selections, invert, delete
drag this layer below the frame and select none
drop shadow frame 0 0 70 5
merge down and duplicate
use your deform tool to turn the bottom frame layer slightly to the left, merge down
Resize the journal, paste as a new layer towards the bottom of frame
turn it slightly to the left using deform tool
sharpen & apply the same drop shadow as before
paste the pencil as a new layer, resize, sharpen & drop shadow
Copy the ticket and paste as a new layer below the journal
position so it is just sticking out from behind it, sharpen & D/S
Add a bow of choice, I used bow 12 and position on the frame
Resize the denim pocket and position to the right side of frame
sharpen & drop shadow
Add your tube and position, add drop shadow 5 5 70 9
Type your name on the journal
Copy paper13 and paste as a new layer above background layer
Apply mask of choice, delete & merge group
resize the doodles and paste above the mask layer
position and sharpen
Add your copyright information
delete background layer & save as a Png!

Monday, 19 October 2009

Innocence

Supplies
Tube of choice - I am using a beautiful tube from KatNKDA which may be purchased from NK Art Shop
Scrapkit - ptu kit also by Kat called 'Winter Girl' available from NK Art Shop
Mask - I am using Babes Mask 16 which you can find here
Font of choice - I am using leaf1
OK - Open a new image in PSP 700x600 floodfill white
Copy Frame16 from the kit, resize and paste as a new layer, sharpen
Click inside the frame with magic wand, selections, modify, expand by 5
Copy Paper3, resize and paste as a new layer, selections, invert, delete and drag below frame layer -copy & paste element 11, resize, position and hit delete again, select none, sharpen more
Drop shadow frame 0 0 70 5 black
Copy element 10, resize and paste as a new layer to the side of the frame, sharpen
Resize flowers 48 & 45 and position at the bottom, sharpen both
Copy rose 3, resize, sharpen & position at top corner of frame
Copy & paste element 30, resize and position below the rose layer, sharpen
Type the word 'innocence' or word of choice, rotate 90 degrees left and position in the tag
Resize bow32 and paste as a new layer, position above the hearts, sharpen & drop shadow
Add your tube, resize if necessary & position
Drop shadow 3 3 70 9
Hide background layer and merge visible all other layers
unhide background and add a new raster layer above it, select all
Open Paper 01, resize and paste into selection
Apply mask, delete and merge group
Copy element 8, resize and paste as a new layer above the mask layer
move into position, sharpen
Add your name and add noise at uniform 40
drop shadow 2 3 67 7
Add your copyright information
delete background layer & save as a Png!