Sunday, 29 March 2009

Delicious

Supplies
Tube of choice - I am using the artwork of Greg Horn which you can purchase from CILM
Scrapkit -'Lovely Chocolate' by Bel Vidotti which you can download from her site here
Thanks again for another lovely kit!
Mask here
Font I am using is LainieDay
OK - Open a new image 600x600 floodfill white
Open Frame5, copy & paste as a new layer, resize by 85%
Click inside with magic wand and expand by 6
Copy Paper9 and paste as a new layer, selections, invert, delete and drag below frame
Duplicate the paper layer and on the bottom layer adjust blur, gaussian blur 20
Add your tube and erase any overhang outside the frame
Add a drop shadow to the frame of 0 0 70 5
Copy Bow3, resize and position on top side of frame, sharpen and drop shadow
Copy leaves1, resize by 80% and paste as a new layer, rotate 90 left and position on side
Copy leaves3, paste as a new layer, resize & position then paste a flower of choice on top
Paste chocolate tag2, resize by 50% and sharpen position on the frame
Copy & paste chocolate tag3 as a new layer, resize & position at bottom of frame
Add a few chocolates, resize & sharpen, drop shadow all the elements
Add your name on the tag using a light colour from the flower
Copy doodle 2 resize by 75% paste below the papers and position on left side
At this stage hide the white background layer and merge visible
Resize if necessary and crop
Unhide white background and add a new raster layer above it, select all
Copy Paper3 and paste into selection, select none
Apply the mask to the paper layer and merge group
Resize masked layer by 85% twice and lower the opacity slightly
You can now save as a jpeg or delete the white background & save as a Png

Fairy Hugs

Supplies
2 tubes of choice from the same artist - I am using these beautiful fairies by Candice Dillhoff which you can purchase from UpYourArt
Scrapkit - 'Moonchild' by Bel Vidotti which you can download from her site here
Thank you for this beautiful kit!!
Mask of choice
Font of choice
OK- Open a new image 600x600 floodfill white
Open Frame3, copy & paste as a new layer, click inside all the frames with magic wand and selections, modify, expand by 5
Paste a Paper from the kit as a new layer, selections, invert, delete and move the paper below the frames
Drop shadow the frame layer 1 1 50 5 and again at -1 -1 50 5
Click inside the top frame with magic wand and expand by 5, copy your first tube and paste as a new layer, resize if necessary and position, selections, invert, delete and move below the frame layer, do the same on the bottom frame with your 2nd tube
Copy the clip and paste as a new layer, resize and use your raster deform tool to position it on the side of the top frame, sharpen
Copy & paste Flower6, resize and position at the bottom right
Copy the glitter, paste as a new layer, mirror, resize and place over the flower, sharpen
Copy & paste the tag as a new layer, resize and position on top left, move slightly with the deform tool and drop shadow 0 0 70 5
Copy one of the butterflies and paste as a new layer
I also resized the two swirls and placed them at the bottom left of frames
Add some text of choice to the tag
Hide white background and merge visible
resize by 85%, unhide white background layer and crop
Copy a Paper from the kit as a new layer above the background layer and apply a mask
Merge group, add noise to the mask layer at uniform 45
Now add your name & copyright information
Save as a jpeg or delete the white background layer & save as a Png

Saturday, 28 March 2009

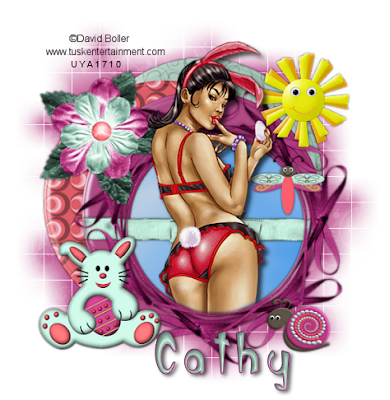
Chocolicious


Supplies

Tube of choice -I am using the artwork of David Boller which can be purchased from UpYourArt
Scrapkit - 'Shabby Spring Kit' by Vaybs which you can download here
Thanks Vaybs for this beautiful kit!!
Mask of choice
Font of choice

OK - a nice quick tut

Open a new image in PSP 600x600 floodfill white
Open one of the triple frames, copy & paste as a new layer
Click inside the frame with magic wand and expand by 5
Copy Paper20, paste as a new layer, selections, invert, delete and move below the frame
Copy one of the bow frames, paste as a new layer & resize by 75%, position around the frame
Copy a ribbon of choice and paste as a new layer, resize by 65% and position below the bow frame, erase the ends with eraser tool
Copy & paste a Bunny, snail, fly and flower, resize & position on tag
Copy the sun & place on top right of tag
sharpen all the elements and add a drop shadow of 0 0 70 5
Copy your tube and paste as a new layer, erase any overhang, drop shadow 5 5 70 9
Add your name using colours from the tag
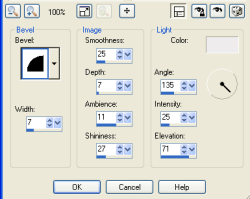
Add an inner bevel - settings

Photobucket
Drop shadow 2 3 69 7
Copy a paper of choice and paste as a new layer above background layer, apply a mask, merge group. Add your copyright information, delete white background layer, merge visible, resize & crop and save as a Png

Tuesday, 24 March 2009

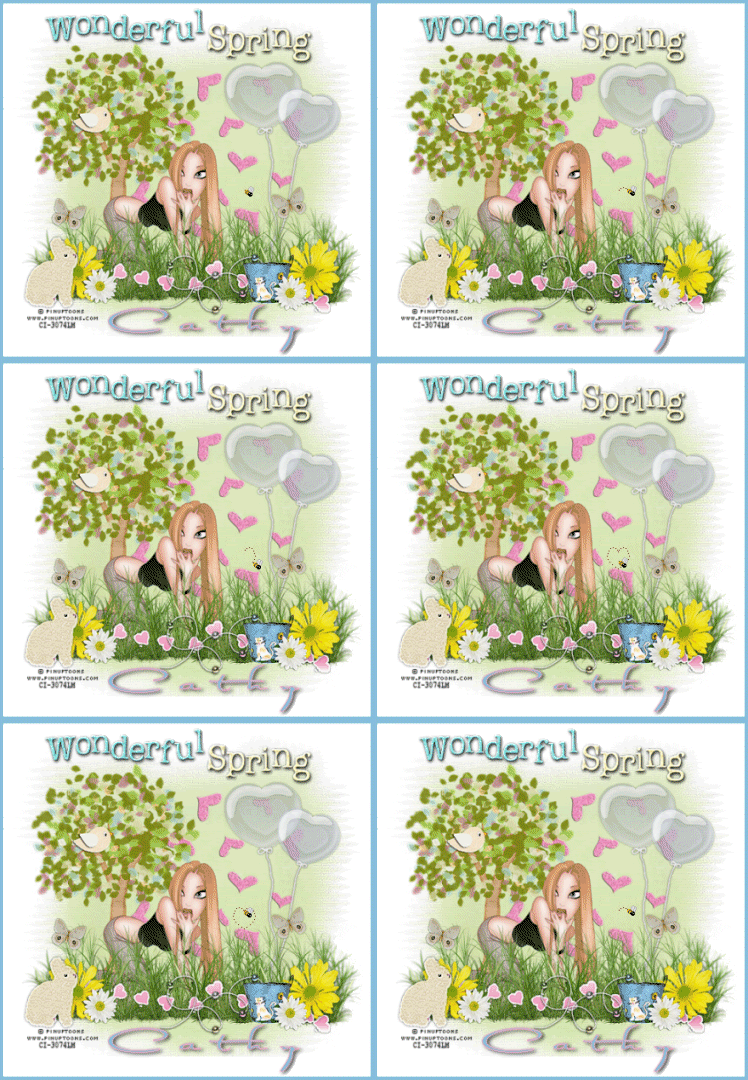
Wonderful Spring

Photobucket

Supplies
Tube of choice - I am using the artwork of Pinuptoons which you can purchase from CILM
Scrapkit - 'Spring Feast' by Jaelop which you download from her site here
Thank you Jaelop for another beautiful kit!
Mask of choice
Font of choice
Bee animation here
OK - Open a new image 600x600 floodfill white
Open a paper from the kit, resize & paste as a new layer, apply mask and merge group
Open the grass21, resize, copy & paste as a new layer, duplicate twice and position
Copy & paste the tree36, resize and position below the grass layers
Copy some flowers from the kit - I used 6 & 7 and paste at side of grass, duplicate & mirror
Copy the balloons, I used 57, resize & paste as a new layer
Paste hearts56 as a new layer above the mask layer, resize & sharpen
Add your tube and position below the grass layer
I added the bucket50 and butterfly46 as well as the rope59 which I rotated with the raster deform tool so it looks like it is coming out of the bucket
I also added heartline91 along the bottom of the grass
Resize the bunny78 and paste as a new layer, position where you think it looks best
When happy with your tag, hide white background & merge visible, resize by 85%
Open the wordart97 and choose the words you want on your tag by drawing around them with your freehand selection tool, copy & paste as a new layer & resize, sharpen more
Add your name & copyright information
Crop your tag and paste as a new image in animation shop
Animation
Open the bee in ani shop - it has 41 layers
Duplicate your tag so that you have 41 layers
Click on the bee, edit, select all, copy
Click on your main tag, edit, select all, paste into selected frame
Position the bee where you want it then release the mouse
View your animation and if happy save as a gif

Monday, 23 March 2009

A touch of Spring

Supplies
Tube of choice - I am using the artwork of Ching-Chou Kuik which you can purchase from UpYourArt
Scrapkit - 'Touch of Spring' by Chingjp a beautiful freebie kit which is part of a blog train - you can find it on her site here
Thank you!!!
Mask of choice
Font of choice
Xero Porcelain (optional)
OK - Open a new image 600x600 floodfill white
(All the elements I resized by 25% then by around 50-60%)
Open the frames 47 copy & pate as a new layer
Click inside each frame, selections, modify, expand by 5
Copy Paper12 and paste as a new layer, selections, invert, delete and move below the frames
Open the clouds 68 copy and paste as a new layer above the paper layer and position
Copy leaves59 and paste as a new layer to the bottom right
Copy & paste leaf branch26 and position to bottom left of frame
Open Spring element 44 and paste as a new layer
Paste the Flower red to one side
Copy butterfly43 and position on the frame, duplicate and move to the other side
Copy the birdhouse22 and position top right of the frame
Open the cherubs 69 and position where you think looks best
Click on the frame layer and paste your tube as a new layer so she is positioned behind the grass
I added a drop shadow to all elements of 0 0 60 4
I applied Xero porcelain to my tube, cherubs & birdhouse at default setting
Hide white background and merge visible
Add a doodle below the tag, I used element42
Copy & paste Paper16 as a new layer above the background layer and apply a mask of choice
Merge group
Add your copyright information and your name
I used Paper1 in the material pallet for my name and applied a gradient glow
You can now crop and resize
Save as a jpeg or delete background layer & save as a Png

Saturday, 21 March 2009

New Life

I thought I would do a tut in honour of Mother's Day which is celebrated here in the UK this sunday, as Spring brings new life, and I am also getting a puppy on sunday - thats where the name came from!!!
Supplies
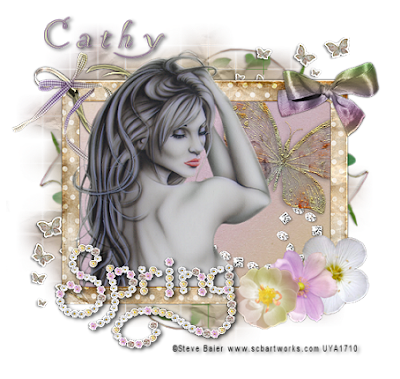
Tube of choice - I am using the artwork of Steve Baier which you can purchase from UpYourArt
Scrapkit - 'Beautiful Spring' by Jaelop here
Thank you for this beautiful kit!!
Mask of choice
Font of choice
OK - Open a new image 600x600 floodfill white
Open Frame 11a from kit, copy & paste as a new layer, resize
Click inside frame with magic wand, selections, modify, expand by 5
Copy Paper4 from kit and paste as a new layer, resize, selections, invert, delete
select none and move paper layer below frame
Copy Butterfly12, resize and paste as a new layer below the frame layer, position as above
Copy the diamonds31 resize and paste as a new layer, sharpen more
Now add your tube and erase any overhang at bottom of frame
Copy Bow1, paste as a new layer, resize & place at top right of frame, sharpen
Open ribbons5 and 19, resize both and place at top left of frame, sharpen both
Add drop shadow to frame, bow & ribbons of 0 0 70 5
Add some flowers at bottom right of frame
Copy the Spring wordart, resize & paste along bottom, sharpen & drop shadow
Hide white background and merge visible
unhide white background
Open butterflies37, resize and paste as a new layer below tag, sharpen
Add leaves4, resize, and paste as a new layer, duplicate & mirror twice - position around the frame
see tag above for reference
Copy Paper10 resize by 25% and paste as a new layer above white background layer
Apply mask of choice & merge group
Add your name and copyright information
resize & crop your tag
Save as a jpeg or delete background layer & save as a Png

Friday, 20 March 2009

Party Girl!

Supplies
Tubes of choice - I am using artwork by Ronnie Werner which you can purchase from UpYourArt
Scrapkit - 'Club!' a gorgeous freebie from Bluey which you can download here
Thanks Bluey!
Plugins - Xero soft mood (optional)
Mask of choice
Font of choice
OK- open a new image 700x600 floodfill white
Open Frame3 from the kit, copy & paste as a new layer, resize
Click inside the frames with magic wand and expand by 4, paste a paper from the kit as a new layer, selections, invert, delete and drag below the frame layer, select none
Back to the frame layer, click in the first frame with magic wand and expand by 5
Paste one of your tubes a new layer and position so the face is in the frame, selections, invert, delete and move below the frame layer. Repeat this for the other frames if you wish, I only placed tubes in 2 of the frames
Apply xero soft mood to the tubes in the frames
Haziness and glow red at 50, the rest at 0
Drop shadow the frame 0 0 70 5
Hide white background and merge visible
Unhide background layer
Paste your main tube and position, drop shadow 5 5 70 11
Paste one of the labels and position below your tube, drop shadow
Copy & paste the glitter splodge, resize and position below the frame, duplicate and mirror
Add any elements from the kit and position
Paste paper7 as a new layer above white background and apply mask of choice
Add your copyright information and your name
On the name I added noise at random 12
drop shadow 2 3 70 7
Hide white background and merge visible, resize and crop
save as a jpeg or delete white background and save as a Png!

Thursday, 19 March 2009

Easter Bunny

Supplies
Tube of choice - I am using the artworkof Russell Platt which you can purchase from UpYourArt
Scrapkit - 'Easter Kit' a beautiful freebie kit by Vaybs which you can downlaod from her blog here Thank you Vaybs!
Plugins -Two Moon -warm cloth
or a mask of choice
Font - Easter Fun here
OK - open a new image 600x600 floodfill white
Open Frame 13 from the kit, copy & paste as a new layer, resize
Click inside the frame with magic wand, selections, modify, expand by 5
Paste a paper from the kit as a new layer, selections, invert, delete, select none
Move your paper layer below the frame
Open Frame 3 from the kit, copy & paste as a new layer, resize so it fits just around the inside of the original frame - drop shadow both frames 0 0 70 5
Now add any elements from the kit - there are lots to choose from
Paste your tube as a new layer and erase any overhang outside the frame
Drop shadow tube 5 5 70 5
Hide the white background and merge visible
Duplicate, and on the bottom layer adjust blur gaussian blur 20
Apply Two Moon warm cloth - settings:
21
59
19
147
8
The rest at 0
Alternatively you could add a paper and apply a mask of choice
Add your name using 2 colours from the tag, I applied an inner bevel and drop shadow of
2 3 70 7
Duplicate your name and on the bottom layer apply the same blur and Two Moon effect
Add any copyright information
Resize and crop your tag
Save as a jpeg or delete the white background and save as a Png

Wednesday, 18 March 2009

Fling into Spring!

Photobucket

I just love these cute little fairies !!
Supplies
Tube of choice - I am using the artwork of Candice Dillhoff which you may purchase from UpYourArt
Scrapkit - 'Spring Fling' by Sabre which you can download from his site here
Thank you Sabre!
Plugins - Two Moon - Wish it would rain (optional)
Xero porcelain (optional)
Font of choice
OK - Open a new image 650x550 floodfill white
Open the frame from the kit and paste as a new layer, resize and rotate 90%
Click inside the frame with magic wand and expand by 4
Copy Paper2 and paste as a new layer, selections, invert, delete and move below the frame
Paste some flowers of choice from the kit at side of frame
Add a drop shadow to your frame of 0 0 70 5
Hide white background and merge visible, unhide background layer
Duplicate your frame layer and on the bottom layer adhust blur, gaussian blur 20
Apply Two Moon, wish it would rain at default settings
(alternatively you could add a mask)
Copy and paste the fairy dust, resize and position over the tag
Now paste your tube as a new layer, resize and position, drop shadow 5 5 70 9
I applied xero porcelain to my tube - again this is optional
Copy & paste the bow, resize and position at bottom of frame
Add the butterfly at top corner, resize and sharpen, duplicate & resize by 70%
Add your name and any copyright information
Animation
Duplicate your fairy dust layer twice for a total of 3 layers
On the bottom layer, adjust add noise at 35
Middle layer add noise at 36
Top layer add noise at 37
Hide the top 2 fairydust layers and copy merged your tag into ani shop as a new image
Back to PSP, hide the bottom layer and unhide the middle layer, copy merged into ani shop after current frame, back to PSP, hide middle layer and unhide top layer, copy merged into ani shop after current frame.
You can now view your animation and if happy save as a gif!

Tuesday, 17 March 2009

I wanna dance in the rain

Supplies
Tube of choice -I am using the beautiful artwork of Candice Dillhoff which you can purchase from UpYourArt
Scrapkit - 'Dance in the rain' a beautiful freebie by Jamie Dell Scraps HERE
Thank you!!
Mask of choice
Font of choice
OK - Open a new image 600x600 floodfill white
Open the leaf frame, resize and paste as a new layer
Click inside the frame with magic wand, selections, modify, expand by 2
Open Paper 5, resize by 25% and paste as a new layer
Selections. invert, delete and move below the frame layer, paste the rain cascade, resize and position, hit delete, select none
Copy & paste the tree as a new layer, resize and position below the paper layer
Paste a bow at top of frame, add some flowers around the tree trunk and a butterfly
Now paste your tube and position, add a drop shadow of choice
Open the drops, copy and paste as a new layer at side of tube, resize, duplicate and mirror
Copy & paste the rainbow, resize and position so it is going around the frame
Now add a paper of choice and apply a mask
Add your copyright information and your name
Resize & crop if desired
Save as a jpeg or delete white background and save as a Png

Sunday, 15 March 2009

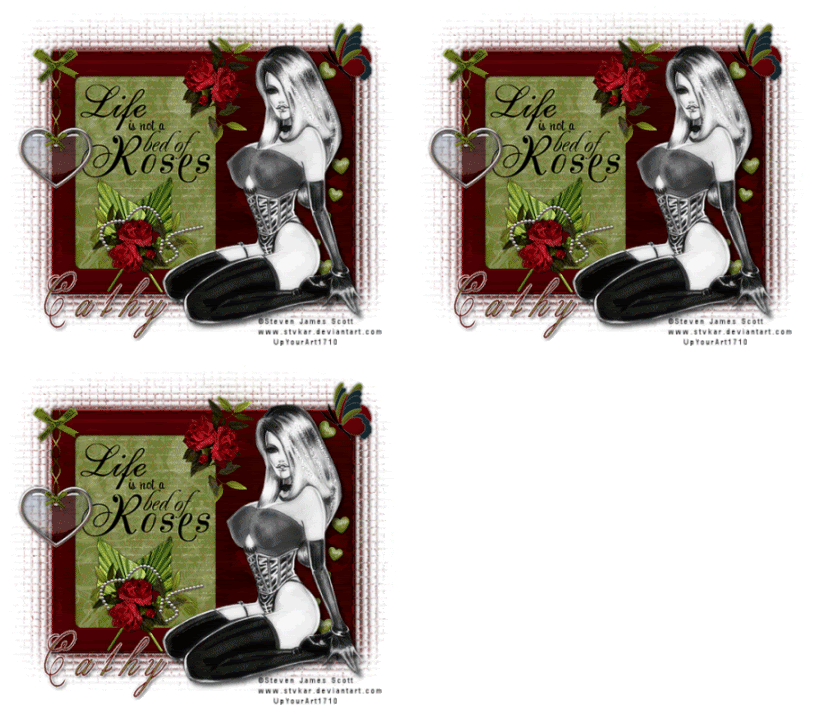
Bed of Roses

Photobucket

Supplies
Tube of choice -I am using the artwork of Steven James Scott which you can purchase from UpYourArt
Scrapkit - 'Rose Kit' by Vaybs which you can download from her blog here
Thanks Vaybs for this beautiful kit!
Font of choice
OK - Open a new image 700x 600 floodfill white
Open Frame6, copy and paste as a new layer
Click inside the frame with magic wand and modify by 5
Copy & paste Paper9 as a new layer, selections, invert, delete and move down below the frame
Copy the wordart from the kit and paste as a new layer, resize to fit
Copy Rose decor1, paste as a new layer at bottom of frame, resize
Paste the rose, resize and position - see my tag for reference
Copy one of the rose lines and paste on side of frame
Add a drop shadow to all your elements 0 0 70 4
Hide white background and merge visible
Duplicate this layer and on the bottom one adjust blur, gaussian blur 15
Effects, texture effects, mosaic glass - columns and rows both at 50 and symmetric checked
Add one of the hanging hearts and a butterfly, or use any elements you desire
Add your tube and position
Now add your name and copyright information
Animation
Using your freehand selection tool draw a few lines through the hair on the tube and add noise at 35, copy merged into animation shop as a new image
Back toPSP, edit undo select none, edit undo noise, reapply noise again at 37 and copy merged into ani shop after current frame, repeat above step once more, changing noise to 39
View your image and if happy save as a gif

Saturday, 14 March 2009

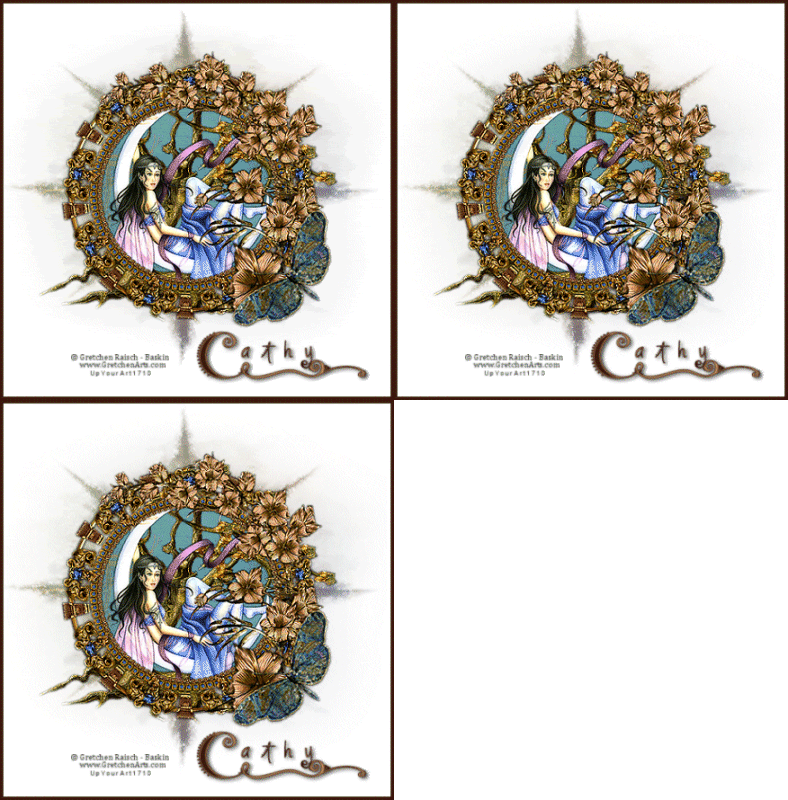
Fairy Portal

Photobucket

Supplies
Tube of choice - I'm using the artwork of Gretchen Raisch-Baskin which you can purchase from UpYourArt
Scrapkit - 'Spring Portal' by Sabre which you can download here
Thank you Sabre for another beautiful kit!
Mask also by Sabre
Font of choice
Plugins - Xenofex constellation
OK- Open a new image 600x600 floodfill white
Open Frame3 copy & paste as a new layer, resize
Click inside frame with magic wand, selections, modify, expand by 25
Paste Paper2 as a new layer, selections, invert, delete
Drag this layer below the frame, paste your tube, resize if necessary and hit delete again
Copy and paste the tree as a new layer below your tube layer
Copy the flowerbranch and paste as a new layer, mirror and resize
Paste one of the butterflies and position
Add a new raster layer above the background layer and select all
Paste Paper 3 into selection
select none and apply mask2, merge group
Add your name & copyright info
Animation
duplicate the mask layer twice for a total of 3 layers
on the bottom layer apply constellation
Click on Settings - small star constellation and tick 'keep original image'
on the middle layer apply constellation again and change the random seed
do the same on the top layer
Hide the top2 mask layers and copy merged
Paste into animation shop as a new image
Back toPSP, hide the bottom mask layer unhide the middle one
Copy merged into ani shop after current frame
Back to PSP again and hide middle mask layer unhide top mask layer
Copy merged into ani shop after current frame
You can now view your animation
resize if necessary and save as a gif

Wednesday, 11 March 2009

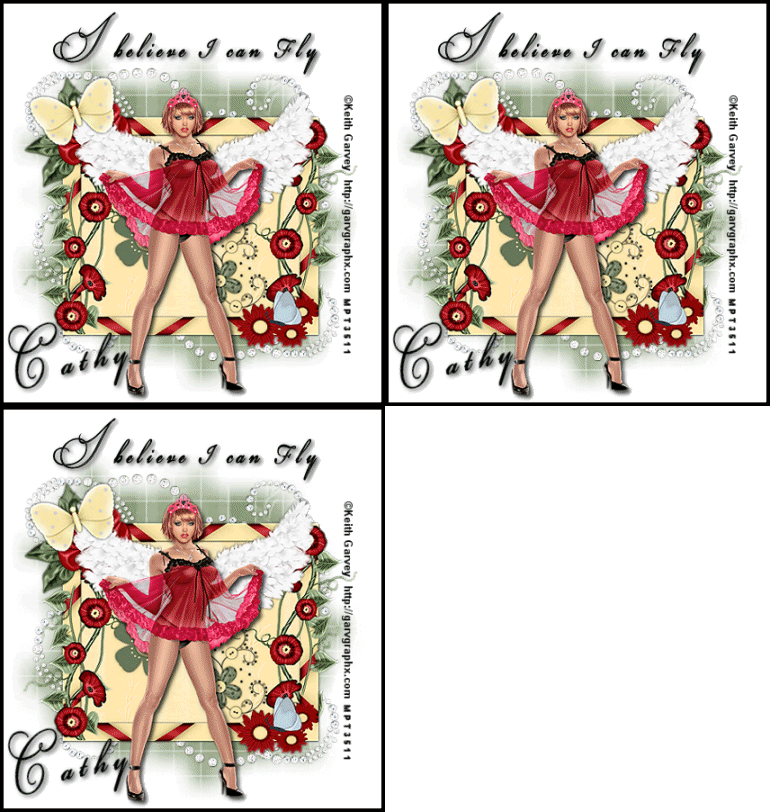
I believe I can fly

Photobucket
Supplies
Tube of choice - I am using the beautiful artwork of Keith Garvey which can be purchased from MPT
Scrapkit -'Angela' by Bea which you can download from her blog here
Thanks Bea for another beautiful kit!
Mask of choice
Font of choice
Plugins - DSB Bright Noise
OK - open a new image 600x600 floodfill white
Open Frame4 from the kit, copy & paste as a new layer, resize by 75%
Click in centre of frame with magic wand and expand by 5
Copy a paper of choice & paste as a new layer, selections, invert, delete
Move your paper layer below the frame layer
Copy Flower20 and paste as a new layer, resize so it fits inside the frame
Copy flower 18 and paste on side of frame, resize and duplicate, mirror
Copy flower22 and paste on top right of frame, resize
Drop shadow your frame and all flowers 0 0 70 4
Open the angelwings, copy & paste as a new layer, resize
Paste your tube and position over the wings
Drop shadow tube 5 5 70 9
Paste any other elements from the kit and position
Hide your white background and merge visible, resize by 85% and crop
Paste a paper of choice and apply a mask, merge group
Open doodle1 and paste as a new layer above the mask layer, resize by 80% sharpen
Duplicate the doodle layer, mirror & flip and move into position
Using a font of choice type the words
add your name & copyright information
Animation
Merge your 2 doodle layers together and duplicate twice for a total of 3 layers
On the bottom layer add bright noise at 45 and tick mix
on the middle layer apply bright noise again but tick mix twice
on the top layer reapply bright noise, ticking mix 3 times
Now hide the top 2 doodle layers and copy merged into ani shop
Back to PSP, hide the bottom doodle layer and unhide the middle one
copy merged and paste into ani shop after current frame
Back to PSP, hide middle doodle layer, unhide top one
Copy merged & paste into ani shop after current frame
Save as a gif and you're done!

St Paddys Day

Supplies
Tube of choice - I'm using the work of Bam Bam which you can purchase from MPT
Scrapkit - 'Green with Envy' by Simone which you can download from her site here
Thanks Simone for this lovely kit
Mask of choice
Font of choice
OK - A quick and easy tut!!
Open a new image 600x600 floodfill white
Open Frame7 from the kit, copy & paste as a new layer onto your image
click inside the frame with magic wand, selections, modify, expand by 7
Copy Paper23 and paste as a new layer, selections, invert, delete, select none
Move the paper layer below the frame
Copy the mini clovers and paste as a new layer above the paper layer, resize so it fits
Now paste your tube as a new layer and position
Paste any elements from the kit you like and position
Use my tag as a guide or do your own thing
I added a drop shadow to all elements and the frame of 0 0 70 5
Drop shadow your tube 5 5 70 9
Hide white background and merge visible, resize & crop
Now add a paper of choice above white background layer and apply a mask
Add your name and saying of choice as well as copyright information
Save as a jpeg or delete white background layer and save as a Png

Sunday, 8 March 2009

Grunge Babe

Supplies
Tube of choice -I'm using the artwork of Michael Landefeld which you can purchase from CILM
Scrapkit - FTU 'Grunge Babe' by Scrap Dimensions
Thank you!
Mask of choice
Font of choice
OK - open a new image 600x600 floodfill white
Copy Frame5 & paste as a new layer, resize by 85% twice
Click inside the frame with magic wand and expand by 6
Copy Paper2 and paste as a new layer, resize by 85% twice, selections, invert, delete
Move paper layer below the frame, then paste a close up of your tube, position and delete again
select none
Change the opacity of the tube to overlay
Copy & paste the barrel as a new layer, resize & position
Copy the chain and paste so it looks like it is hanging over the barrel
Use your eraser tool to erase part of the chain
Copy & paste the beads as a new layer, resize & position at top of frame
Paste some brads at either side
Paste a few buttons at bottom of fame and paste the bag on top of them
Copy & paste a pinflower as a new layer and position, resize
Paste one of the skulls on the barrel, resize & sharpen
Add a drop shadow to all elements & frame of 0 0 70 5
Paste your main tube as a new layer and position
Drop shadow 5 5 70 9
Hide white background and merge visible
Resize by 85 % and crop if necessary
Add a new raster layer above white background - select all and paste Paper4 into selection, select none and apply your mask
Add your name & copyright info
Save as a jpeg

Friday, 6 March 2009

Beautiful Baier

Supplies
Tube of choice - I am using the artwork of Steve Baier which you can purchase from UPYourArt
Scrapkit - 'Beautiful' by Bel Vidotti which you can download here
Thanks for this beautiful freebie!!
Mask of choice
Font of choice
OK - open a new image 600x600 floodfill white
Open Frame1 from the kit, copy & paste as a new layer
click inside the frame with magic wand, selections, modify, expand by 5
copy a paper from the kit & paste as a new layer, selections, invert, delete and drag the paper layer below the frame now paste your tube as a new layer, resize if needed and position then hit delete again - select none
Sharpen your tube if necessary and drop shadow 5 5 70 5
Drop shadow the frame 0 0 70 5
Hide white background and merge visible, duplicate and on the bottom frame layer free rotate 12 degrees to the left
Add a wrap and position over the frame, resize and erase the side bits
sharpen & drop shadow same as the frame
Add elements of choice from the kit and position
Copy & paste doodle 3 as a new layer below the frame, resize and position, duplicate and flip
Copy a paper of choice, paste as a new layer above the white background layer and apply a mask
Hide white background again and merge visible, resize & crop your tag
Now add your name & copyright information
Save as a jpeg or delete the white background layer & save as a Png

Thursday, 5 March 2009

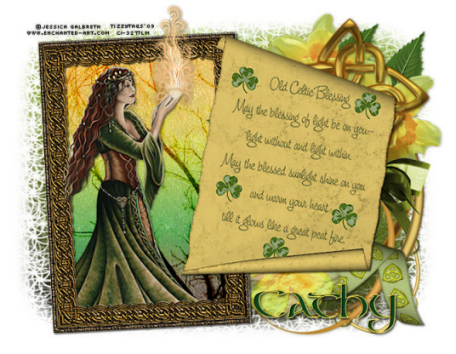
Lucky Irish Charm

Supplies
Tube of choice -I am using the artwork of Carrie Hall which you can purchase from UpYourArt
Scrapkit - 'Celtic Gold' freebie add on by TizzysAngel which you can find here
Thanks Tizzy!!
Mask - 'Clover's DayDream2' by Sabre which you can download from his site here
Thank you Sabre
WordArt - here
Plugins - DSB Bright Noise
(To view animated tag Click here)
OK - open a new image 600x600 floodfill white
Open the Bronze flower frame, copy & paste as a new layer, rezize by 85%
Click in the centre of the frame with magic wand, selections, modify, expand by 5
copy & paste a paper from the kit as a new layer, selections, invert, delete, select none
Move the paper layer below the frame layer
Open the triquetracircle & copy and paste above the paper layer, resize slightly
Open the stone cross, resize and paste around the frame, duplicate as often as you need
Now add your tube and the word art and position
Open the swirl and paste as a new layer above the background layer, mirror
I also resized the swirl and positioned it in her hands
Now add a paper of choice as a new layer below al the layers and apply the mask
Duplicate the mask layer a few times to make it show up more
Add your name & copyright information, crop your tag and resize if desired
Animation
If you wish to animate, merge your crosses and the small swirl layers
Apply DSB Bright noise to this layer at 45 with mix clicked once
Copy merged into animation shop
Back to PSP,edit undo and apply Bright noise again click mix twice
Copy merged and paste into ani shop after current frame
back to PSP, edit undo and apply again with mix clicked 3 times
copy merged and paste into ani shop after current frame
Save as a gif
I hope you enjoyed this tut!
I was thrilled that Tizzy made me a tag using her Celtic Gold kit so I have to show it off
Thanks again Tizzy for this beautiful creation!!!


Photobucket

Tuesday, 3 March 2009

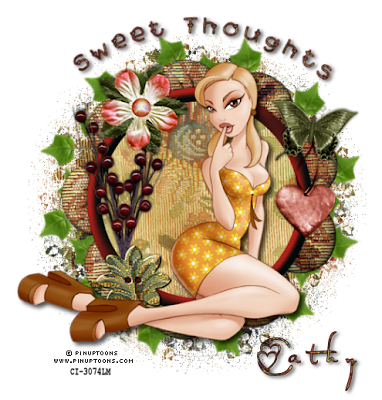
Sweet Thoughts


Supplies
Tube of choice - I am using artwork from PinupToons which can be purchased from CILM
Scrapkit - 'Thankful' by Vaybs which you can download here
Thank you Vaybs!
Mask - WSL 125 which you can download here
Font of choice
OK - open a new image 600x600 floodfill white
Open frame (25) from the kit - copy & paste as a new layer, resize by 85%
Copy the circle of leaves (30) and paste as a new layer below the frame, resize
Click inside the frame with magic wand, selections, modify, expand by 6
copy paper (4) and paste as a new layer, selections, invert, delete, select none
Drag this layer below your frame layer
Copy element (7) and paste as a new layer, position at side, duplicate and place beside the other one, drop shadow 0 0 70 5
Copy button (29) resize and paste at bottom of frame so it hides the bottom of the branches
Paste a flower of choice, butterfly and heart, position and drop shadow as above
Now paste your tube - drop shadow 5 5 70 9
When happy with how your tag looks, hide white background and merge visible
Unhide background and add a new raster layer above it, select all
copy paper (28) and paste into selection, select none
Now apply your mask, delete and merge group
Add your name and any copyright information
Save as a jpeg or delete the background layer & save as a Png


Sunday, 1 March 2009

A Spring Moment

Supplies
Tube of choice - I am using the artwork of Ching-Chou Kuik which can be purchased from UpYourArt
Scrapkit - 'Fruhling' by Bea which you can download here
Thank you Bea!
Mask of choice
Font of choice
OK - open a new image 600x600 floodfill white
Open frame - copy & paste as a new layer
click inside the frame with magic wand, selections, modify, expand by 8
Copy & paste paper4 as a new layer, selections, invert, delete and drag below frame - paste your tube as a new layer, resize to fit then hit delete again and select none
Add a drop shadow to the frame - 5 5 50 5
Add some embellishments from the kit and position
hide white background and merge visible
resize if necessary
copy and paste paper1 as a new layer above background layer
apply a mask of choice
add your name & copyright information
save as a jpeg