Tuesday, 28 December 2010

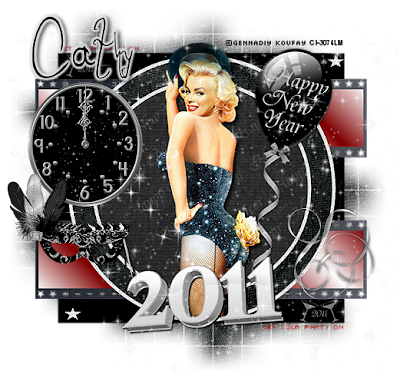
Welcome 2011


Supplies
Tube of choice - I am using the artwork of Gennadiy Koufay which is available at the moment from Cilm
Template 60 by Sapphy which you can grab at her blog Demented Hallucinationz here
Thank you!
Scraps of choice - I am using a ptu kit by Digimania called '2011 wishes' which you can purchase here but any New Year scraps will do (I couldn't find any freebie kits so far this year)
Mask of choice - I am using WSL 84 here
Font of choice - I am using 'Romance Fatal'
eye candy gradient glow (optional)
OK - Open the template in PSP, delete the copyright layer and the wordart layer
click on the circle layer, selections, select all, float, defloat
copy a paper of choice, paste as a new layer, invert and delete.
delete the original layer, repeat this step with the outer circle layer
Copy & paste your tube as a new layer, add a drop shadow 5 5 70 7 black
erase any overhang at the bottom
resize and add elements of choice to decorate the tag
add a paper above the background layer and apply your mask
add your name and apply a white gradient glow
resize and crop, add your copyright info
save as a Png!


Happy New Year 2011

I would like to take this opportunity to wish everyone who visits my blog a Happy and prosperous New Year for 2011 ♥♥♥

Supplies

Tube of choice - I am using the artwork of Jennifer Janesko which at the time of writing is available to purchase from CILM

Scrapkit - a beautiful ptu kit from designs by Stina called 'New Years Lullaby', you can view her blog here and purchase her kit from several stores - Twilight Scraps has the kit at 50% off until 31st Dec

Masks of choice - I am using DBV mask 89 here and Vix mask 2 xmas 2010 here
Thank you ladies!
Fonts I am using are 'Musicals' and 'Bickham Script Fancy'
Plugins - Xero porcelain and eye candy gradient glow

OK- open a new image in PSP 650x650 floodfill white
Copy & paste the clock5 from the kit, resize by 80% and duplicate, merge down
copy & paste your tube, position and duplicate
hide the top tube layer and bring the bottom tube layer below the clock layer
erase any overhang at the bottom
unhide the top layer and erase the overhang again
apply a drop shadow to bottom tube layer
apply xero porcelain at default
hide background layer & merge visible
unhide background layer
resize your tag layer by 80% and sharpen
move to the side
copy & paste the piano, resize & sharpen
place to the side, drop shadow
copy & paste the xmas tree, resize & sharpen and position below the piano layer, add a light drop shadow
resize the hat, shoe & champagne bucket and position along the bottom, duplicate the shoe and position like in my tag above
copy & paste the 2011a element, resize and sharpen
position above the other elements
copy & paste the confetti trumpet
if you are using the same tube as me, position over the glass, resize to fit and erase the trumpet, otherwise position where it looks best on tag
add a new raster layer above background and select all
copy and paste one of the gold papers from the kit into selection, select none
apply the Vix mask, delete & merge group, duplicate twice, merging down after duplicating
copy & paste the confetti 01 below this mask layer, resize by 85% and sharpen more
add another new raster layer above background layer and select all
copy & paste Paper 20 into selection, select none
apply DBV mask 89, delete and merge group
duplicate and merge down
set Paper 20 as your background pattern in the palette, change angle to 0 and scale to 75
type 'Happy New Year' and drop shdow 2 3 67 7 black
add your name using the Bickham script font and apply a gold gradient glow
resize and crop your tag, add your copyright info and save as a Png


Monday, 20 December 2010

Dreaming of a White Christmas

Suplies
Tube I am using is by PinupToons which is currently available to purchase from CILM
Scrapkit - another great freebie from Vaybs called 'Northern Light' which you can download from her blog here
Masks - DBV Xmas Mask 03 and 13 here
Wordart is by Cupcake Sprinkles here
Thank you ladies for the great freebies!
Font of choice - I am using Kingthings Christmas2
OK - open a new image 650x650 floodfill white
Copy & paste the fireplace from the kit as a new layer
Place the tree to the side and add a present
resize the reindeer and place at opposite side
sharpen and drop shadow 0 0 70 5 black
resize a flower and position below the reindeer layer
Paste your tube as a new layer & position
drop shadow 5 5 70 9
decorate with any other elements from the kit you like
add a new raster layer above background layer & select all
copy and paste Paper 2 into selection, select none
apply DBV mask13, delete and merge group
add another raster layer and repeat above steps using the other mask
resize the wordart and position on your tag
resize and crop
add your name & copyright info
delete background layer & save as a Png

Sunday, 19 December 2010

Ho Ho Ho

Supplies
Tube of choice - I am using the artwork of Anthony Guerra which at the time of writing is available from CILM
Scrapkit - A great freebie kit from HezaScraps 'Pimpin ho ho ho' which you can find here
Thank you!
Mask of choice - I am using WSL 84 here
Eye candy gradient glow and Xero porcelain (both optional)
Font I am using is AC1-ornament
OK - open a new image in PSP 650x650 floodfill white
Copy and paste the Pimp my ride element as a new layer
resize the presents, the cup and the candy cane duo
position as above, sharpen and drop shadow 0 0 70 5 black
resize the sleigh and position
add your tube and place to the side
copy and paste the pimp cane and use your deform tool to turn it slightly
position as above
hide background layer and merge visible all other layers
apply xero porcelain at default setting
Add a new raster layer above background layer, select all
Copy & paste Paper 11 into selection, select none
apply your mask, delete & merge group
add the Ho Ho Ho word art, resize and sharpen more
resize the star and duplicate a few times and position above the mask layer
sharpen more the stars
Now add your name and apply a white gradient glow and then a red one
Resize and crop your tag
add your copyright info
delete background layer & save as a Png

Saturday, 18 December 2010

Christmas Wishes

Supplies
Tube of choice - I am using a tube by Anna Marine which at the time of writing this tut is available to purchase from CILM
Scrapkit - another gorgeous freebie kit from Vaybs called 'Silent Night' which you can download from her blog here
I am also using a mask by Vaybs - DBV Xmas Mask 05 which you can also get at above link
Thanks Vaybs!
Font of choice - I am using Santa's Sleighful and Al Sandra
Eye Candy Gradient Glow
Xero Porcelain
OK - open a new image in PSP 650x650 floodfill white
Copy and paste the window frame (40)from the kit as a new layer
decorate the window with some elements of choice from the kit
Copy & paste the xmas tree (21) and position to the side
Copy & paste some of the presents and position at opposite side
resize and sharpen all elements
add a drop shadow to the window frame 0 0 70 5 black
now copy & paste your tube and position so she is sitting on the presents
drop shadow 5 5 70 9 black
resize element 68 and position beside the tree, sharpen
resize element 39 and position
hide background layer and merge visible all layers
resize by 85% and sharpen
apply xero porcelain at default settings
unhide background & add a new raster layer above it, select all
copy & paste Paper 17 into selection, select none
apply your mask, delete & merge group
use your deform tool to push in the mask layer so it just shows behind the tag
copy & paste the gold stars (78)above mask layer, resize & sharpen
Add your words and name. apply a white gradient glow and drop shadow:
2 3 67 7 green
add your copyright info
delete background layer, crop and save as a Png

Friday, 17 December 2010

All I want for Xmas...

Photobucket


Supplies
Tube of choice - I am using a tube by Joan Pelaez which at the time of writing is available from CILM
Scrapkit - a gorgeous PTU kit from KatNKDA called 'Xmas Joy' which is available from NKArtshop
Snow animation here
Mask DBV Xmas Mask 07 here
Font I am using is Snowdrift
eye candy gradient glow
Animation shop

OK - Open a new image in PSP 650x650 floodfill white
Copy & paste a frame of choice from the kit, resize to fit and sharpen
click inside the frame with magic wand & expand by 6
resize a paper of choice from the kit and paste as a new layer
selection, invert, delete and select none
drag below the frame layer
add a drop shadow to frame layer 0 0 70 5 black
Add your tube and position where it looks best, drop shadow 5 5 70 9 black
now decorate your frame using elements from the kit
resize and sharpen the elements you use
Add a new raster layer above background layer & select all
copy & paste a paper from the kit into selection, select none
Apply your mask, delete & merge group, duplicate & merge down
Add your name and words using foreground white, background red
apply an inner bevel - width 6, depth 20 and others at 0
angle 315, intensity 25, elevation 90
apply a white gradient glow and drop shadow 2 3 67 7 black
resize all layers and add your copyright info
If you wish to animate...
there's probably an easier way to do this but this is how I do it
merge visible all layers below the frame and hide
now merge visible all layers above the frame
unhide the bottom layer and copy & paste into animation shop as a new animation
duplicate until you have 10 layers
open the snow animation & resize by 80%
click on your original animation and select all
click on the snow, select all & copy
click back on the original animation and paste into selected frame
position the snow in centre and then release your mouse
go back to PSP and copy merged the top layers - back to ani shop
paste as a new animation, duplicate until you have 10 layers, select all, copy
go to main animation and paste into selected frame
move into position and release the mouse
view your animation so you can see what it looks like
if happy save as a gif

Saturday, 4 December 2010

Red Hot Xmas

Supplies
Tube of choice - the tube I am using is by Jessica Dougherty and is available from CILM
Scrapkit - 'Ho Ho Ho' sampler from Gothic Inspirations Blog Train which you can grab here
Thank you!
Mask - I am using DBV xmas mask07 which you can find here
Thanks Vaybs!
Fonts of choice -I am using Kingthings wrote for my name and Santa's sleighfull for the words
eye candy gradient glow
OK - open new image in PSP 650x650 floodfill white
Copy & paste the Frame2, resize by 80% twice and image mirror
click inside centre of frame with magic wand & expand by 4
copy and paste Paper2 as a new layer
invert & delete - drag below frame layer & select none
drop shadow frame 0 0 70 5 black
paste the glitter from the kit as a new layer above the paper layer
resize & sharpen more, erase any overhang
Copy & paste the doodle cluster, resize by 80% and position on side of frame, sharpen & drop shadow as above
Now paste your tube and position to sit on the balls
drop shadow 5 5 70 9 black
resize the little voodoo doll and position where you like on the tag
you can add any other elements you like from the kit to decorate your tag
I resized and duplicated the tree a few times and positioned behind the tag, sharpened
Now add a new raster layer above background layer and select all
copy & paste Paper 5 into selection, select none
apply your mask, delete & merge group, duplicate & merge down
duplicate again and mirror
type your words of choice and apply a gradient glow
add your name & copyright info
delete background layer & save as a Png

Saturday, 27 November 2010

Blue Christmas

Supplies
Tube of choice - I am using a tube by Al Rio which may be purchased from CILM
Scrapkit - a lovely freebie kit from Lacarolita called 'Cold Winter'which you can grab here
Thank you!
Masks - SD Mask 6 here and WSL Mask 221 here
Thank you!
Plugins - Mura meister copies, eye candy gradient glow, xero porcelain
Fonts - Cupiedoll and Al Sandra both available to download from Dafont
OK - Open a new image in PSP 650x650 floodfill white
Copy & paste your tube as a new layer, apply xero porcelain at default setting
copy the xmas tree, resize to suit and position, sharpen & apply porcelain as above
now resize the drummer, reindeer and some flowers, position as above, sharpen all and apply porcelain
resize a star from the kit & position behind your tube, sharpen
add a new raster layer above background layer and select all
copy & paste Paper6 into selection, select none
apply the SD mask, delete and merge group
using cupiedoll font set at background #3d3f94 size 72 type the words 'Blue Blue Christmas without you' above the mask layer, apply Mura meister copies Tiling, gap 5
apply your WSL mask to this layer
now type the words Lonely this Christmas and apply a gradient glow twice using white and then a light blue from the tag
using the Al Sandra font type 'without you' and drop shadow 2 3 67 7 black
position your words how you like them
add your name & copyright info
delete background layer & save as a Png

Saturday, 13 November 2010

Autumn Eve

Supplies
Tube of choice - I am using the artwork of Anna Marine which may be purchased from CILM
Scrapkit - a beautiful freebie kit by Doris at Scraps Dimensions called 'Autumn Eve' which you can find here
Thank you
Mask of choice
Font of choice
OK - open a new image 650x650 floodfill white
Copy & paste the clock
selections, select all, float, defloat
now paste your tube as a new layer and position within the clock
invert and delete, select none
copy & paste the dry grass, resize and position to the side
paste the branch as a new layer and position over the grass, resize to suit
resize the sign and position at bottom
copy & paste the mushrooms, resize and position to side of sign
paste the plant as a new layer at opposite side, resize
position the squirrel on top of sign
add some flowers or other elements from the kit
copy & paste the trees and position behind the clock
when you are happy with your tag, hide background layer & merge visible
resize to suit
add a new raster layer above background layer & select all
copy & paste Paper 4 into selection, select none
apply your mask of choice, delete & merge group
now add your name & any copyright info
delete background layer & save as a Png

Monday, 8 November 2010

Colour me Autumn

Supplies
Tube of choice -I am using a tube by Jamie Kidd which is available to purchase from CILM
Scrapkit - a beautiful freebie kit from Artmama called 'Always' which you can download from her blog here
Thank you!
Mask of choice - I am using Artmamas Mask10 which you can find at the above blog
Fonts of choice - I am using Al Sandra and Autumn Nights
OK - Open a new image 650x650 floodfill white
Add a new raster layer and select all
Copy & paste Paper3 into selection, select none
Apply mask, delete & merge group, duplicate mask layer & merge down
Copy & paste the clock from the kit as a new layer, position to the side
copy frame05, paste as a new layer and rotate 90 degrees
paste your tube as a new layer and position, drop shadow 5 5 70 9 black
now decorate with elements from the kit
type the words along the bottom and apply a gradient glow
add your name and your copyright info
delete background layer and save as a Png

Sunday, 31 October 2010

Autumn Daydreams

Supplies
Tube of choice - the tube I am using is by Susan McKivergan and is available to purchase from UpYourArt
Scrapkit - a beautiful ptu art kit from KatNKDA called 'Autumn Bliss' which is available to purchase from NK Art Shop
Mask of choice - I am using Otherworld Sabre Mask1 which you can find here
Font of choice
OK - Open a new image in PSP 600x600 pixels floodfill white
Copy & paste your frame of choice fromthe kit, resize to fit & sharpen
click in centre of frame with magic wand & expand by 5
resize a paper of choice from the kit and paste as a new layer, position
selection, invert, delete and drag below frame layer, select none
drop shadow the frame 0 0 70 5 black
Resize leaves 02 and 04b
position in the frame and sharpen both
copy & paste the embellish as a new layer, resize, position at top of frame
paste your tube, resize if necessary and drop shadow
copy 2 of the flowers, resize and position to bottom of frame
resize the slug and position, sharpen all elements that have been resized
add a new raster layer above the background layer and select all
copy & paste background 6 into selection, select none
apply your mask, delete & merge group
duplicate mask layer & merge down
add noise at uniform 50
Now add your name and copyright info
delete background layer & save as a Png

Sunday, 24 October 2010

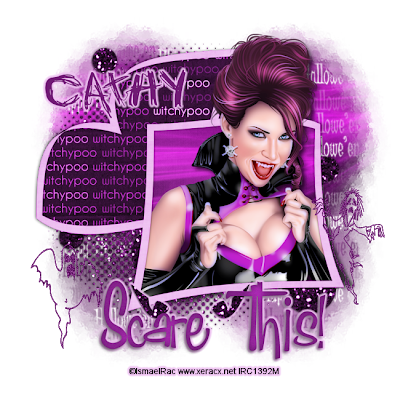
Scare this!

Supplies - tube of choice, I am using a tube by Ismael Rac which you may purchase from his store here
Scrapkit - a little freebie add on kit from Vix called 'Hallo Rockin We'en' which you can download from her blog here
I am also using Vix Halloween Mask 2010 no.1 here
Thank you Vix!
Fonts - Halloween2 & Jo wrote a love song
most of the fonts I use can be downloaded at Dafont or can be googled
OK - this is a little quickie
open a new image in PSP 600x600 pixels
floodfill white
Copy & paste cluster frame 3 as a new layer
click inside the top frame with magic wand & expand by 3
Copy paper 5 & paste as a new layer, resize by 65% and position over the top frame
selection, invert, delete & drag below frame layer, select none
now repeat these steps with the bottom frame using Paper 4
I colourised the layers using adjust hue & saturation at 211 & 159
add a drop shadow to the frame layer 0 0 70 5 black
copy & paste your tube as a new layer, position in the bottom frame and erase any overhang, drop shadow your tube 5 5 70 9
copy & paste your wordart of choice from the kit, colourise to suit
using the Halloween 2 font, add a few doodles around the tag
type your name & add a gradient glow
Add a new raster layer above the background layer & select all
copy & paste Paper 4 into selection, select none
Apply your mask, delete & merge group
resize tag to your liking and add your copyright info
delete background layer & save as a Png

Saturday, 23 October 2010

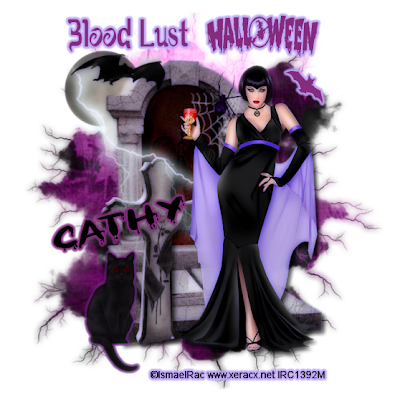
Blood Lust Halloween


Supplies
Tube of choice - I am using the artwork of Ismael Rac available to purchase from Xeracx here
Scrapkit - a great kit from Scraps Dimensions called 'My Gothic Hour' which you can download here
Mask is also by Doris at Scraps Dimensions and you can find it here
Thank you!
Fonts of choice - I am using Halloween2, Romati and Bloody
all available to download from Dafont
Plugins - eyecandy gradient glow, xero porcelain
OK - open a new image 600x600 floodfill white
add a new raster layer & select all
copy a paper of choice from the kit & paste into selection, select none
apply the mask, delete & merge group
copy the grave and resize by 75% twice, image mirror & apply a drop shadow of choice
Paste your tube as a new layer and position, drop shadow
resize the moon and position behind the grave
copy the lightning layer and position over the grave, resize
I used my freehand selection tool with feather set at 25 to remove the sharp edge
just draw around the edge and hit delete a few times, select none
resize the bat and spider, position the bat in the moon and the spider on the web
resize the cat by 50% and position at bottom of grave
apply a gradient glow to the cat using a colour from your tag
resize the tombstone & position
hide background layer & merge visible
resize by 85% and apply xero porcelain at default settings
unhide background
add your words of choice and apply a gradient glow
do the same with your name
add any copyright info
delete background layer & save as a Png

Sunday, 17 October 2010

Be Very Afraid!

Supplies
Tube of choice - I am using a tube by Elias Chatzoudis which may be purchased from MPT
Scrapkit - a fantastic kit by Vaybs called 'The Witches Den' which you can download from her blog here
Thank you!
Mask of choice - I am using a Vix Halloween Mask 2010 no.1 here
Fonts of choice - I am using Jo wrote a lovesong and Horny Devils both available to download from Dafont
Eyecandy gradient glow
OK - Open a new image 600x600 floodfill white
add a new raster layer and select all
copy a paper of choice from the kit & paste into selection, select none
apply your mask, delete & merge group
Copy & paste the fireplace fromthe kit, resize by 80% and sharpen
copy the roses (28) and position on top of fireplace, resize and sharpen
copy & paste your tube, drop shadow and position to side
copy frame 13, click inside with magic wand & expand by 3
copy Paper 9, resize by 50% and paste as a new layer
position within the frame, invert & delete, sharpen more
move the paper layer below the frame
copy your tube again and paste as a new layer, position within the frame and hit delete again, select none, lower the opacity to 65 and change the layer setting to difference
merge these 3 layers together, resize if necessary and position
Now add your elements of choice from the kit, there are so many to choose from
Type your words of choice using a red colour from the tag, apply a black gradient glow and then a white gradient glow, do the same with your name
add your copyright info
delete background layer & save as a Png

Sunday, 10 October 2010

Hands Off the Pumpkins!

Supplies
Tube of choice - I am using a tube by Elias Chatzoudis which is available to purchase from MPT
they have a lot of Halloween tubes on sale under 'Holiday Tubes'
Scrapkit - a great ptu kit from KatNKDA called 'It's Pumpkin Time' which may be purchased from NK Artshop
Mask - Vix Mask Halloween 0904 here
Font - I am using 'Bloody' which you can find at Dafont
Eye candy gradient glow
Open up a new image in PSP 600x600 floodfill white
add a new raster layer and select all
Open background 03 from the kit, copy & paste into selection, select none
apply mask, delete & merge group, duplicate & merge down
Resize the scarecrow and paste as a new layer, sharpen
resize & paste the pumpkins as a new layer & position at bottom, sharpen
copy & paste your tube, resize if necessary and drop shadow 5 5 70 11 black
copy the signpost, resize by 30% and paste as a new layer
using the dropper tool, select an orange shade from the pumpkins and use as your background colour, foreground nul, type your words, position & convert to raster layer
drop shadow the words layer 2 3 70 5 black and merge down onto the signpost
move the signpost below the pumpkins and use your deform tool to turn slightly
add one of the bats from the kit, resize & position
Type your name using the same orange shade and apply a black gradient glow, drop shadow as before, duplicate and on the duplicate layer adjust blur gaussian blur 6
add your copyright info
delete background layer & merge visible
save as a Png!

Saturday, 11 September 2010

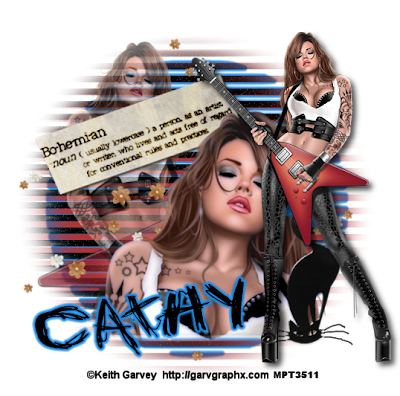
Bohemian Rhapsody

Supplies
Tube of choice - I am using the artwork of Keith Garvey which may be purchased from MPT
Scraps I am using are from Artmama's 'Bohemian Rhapsody' kit here
Thank you!
Mask I am using is Monti's blinds here
Font is Jo-wrote a lovesong here
plugins - eye candy gradient glow
Open a new image in PSP 600x600 floodfill white
add a new raster layer and floodfill black
apply mask delete & merge group
add a gradient glow using a colour to match your tube
add another new raster layer below the mask layer
floodfill with a colour of choice and apply the mask again
delete and merge group
add noise to top mask layer at random 12
paste your tube as a new layer
position to the side and lower opacity
now paste a close up of the tube
resize if necessary and position as above
copy embellishment 32 from the kit
paste as a new layer below the close-up layer
duplicate, image mirror and move into position
copy embellishment 24 and paste as a new layer
use your deform tool to turn slightly and position
add your name and using the deform tool move into position
apply the same colour gradient glow you used on your mask
add the cat from kit, resize & position
paste your tube again and positionto side, add a drop shadow 5 5 70 11 black
add any copyright info
delete background layer & save as a Png

Sunday, 8 August 2010

Missing You

Supplies
Tube of choice - I am using the artwork of Keith Garvey which may be purchased from MPT
Scrapkit - a beautiful freebie kit from Lacarolita 'Black & White' which you can download here
Thank you!
Mask of choice - I am using WSL 83 here
Font of choice - I am using BickhamScriptFancy
Eye candy gradient glow
OK - Open a new image 600x600 floodfill white
Copy & paste the hearts as a new layer, resize to fit
duplicate this layer and on the bottom layer adjust blur, gaussian blur 10
merge down
copy & paste the glitter stars, resize & position
resize the feather & position
add your tube and apply a drop shadow 5 5 70 11
go to effects, photo effects, black & white film
colour red strength 70
add any other embellishments from the kit of your choice
add a new raster layer above background & select all
copy & paste Paper 9 into selection, select none
apply mask, delete & merge group
add your name and apply a light grey gradient glow
add any copyright info
delete background layer, resize & crop
save as a Png

Sunday, 1 August 2010

Retro Chic

Supplies
Tube of choice - I am using the artwork of Ismael Rac which may be purchased from Ismael's store here
Scrapkit - a gorgeous PTU kit from KatNKDA called 'Night Wings' which is available to purchase from NKArtShop
Mask of choice - I am using DVB mask 79 here
Font of choice - I am using Beauty school dropout
OK - open a new image 650x600 floodfill white
copy frame 22 from the add-on kit, resize to fit and sharpen
click in the centre of frame with magic wand and expand by 6
copy background 06 from add-on kit, resize & position within the frame
selection, invert, delete and drag below frame layer
copy & paste element 04 and resize, position & hit delete again, select none
sharpen the black birds layer
add a drop shadow to your frame layer
copy the black rose 12, resize & duplicate twice
position at bottom corner of frame, sharpen the roses
copy element 29 from the main kit, resize and sharpen, duplicate & mirror
position these behind the roses
resize element 11 and position at top corner of frame
add a bow of choice and any other elements from the kit you fancy
paste your tube as a new layer, resize if necessary and apply a drop shadow
hide background layer & merge visible
resize & crop
unhide background layer and add a new raster above it, select all
paste a paper of choice into selection, select none
apply your mask of choice, delete and merge group
copy element 05 from the add on kit
paste as a new layer above the mask layer, resize, duplicate and flip
move these into position and apply a light drop shadow
add your name & copyright info
delete background layer & save as a Png

Saturday, 24 July 2010

Treasure Island

Supplies
Tube of choice - I am using the artwork of Keith Garvey available to purchase from MPT
Scrapkit - a fab PTU kit from Karla Scrapz called 'Treasure Seeking'
you can find details of where to purchase the kit on her blog!
mask of choice - I am using DBV 79 here
Font of choice - I am using Sand here
eye candy gradient glow
OK - Open a new image in PSP 600x600 floodfill white
add a new raster layer and select all
copy paper 7 from the kit and paste into selection, select none
Apply the mask, delete and merge group
resize the ship (72) and position
copy & paste the leaves (65) resize and position, duplicate & mirror
copy the sand dune (56)and (15) resize and position
add any elements of choice from the kit you like
it is a huge kit with lots of fab elements to choose from
add your tube and drop shadow
Type your words of choice using the sand font with background colour #926b4f
to angle it hold down your control key and place your mouse at the bottom of the first letter and pull downwards until you have it as desired, convert to raster layer and apply a gradient glow using #e4dacf
add your name and copyright info
delete background layer, resize & crop and save as a PNG

Saturday, 10 July 2010

Brattitude

Supplies
Tube of choice -I am using a tube by Jose Cano which is available to purchase from MPT
Scrapkit - another great freebie by Vaybs called 'Brattitude' which you can download on the creative misfits blog here
Thanks Vaybs!!
Mask of choice - I am using Vaybs mask 89 here
Font of choice - I am using Acid label here
Eye candy gradient glow
OK - Open a new image 600x600 floodfill white
Copy & paste Frame 6, resize by 85% and sharpen
click in centre with magic wand & expand by 6
copy & paste Paper 3 as a new layer, resize by 70%
selections, invert, delete and drag below the frame layer
now paste a close up of your tube. position & resize if necessary
hit delete again and select none
change the opacity of your tube layer to multiply
add a drop shadow to frame 0 0 70 5
Copy the brat element 23 and paste as a new layer
use your deform tool to turn slightly & position in middle of frame
Add some elements from the kit, there are lots to choose from
Paste your tube again and position to the side
Add your name and apply a black gradient glow
Now paste a paper of choice as a new layer above background layer
Apply your mask, delete & merge group
I duplicated my mask & merged down to give a darker mask layer
Delete background layer
resize & crop your crop your tag
add your copyright info & save as a Png

Saturday, 3 July 2010

Miss Independence

Happy 4th July to all you Americans!!!!
Supplies
Tube of choice - I am using a tube by BamBam which is available to purchase from MPT
Scrapkit - a fab freebie kit from Artmama 'America 2010' which you can download from her site here
Thank you!
Mask of choice - I am using WSL 111 here
Fonts of choice
Eye candy gradient glow
OK - Open a new image 650x600 floodfill white
add a new raster layer and select all
copy paper 9 and paste into selection
apply mask, delete and merge group, duplicate & merge down
duplicate again and on the bottom layer adjust blur gaussian blur 10
Paste your tube as a new layer and position
resize if necessary and apply a drop shadow
copy stars 34 and 35 from the kit, resize by 50% and duplicate both
position down one side and sharpen each star
copy & paste the flowers 25, resize and sharpen
position at opposite side
copy & paste the button 31, resize and position at bottom of flowers
resize the words 16 and position at bottom of tag, sharpen & drop shadow
copy & paste the statue of liberty. resize and position on tag
copy embellishment 06, paste as a new layer below the mask layer
position and duplicate, mirror
copy & paste element 13, resize and position
duplicate & mirror - position and merge down
duplicate this layer & flip, position and merge down again
Using a dark blue colour from the tag type the words 'Miss Independence' (or your words of choice)
apply a white gradient glow then a red gradient glow
position along the bottom of tag
add your name and apply the same glow
hide background layer and merge visible
resize by 85% and crop
add your copyright info
delete the white background layer & save as a Png

Sunday, 27 June 2010

Tree of Love

Supplies
Tube of choice - I am using a tube by Jennifer Janesko which may be purchased from CILM
Scrapkit - a beautiful ptu kit by KatNKDA which is available from NK Art Shop
Font of choice - I am using Adinekimberg Script
Plugins -xero porcelain, penta colour dot, eye candy gradient glow
OK - Open a new image in PSP 650x600 pixels and floodfill white
Copy & paste frame 5 from the kit, resize to fit and sharpen
copy paper 1 and paste as a new layer below the frame layer
resize and position and erase any overhang outside the frame
copy & paste your tube as a new layer above the paper layer
position within the centre of frame and erase any overhang
apply xero porcelain at default settings and add a drop shadow
click on frame layer, selection, select all, float defloat
paste your tube again as a new layer and position
selection, invert and delete
change the opacity of this layer to overlay, duplicate & mirror
apply a drop shadow to the frame layer
hide background layer & merge visible
unhide background
copy the tree (41) resize and position on tag, duplicate, mirror and move the duplicate layer to the top opposite side
resize the bird (42) and position on tag, sharpen
add any elements of choice, I used 33 and 27, resize and sharpen
hide background & merge visible
unhide background
using your rectangle tool, foreground nul, background black
draw a rectangle around the tag slightly larger, convert to raster layer
adjust blur, gaussian blur 10
apply penta colour dot at default settings
copy element 18, resize and paste as a new layer above the black layer
position and sharpen
add your name and apply a pink gradient glow
add any copyright info
delete background layer & save as a Png!

Saturday, 22 May 2010

Diva Style

Supplies
Tube of choice -I am using a tube by Keith Garvey which is available to purchase from MPT
Scrapkit - a little freebie kit from Gothic Inspirations 'Diva Style Sampler' here
Thank you!
Mask - I am using WSL 226 here
Font of choice - I am using Carlotta
Plugins - xero porcelain & eye candy gradient glow
OK - Open a new image in PSP 650x600 floodfill white
Copy & paste the bling as a new layer
copy & paste the circles and resize, move to the side & sharpen
Paste the netting as a new layer, duplicate, image mirror
bring them both together & merge down
resize parchment 2, paste as a new layer above the netting
use your deform tool to turn slightly to the left
copy the notes, resize and paste as a new layer above the parchment
position and duplicate twice, move each duplicated layer down and across
merge these 3 layers together then use your eraser tool to erase any at the sides
sharpen the notes layer
resize the silver embellishment and paste to the side
copy the flower, resize & sharpen, position at the top of the embellishment
resize the rose, paste as a new layer, sharpen & drop shadow 0 0 35 5
use your deform tool to turn it and position as above
resize the champagne glass, sharpen & drop shadow as above
position under the rose
add your tube, resize if necessary & apply porcelain at default
copy & paste the wordart, resize and position along the bottom
sharpen & drop shadow 2 3 67 7
hide background layer & merge visible all layers
resize by 85% & crop
unhide background layer & add a new raster layer above it, select all
copy & paste Paper 1 into selection, select none
apply mask, delete & merge group
add noise to mask layer at random 12
add your name using a dark pink colour from the tag
apply a white gradient glow & drop shadow 0 0 35 5
now add your copyright info, delete background layer & save as a Png

Sunday, 16 May 2010

Red Hot

Supplies
Tube of choice -I am using the artwork of Jennifer Janesko which is available to purchase from CILM
Scrapkit - another great freebie kit from Vaybs called 'Skull Candies' which you can download from her blog here
Thank you Vaybs!
Mask of choice - I am using WSL 105 here
Font of choice -I am using TK Doodle
Eye candy gradient glow (optional)
OK-open a new image 600x600 floodfill white
Copy & paste element 15 as a new layer, resize by 85%
click in the centre of frame with magic wand & expand by 6
Copy Paper 11 and paste as a new layer, resize by 75%
selections, invert, delete & drag below frame layer, select none
apply a grey gradient glow to the frame layer & drop shadow 0 0 70 5
add your tube as a new layer & erase any overhang, drop shadow 5 5 70 9
Copy element 83, resize and position along bottom of frame
paste the red bow (75) on top, sharpen both & drop shadow
Now resize the stars by around 50% and place on tag, sharpen & drop shadow
Copy butterfly 23, resize, sharpen & position
Hide background layer & merge visible all layers
resize by 85% and crop
unhide background & add a new raster layer above it, select all
Copy & paste Paper 5 into selection, select none
apply mask, delete & merge group
Copy the diamonds (18) and paste as a new layer above mask layer
resize so they just sit nicely around the frame & sharpen more
drop shadow 0 0 70 5
copy & paste element 58 as a new layer above mask layer
resize and position, duplicate & image mirror
resize element 63, position on tag, add your name and apply a grey gradient glow
now add your copyright info
delete background layer & save as a Png!
Friday, 7 May 2010

Hotter than Hell

Supplies
Tube of choice - I am using a tube by Ismael Rac which you may purchase from AMI
Scrapkit - freebie kit from Heza, part of the 4 elements blog train which you can download from Heza Scraps here
Thank you!
Mask of choice - I am using WSL 84 here
Font I am using is Flame here
Eye candy gradient glow

OK - Open a new image in PSP 600x600 floodfill white
Copy & paste Frame 2 as a new layer
click inside frame with magic wand & expand by 6
copy Paper 1 and paste as a new layer, resize by 75% position, selection, invert, delete and select none, drag below the frame
add drop shadow to frame layer 0 0 70 5
Copy one of the orange flames, resize and place above the paper layer, sharpen
resize a blue flame and position over the orange flame
copy & paste your tube as a new layer
drop shadow 5 5 70 11 black
drop shadow again -15 -5 70 11 using an orange colour from the tag and tick the box: shadow on a new layer
move this shadow layer slightly to the right
resize flower 2 and position on top corner of frame, sharpen
resize your wordart of choice from the kit
position, sharpen & drop shadow 2 3 67 7
copy element 5, paste as a new layer above the background layer, image mirror
move into position and apply the same shadow as above
hide background layer, merge visible all layers, resize & crop to desired size
unhide background & add a new raster layer above it, select all
copy Paper 4 and paste into selection, select none
apply mask, delete & merge group
Add your name and apply a black gradient glow
now add your copyright info, delete background layer
save as a Png

Sunday, 2 May 2010

Bootylicious

Supplies
Tube of choice -I am using a tube by Ismael Rac which you may purchase from AMI
Scrapkit - A freebie kit by Kara of 'Sweet Cravings Scraps', the kit is part of 'The Four Elements' Blog train and you can download it from her blog here
Thank you!
Mask of choice - I am using WSL 82 here
Font of choice - I am using Shark Random Funnyness here
Al Sandra here
Eye candy gradient glow
OK - Open a new image in PSP 600x600 floodfill white
Copy & paste frame 4 as a new layer, resize to suit
click in centre of frame with magic wand and expand by 6
copy & paste Paper 15 as a new layer, resize and position how you like it in the frame, invert, delete and select none - drag the paper layer below the frame
add a drop shadow to frame layer 0 0 55 5
copy the flowing wheat, resize and paste as a new layer, position and sharpen
copy the flower 1, resize and position
add the grass mound, resize and position along the bottom, sharpen
paste your tube as a new layer, resize if necessary and drop shadow 5 5 70 11
add a butterfly and bird of choice from the kit, resize, sharpen and position on tag
add a new raster layer above background layer & select all
Copy & paste Paper 3 into selection, select none
apply mask, delete & merge group
hide background layer & merge visible all layers
resize by 85% and crop
unhide background layer for now
For the words, type the word 'Booty?' using the shark random font - any colour will do as we are going to change it, convert to raster layer
select all, float, defloat
open the preview from the kit and paste as a new layer
position it over your words where it looks best, invert and delete, select none
apply a gradient glow in black - delete original word layer
now type 'where's the' using al sandra font - using black in both foreground & background
apply a white gradient glow & drop shadow 2 3 47 7 black
Add your name & copyright info
delete background layer & save as a Png

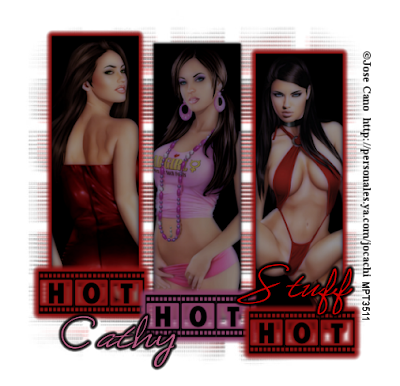
Hot Stuff 2


Supplies
3 tubes of choice from the same artist - the tubes I am using are from Jose Cano and may be purchased from MPT
Mask - I am using Butterfly Mask 32 here
Plugins - Eye Candy gradient glow, xero porcelain
OK - No scraps again for this
Open a new image in PSP 600x600 floodfill white
Using your preset shape tool set on rectangle, foreground nul, background black
draw out a rectangle like mine above, convert to raster layer
duplicate twice and move into position placing each one slightly lower than the previous one
select the first rectangle, select all, float, defloat - copy your first tube and paste as a new layer
resize if necessary and position within the rectangle, invert and delete, select none
lower the opacity to around 55 and apply xero porcelain at default settings
repeat this step with the other 2 rectangles
now click on the rectangle layers and apply a gradient glow using a colour from your tube
I used red and applied a gradient glow to the 2 outside rectangles only
Using the filmstrip font, foreground & background both black, type the word 'HOT'
position at bottom of first rectangle and duplicate twice, move them into position as above
now apply a gradient glow using the same colour you used previously
I applied a pink glow to the middle one to match the tube
using the prairie dog font, foregound nul, background the colour from your gradient glow - type the word 'Stuff' and apply a black gradient glow - position on the tag beside the words
hide background layer & merge visible all layers
resize and crop
unhide background & add a new raster layer above it
floodfill black, apply mask, delete & merge group
add a new raster layer and floodfill with the colour you used for your glow
apply mask again, delete, merge group and resize by 95%
add your name & copyright info
delete background layer & save as a Png!

Monday, 26 April 2010

Shut up & kiss me!

Supplies
Some tubes of choice from the same artist - I am using Pinuptoons which may be purchased from CILM
Template - 164 by Beth here
Thanks Beth!
No scraps for this
Mask of choice - I am using Artmama mask 11 here
Font I am using is Romance Fatal
Eye candy Gradient Glow
OK - Open the template, delete the copyright layer & the silver layer
add a new raster layer, bring to the bottom & floodfill white
click on one of the black rectangles, select all, float, defloat
copy & paste one of your tubes and position within the rectangle, invert & delete, select none
lower the opacity of the tube layer to around 40
repeat this step for the other 2 rectangles
now click on one of the grey frames, select all, float, defloat, add a new raster layer, floodfill black -copy & paste another tube of choice as a new layer, invert & delete, select none
lower the opacity of the tube layer again, add a drop shadow to the white frame:
0 0 70 7
repeat this step with the other small frame
Copy & paste your main tube, position & drop shadow 5 5 70 11
resize the wordart & position where you like on the tag
hide background layer & merge visible all layers
resize & crop your tag
unhide background & add a new raster layer above it
floodfill with a colour or gradient of choice
apply mask,delete & merge group, duplicate & merge down
Now add your name using black and apply a pink gradient glow followed by a black gradient glow
add your copyright info
delete background layer & save as a Png

Friday, 23 April 2010

The Tea Party

Supplies
Tube of choice - I am using the artwork of Michelle Lynch which is available to purchase from UpYourArt
Scrapkit - a fabulous freebie kit from Vaybs called 'Alice in Wonderland' here
Mask - I am using DBV Mask 89 here
Thanks again Vaybs for sharing your talent with us!
Font of choice - I am using heart emboss
Xero porcelain
Eye Candy gradient glow
OK - Open a new image in PSP 600x600 floodfill white
Add a new raster layer & select all
Copy & paste Paper 5 into selection, select none
apply mask, delete & merge group, duplicate & mirror, merge down
Copy & paste element 23 as a new layer
resize slightly & apply xero porcelain at default settings
copy element 16, resize and position along the side, apply porcelain again
paste element 14 at opposite side and resize
resize the toadstools 26 and position as above
copy the cup 29 and paste as a new layer, resize and apply porcelain
add your tube, resize if necessary and position to the side
apply porcelain to your tube
copy element 30 and paste as a new layer above the mask layer
resize slightly and position along the bottom
copy & paste element 17 as a new layer above this layer, resize slightly and position
add the keyhole & key 24 & 25, resize both & position on tag
the clock I used came with the tube
Add your name and apply a black gradient glow
copy the hat 15, resize & place beside your name
Hide background layer & merge visible all layers
resize & crop to your liking
add your copyright info
delete background layer & save as a Png

Sunday, 18 April 2010

Taurus

For all you Taureans!!
Supplies
Tube of choice - I am using an image by Dominic Marco which is available to purchase from CILM
Scrapkit- a great ptu art kit from KatNKDA called 'Taurus' which is available to purchase from NKArt Shop
Mask of choice - I am using WSL 105 here
The aplhas are supplies in the kit
OK - Open a new image in PSP 600x600 floodfill white
Copy & paste Frame 63 as a new layer, resize and sharpen
click in center of frame with magic wand & expand by 8
copy & paste paper 17 as a new layer, resize, invert & delete
select none and drag paper below frame layer
add a drop shadow to the frame 0 0 70 5
copy element 2, resize and paste as a new layer over the frame, sharpen
resize flower 9 and paste at bottom of frame to the side
add your tube and position
resize element 45 and position below the tube so the horns look like they are coming from your tube, sharpen twice and drop shadow
copy & paste element 4, resize, sharpen & drop shadow
position to the side, add a bow from the kit and place on top
resize element 52, paste as a new layer, image mirror
position and sharpen
hide background layer & merge visible all layers
resize by 85% and crop
unhide background & add a new raster layer above it, select all
copy & paste Paper 15 into selection, select none
apply your mask, delete & merge group, duplicate, merge down
Use the alphas from the kit to add your name
add your copyright info
delete background layer & save as a Png

Playtime!

Supplies
Tube of choice - I am using a tube by BamBam which is available to purchase from MPT
Scrapkit - a freebie kit from Lacarolita called 'Playboy Bunny' here
Mask of choice - I am using DBV Mask 89 here
Thanks ladies for the fab freebies
Font of choice - I am using Fiolex girls
Plugins - Xero porcelain and eye candy gradient glow (both optional)
OK - Open a new image 600x600 floodfill white
Copy & paste a frame of choice from the kit, resize and sharpen
click inside the frame with magic wand & expand by 5
copy & paste a paper from the kit as a new layer, resize by 80%, invert & delete
drag the paper layer below the frame
add a drop shadow to frame 0 0 70 5
paste your tube a a new layer and erase any overhang at bottom
apply xero porcelain default settings and drop shadow
resize the hearts from the kit and position to the side, sharpen & duplicate, mirror
add the stars buttons & bows of choice
resize all elements to suit and sharpen
drop shadow as above
hide background layer & merge visible all layers
resize by 85% and crop
unhide background & add a new raster layer above it, select all
Copy Paper 4 and paste into selection, select none
apply mask, delete & merge group, duplicate & merge down
copy the diamond spiral, resize and paste as a new layer above mask layer
sharpen twice
add your name and apply a gradient glow
add any copyright info
delete background layer & save as a Png

Sunday, 11 April 2010

Angel in blue

Supplies
Tube of choice - the tube I am using is by Ismael Rac and is available to purchase from AMI
Scrapkit - a beautiful freebie kit from Karla called 'My little Angel' which you can download from her site here
Thank you Karla!
Mask of choice
Font of choice
eye candy gradient glow
xero porcelain
OK - open a new image 600x 600 floodfill white
copy & paste the metal frame and resize by 65%, sharpen
click in centre of frame with magic and & expand by 5
copy paper 2 and paste as a new layer, resize by 80%, invert & delete
drag below frame layer
copy the blue branch and paste as a new layer, position within the frame and delete
now copy the starry sky and paste as a new layer, resize by around 65% and delete
select none and apply a drop shadow to frame layer 0 0 45 5
Paste your tube as a new layer, resize if necessary and erase any overhang at bottom of frame
apply a drop shadow to tube and apply xero porcelain default settings
copy the angel wings, resize and position behind your tube
resize the blue ribbon wrap and position along bottom of frame
add the bag and candle and a few butterlies, resize all and sharpen
copy the paloma, resize & position at top of frame
copy a flower of choice, resize & sharpen and place at bottom of frame
add the angel wordart and use a blue colour from your tube to type the word 'blue'
add your name and apply a gradient glow
hide background layer & merge visible all layers
resize by 85% and crop
unhide background and add a new raster layer above it, select all
copy & paste Paper 12 into selection, select none
Apply a mask of choice, delete & merge group
add any copyright info, delete background layer & save as a Png