Monday, 31 August 2009

Black Cherry

Supplies
Tube of choice - I am using the artwork of Ismael Rac available to purchase from AMI
Scrapkit - a beautiful freebie kit called 'Black Cherry' from Lynn at Scrappers Emporium
Thankyou!
Mask I am using is Babes Mask 1 here
Font of choice
OK - Open a new image 600x600 floodfill white
Add a new raster layer & select all
Copy Paper2 and paste into selection, select none
Apply mask, delete and merge group
Copy Brad 2 and paste as a new layer, resize until it fits in centre, sharpen & drop shadow
Copy the blossom, resize and paste as a new layer to the side, behind the brad
duplicate & resize again, position, merge down, sharpen
Resize the rain drops and position as above, duplicate twice
on the bottom raindrops layer add noise at uniform 40
add noise at 42 to the middle layer and 44 to the top layer
Copy & paste the butterfly trail, resize and position to the side
Add your tube, position & drop shadow
Resize the letter,position at bottom left, turn slightly using the deform tool
Resize flower 1 and paste as a new layer at bottom right
copy Brad 1, resize and position in centre of flower
Copy & paste button bow in centre of brad, resize, sharpen all elements and drop shadow
Add your name & copyright info
To animate - hide the top 2 raindrop layers and copy merged your tag into animation shop as a new image, go back to PSP and hide the bottom raindrop layer, unhide the middle one and copy merged into ani shop, paste after current frame, repeat this step with the top raindrop layer
view your animation and if happy save as a gif

Sunday, 30 August 2009

A bit of black 'n white


Supplies
Tube of choice - I am using the artwork of Ismael Rac available to purchase from AMI
Scrapkit - beautiful freebie called 'Black night' by Jaelop which you can find here
Thank you!
Font of choice - I am using enchanted prairie dog
eye candy gradient glow
This is a little quickie
OK - Open a new image 600x600 floodfill white
Copy element 17, resize and paste as a new layer, sharpen
resize element 18 & paste as a new layer, position on top
Copy a close-up of your tube and paste as a new layer below these 2 layers
change the hue & saturation both at 0
position and erase any overhang, lower the opacity of the tube layer to 50
Copy element 7, resize and paste as a new layer at the top, position & sharpen more
Copy the leaves 18, resize & change the hue & saturation same as above
use your deform tool to turn slightly
sharpen & drop shadow 0 0 50 5
copy flowers 6 & 21, resize both and position as mine above
merge the flowers and leaves together, duplicate & rotate 90 to the right
position as above
Copy ribbon 2, resize and paste as a new layer at the top
sharpen & drop shadow
Add your tube and give it a drop shadow
-5 -5 70 11
Hide background layer and merge visible all other layers
resize if necessary and crop
Resize element 13 and paste as a new layer above the background, duplicate & flip
merge down these 2 layers and erase any bits in the middle showing through the tube
Add your name and apply a gradient glow using a grey colour
Add your copyright info
delete background layer & save as a Png!

Saturday, 29 August 2009

Call Me

Supplies
Tube of choice - I am using the art of BamBam which can be purchased from MPT
Scrapkit - a fantastic freebie called 'Hot pinkalicious lime' from Wacky Scraps
also download the matching sparkly papers
Thanks Lori!
Mask of choice - I am using WSL 83 here
Fonts I am using are DS digital and Jilly Bean
Eye candy gradient glow
Ok - open a new image 600x600 floodfill white
Copy cbframe1 and paste as a new layer
click inside the frame, expand by 5, add a new raster layer
open the green glitter paper and use it as your background pattern
floodfill the new layer and drag below the frame
copy the wire3, resize slightly and paste as a new layer, invert and delete
add a drop shadow to the frame 0 0 70 5
copy & paste ribbon 2 as a new layer, resize by 70% position along the top
copy staple4, paste as a new layer at top of frame, duplicate & rotate by 90 left, position so it looks like they are holding the ribbon in place
resize bow1 and position to the side
copy fastener1, resize and position above the bow
sharpen and drop shadow the elements
copy tag5 and rotate 90 to the left, position at side and using digital font, type your words
Add your tube, position and drop shadow
Copy heart 1 and place at bottom right of tag, drop shadow
resize palm1 and position insidethe heart, change layer to soft light, duplicate a few times and position within the heart
resize heart 3 and position at the other side
type your name using black as your background colour, foreground nul
add a green gradient glow
hide white background and merge visible all other layers
resize by 85% and crop
unhide background and add a new raster layer above it, select all
copy Paper 5 and paste into selection, select none
apply mask, delete & merge group
add your copyright info
delete background layer & save as a Png!

Wednesday, 26 August 2009

Want to be bad?


Supplies
Tube of choice -I am using artwork by Elias Chatzoudis which may be purchased from MPT
Scrapkit - a fab freebie called 'Good girls gone bad' part of a collab kit from ButterflyFlutterby which you can download here
Also grab the freebie add on badges
Mask - I am using WSL 84 which you can grab here
Thanks ladies!
Font of choice - I am using Jilly Bean

OK - Open a new image 600x600 floodfill white
Copy Wordart2, paste as a new layer, resize by 85%, sharpen
Copy & paste bad star3 as a new layer, click inside the star with magic wand
expand by 5 and paste a paper of choice as a new layer
selections, invert, delete and drag below the star frame
paste a close up of your tube, position and delete again, select none
lower the opacity of the tube slightly
drop shadow the star layer 0 0 70 5
merge these three layers together and resize, position to the left of the tag
Copy cassette tape1, resize and place at bottom right of tag
sharpen and drop shadow
Paste your tube as a new layer, drop shadow 5 5 70 11
Resize belt 2 and position along bottom, sharpen & drop shadow
Copy barbed wire 2 and paste along bottom of tag
Add one of the stars and some buttons from the add on kit
Copy glitter splatter 2, resize by 80%
paste as a new layer above the background layer, image mirror
Hide the background layer and merge visible all other layers
resize & crop your tag
unhide background and add a new raster layer above it, select all
Copy Paper 13 & paste into selection, select none
Apply mask, delete & merge group
Copy Ribbon Splatter 1, paste as a new layer below the mask layer, resize
Add your name & copyright info
Delete background layer & save as a Png!

Monday, 24 August 2009

Celebrate the Harvest

Supplies
Tube of choice - I am using the artwork of BamBam which may be purchased from MPT
Scrapkit - a beautiful ptu kit from KatNKDA called 'Harvest' which you can purchase here
Mask - I am using WSL 192 which you can find here
Font of choice
Eye candy gradient glow
OK - Open a new image 600x600 floodfill white
Copy element 34 from the kit, paste as a new layer and resize, sharpen
Copy bow 21, paste as a new layer along the top, resize and use you raster deform tool to push it in a bit at sides, sharpen & drop shadow
Resize element 24 and paste as a new layer at the side, sharpen
Resize one of the tags and paste as a new layer at the top, sharpen & drop shadow
Copy the barrel 3, resize and paste at bottom left side
Copy element 1, resize and paste along the bottom of tag
resize the mouse, element 4, mirror and position on top of the barrel, sharpen
Copy element 2, resize and sharpen and position on the right side of tag
Add your tube, position & drop shadow
Resize element 30, paste as a new layer above the background layer
sharpen & drop shadow, do the same with element 31 and mirror
type some words of choice on the tag
hide white background layer & merge visible all other layers
resize and crop your tag
unhide background and add a new raster layer above it, select all
Copy a paper of choice from the kit & paste into selection
select none, apply mask, delete & merge group
Copy element 26, resize and paste as a new layer above mask layer
For the name I used Paper 1 as my background and added a gradient glow using a yellow colour from the dress
add your copyright info
delete background layer and save as a Png!

An award

I received this award from Kathy at Kathy's Place
Thank you Kathy!!
Here are the guidelines for accepting the award:1 - Display the prize.2 - Link to the Blog from whom you received it.3 - Nominate another 10 blogs.4 - Leave a message on their blog, letting them know they have received it.
It looks like everyone has gotten this award so I will not pass it on again!

Sunday, 23 August 2009

Gothic Angel

Supplies
Tube of choice - I am using the artwork of Elias Chatzoudis which is available to purchase from MPT
Scrapkit - a beautiful freebie kit called 'Gothic Romance' which you can download at Simply Sensational Scraps here
Thank you!
Mask - I am using SD mask 6 which you can find here
Font of choice - I am using Romerati
Ok - Open a new image 600x600 floodfill white
Copy Frame2 from the kit, paste as a new layer, resize 85%
click inside each of the frames with magic wand, expand by 4
Copy Paper13 and paste as a new layer
selections, invert, delete and drag below frames, select none
Apply a drop shadow to the frames 0 0 70 5
Copy the wirebeads1 and paste as a new layer along the bottom of frames
resize, sharpen & drop shadow
Paste some elements of choice inside the frames
Add your tube and position, drop shadow
Copy book1, resize and position below the tube, sharpen & drop shadow
Add a new raster layer above the background layer & select all
Copy & paste a Paper of choice into selection, select none
Apply mask, delete & merge group, duplicate & merge down
resize & crop your tag to your liking
Add your name & copyright info
delete background layer & save as a Png!

Saturday, 22 August 2009

Heavenly Beauty

Supplies
Tube of choice - I am using the artwork of Jennifer Janesko which you can purchase from CILM
Scrapkit - a beautiful ptu kit from Kat called 'Heavenly' which you can purchase from NK Art Shop here
Mask - I am using WSL 249
Tiny text brushes made by Xinstinctive you can download here and here
Export to custom brushes
Font of choice - I am using Vivaldi
Eye candy gradient glow
Ok - Open a new image in PSP 600x600 floodfill white
Copy element 11, resize and paste as a new layer
Click inside the frame with magic wand, expand by 6
Copy Paper14, resize and paste as a new layer
invert and delete and move below the frame layer, select none
Drop shadow frame 0 0 55 5
Resize element 27, paste as a new layer above paper layer, sharpen & drop shadow
Resize element 28 and paste as a new layer, position below the arches, sharpen & DS
Copy the gold leaf 36, paste as a new layer, resize, sharpen & drop shadow
position at bottom of frame, duplicate & mirror
Copy flowers 8 & 10, resize and position over the leaves, drop shadow
Copy bow 23, paste as a new layer on top left of frame, resize, sharpen & DS
Resize the key 30, paste as a new layer and use your deform tool to turn slightly to the right
sharpen more
copy bow 35, resize and position above the key, sharpen more & DS
Now add your tube, resize if necessary and add a drop shadow 5 5 65 9
Add a new raster layer above the background layer, select all
Copy Paper1 and paste into selection, select none
Apply mask, delete & merge group, duplicate & flip, merge down
Add noise to the mask layer, uniform 35
Hide white background and merge visible all other layers
Resize & crop your tag
Add a new layer and bring to the top
Stamp some brushes around the frame using #9a7550 as foreground colour
Add your name using the same colour
Apply a gradient glow using #ebdcb9
Add noise at random 21
drop shadow 2 3 65 7
Add your copyright info, delete background layer & save as a Png!

Friday, 21 August 2009

Love and Hope

Click on the tag to view animation
Supplies
Tube of choice - I am using the artwork of KatNKDA available to purchase from NKArtshop
Scrapkit - 'Love & Hope' by Jaelop which you can download here
Thank you!
Mask I am using is WSL 137 you can find here
Twinks here
Font of choice - I am using 2Peas hearts delight
Ok - Open a new image 600x 550 floodfill white
Copy Frame30 from the kit, resize and rotate 90 degrees to the left
Click inside the frame with magic wand & expand by 6
Copy & paste your paper of choice - the paper I am using came with the tube
invert, delete and drag below frame, select none
Resize the Love(39) and hope(43) words
position on the tag, sharpen & drop shadow 0 0 70 5
Copy element 34, resize, sharpen & drop shadow and position at top of frame
Add your tube and apply a drop shadow
Copy element 12a, resize and paste at bottom of frame, sharpen & DS
Resize element 16 and paste over one side, erase any bits that cover the tube
Add a new raster layer above the white background and select all
Copy & paste Paper4 into selection, select none
Apply mask, delete & merge group, duplicate & merge down
Add noise to mask layer at uniform 35 and lower opacity slightly
Resize & crop your tag
Add your name & copyright info
Copy merged into animation shop
Open the twinks in ani shop, there are 16 frames
you need to duplicate your tag until you have 16 frames
Click on the twinks, select all, copy
Click on the tag, select all, paste into selected frame
position the twinks so they look like they are coming from her hand
View animation & if happy save as a gif!

Pink Chaos

Supplies
Tube of choice - I am using the awesome artwork of Ismael Rac available to purchase from AMI
Scrapkit - a lovely freebie from Lynn at ScrappersEmporium called 'Chaos' which you can download here
Thanks Lynn!
Mask I am using is Babes mask 20 which you can find here
Font of choice - the one I am using is Murro
Muras Meister Copies (optional)
OK - open a new image 600x600 floodfill white
Copy the Frame from the kit, paste as a new layer, resize by 85%
click in centre & expand by 5
Copy the pink paper from the kit, paste as a new layer, selections, invert, delete and drag below the frame, select none - drop shadow frame 0 0 70 5
On the paper layer, type out a word or saying of choice in a white font
Apply copies, tiling and change gap to 2
select the paper layer, float, defloat, invert
click on the font layer and hit delete, select none
lower the opacity to about 75 on the font layer
Copy & paste the eyelet bow, resize and position, drop shadow as above
Resize the pendant and positon tothe side, drop shadow
Copy the heart ribbon, resize, sharpen & drop shadow & position
Add elements of choice from the kit and position where desired
Paste your tube, drop shadow 5 5 70 11
erase any overhang at the bottom of the frame
Add a new raster layer above the background layer & select all
Copy the grey paper and paste into selection, select none
Apply mask, delete & merge group
Use your deform tool to pull the mask into shape
(see my tag above)
duplicate the mask layer & merge down
Add your name and apply a heavy drop shadow
Delete the background layer, resize & crop your tag
add your copyright info and save as a Png!

Wednesday, 19 August 2009

Adoration

Supplies
Tube of choice - I am using the artwork of Jennifer Janesko which may be purchased from CILM
Scrapkit - a beautiful freebie from Vaybs 'Black'n'white tag kit' here
Thank you Vaybs!
Mask - Butterfly mask 26 here
Wordart by Kelly here
Thanks ladies!
Font of choice
OK - open a new image in PSP 600x600 floodfill white
Copy Frame3 & paste as a new layer, resize 85%
Click inside the frame with magic wand & expand by 5
Copy Paper4. resize and position, invert & delete
Move the paper below the frame, drop shadow frame 0 0 70 5
Paste your tube as a new layer and erase any overhang
Drop shadow your tube 5 5 70 11
Copy a flower of choice from the kit & paste as a new layer at bottom left
Copy elements 3 & 20, resize and position at side of frame
Adjust hue & saturation both at 0, sharpen more
resize the tag19 and place at the top right, use your deform tool to turn
Copy the white bow8 and paste above the tag, sharpen & drop shadow
Using a white font, type out the word Adore and position on the tag
Image mirror, image flip and move into position, lower opacity slightly
Add a new raster layer above background layer & select all
Copy Paper5 and paste into selection, select none
Apply mask, delete and merge group
Use your deform tool to push in at sides and pull up & down
Add noise at uniform 35, duplicate
on the bottom mask layer, adjust blur, gaussian blur 10
Copy the wordart and paste as a new layer on top, resize
colourise the top word white and drop shadow 2 3 67 7
Add your name to the tag
resize & crop then add copyright info
delete background layer & save as a Png!

Tuesday, 18 August 2009

Hello Sailor

Supplies
Tube of choice - I am using the artwork of Michael Landefeld which may be purchased from CILM
Scrapkit - another beautiful freebie kit from KatNKDA called 'Summer Morning'
which you can download from her site here
Thank you Kat!
Mask of choice
Font of choice
A little quickie this evening
Open a new image 600x600 floodfill white
Copy Frame9 from the kit, paste as a new layer and resize
Click in the centre of frame with magic wand, expand by 6
Copy Paper10 and paste as a new layer, invert & delete
drag this below the frame layer
drop shadow the frame 0 0 65 5
Copy & paste element10, resize and use your raster deform tool to push it in so it fits nicely around the frame, sharpen
Now paste your tube as a new layer, position & drop shadow
Copy flowers2, resize and paste at side of frame
sharpen & drop shadow
Copy & paste tag08, resize, sharpen & drop shadow
position at opposite side
paste bow 25 above this layer, resize, sharpen & drop shadow
Resize notepaper16 and type your words of choice, merge down
place the notepaper behind the tube & turn slightly to the left with deform tool
drop shadow
Add a new layer above the background layer & select all
Copy & paste Paper6 into selection, select none
Apply your mask, delete & merge group
Copy doodle18, resize & paste as a new layer above the mask layer
duplicate, image mirror & flip and move into position
Add your name to the tag using a font of choice
Delete background layer & merge visible
resize & crop your tag
Add your copyright info and save as a Png!

Monday, 17 August 2009

Midnight Garden

Supplies
Tube of choice - I am using the artwork of Jennifer Janesko which is available to purchase from CILM
Scrapkit - beautiful freebie from Lacarolita 'My Lady Bugs' which you can download from her site here
Thank you!
Mask - WSL259 you can find here
Thanks!
Font of choice - I am using CupieDoll
OK - Open a new image 600x600 floodfill white
Copy Button2 from the kit, paste as a new layer & resize, sharpen & drop shadow
0 0 70 5
Paste your tube as a new layer, position & drop shadow
5 5 70 11
Copy & paste Butterfly1 as a new layer, resize and position
sharpen & apply the same drop shadow as the button
Copy Flower4, resize and paste at bottom left, drop shadow as above
Resize a bow of choice from the kit, I am using bow2 and paste to the side
sharpen & drop shadow
Copy & paste the balloon, resize & sharpen, position on right side
Hide white background layer & merge visible all other layers
unhide background & add a new raster layer above it, select all
Copy Paper7 and paste into selection, select none
Apply mask, delete and merge group, resize by 90%
Copy flower6 and paste as a new layer above the mask layer at bottom right
resize and drop shadow
Resize and crop your tag, add your name & copyright info
Delete background layer & save as a Png!

Sunday, 16 August 2009

Obsession

Supplies
Tube of choice - I am using artwork by Keith Garvey which may be purchased from MPT
Scrapkit - a beautiful ptu kit by KatNKDA called 'Obsession' which you can purchase here
Kat it is such a pleasure to work with your kits!!
Mask is included in the kit
Font of choice - I am using heart emboss
OK - open a new image in PSP 600x600 floodfill white
Copy element36, resize & paste as a new layer
Click in the centre of frame, expand by 3
Copy Paper9, resize and paste as a new layer, position in the frame
selections, invert, delete and drag below the frame
do not deselect yet
resize element 9 and paste as a new layer, position towards the bottom, delete
resize element49 and position, delete and select none
Copy bow39, resize and position at bottom of frame
Drop shadow bow & frame 0 0 70 5
Paste your tube as a new layer, drag it below the frame layer, duplicate
bring the duplicate layer to the top and erase any overhang at the bottom
Copy element 50,paste as a new layer, resize & position to the side of frame
copy element 33, resize and paste at the right side
Open element13, resize, clickin all the frames, expand by 3
copy paper11 and paste as a new layer, selections, invert, delete, select none
drop shadow the frames 0 0 70 5
click in each frame one at a time and expand by 6
paste your tube, invert, delete and drag below frame
change tube layer to overlay
do this for a few of the frames then merge visible
copy and paste as a new layer onto your main tag
bring below your tube layer
Hide white background & merge visible all other layers
unhide background layer
Copy element 52, paste as a new layer above background, resize, duplicate & flip
position these 2 layers to the right side
Copy elements 41 & 42, resize both and paste above the leaves
move into position
Add a new layer above the background layer and select all
Copy Paper13 and paste into selection, select none
apply mask2 from the kit, delete & merge group
add noise at uniform 40
Add your name & copyright info
delete background layer & save as a Png!

Saturday, 15 August 2009

Once Upon A Time...

Supplies
Tube of choice - I am using pinuptoons art available to purchase from CILM
Scrapkit -'Magical World' freebie by Seachell part of the Fantasy Blog Train
you can get this from Seachells site here
Thanks!
Mask I am using is WSL 297 which you can download from her site here
Wordart is by Vaybs which you can find here
Thanks ladies for the fab freebies!
Font of choice - I am using Shark random funnyness
Eye candy gradient glow
OK - Open a new image 600x600 floodfill white
Copy & paste Frame15 from the kit, resize
Click inside the frame with magic wand, expand by 6
Resize Paper2 and paste as a new layer, position in the frame
selections, invert, delete and drag below frame layer, select none
Add a drop shadow to the frame 0 0 70 5
Copy element7, resize & paste as a new layer, position to the left
Copy the castle 8, resize and position to the right
Copy & paste the fairydust 11, resize & position
Add the little elves 9 & 10, resize & position where you like on the tag
Add a bow and butterfly and position to the top of the frame
sharpen & drop shadow 0 0 70 5
Paste your tube and drop shadow 5 5 70 9
Open the wordart, resize and paste as a new layer
Add a gradient glow using the colour d1c4c2
Add a new raster layer above the white background layer and select all
Copy & paste Paper6 into selection, select none
Apply mask, delete & merge group, duplicate, mirror, flip & merge down
move into position
Hide white background layer & merge visible all other layers
Resize & crop to your liking
Add your name & copyright info
Delete the background layer & save as a Png!

Thursday, 13 August 2009

Aint seen nuthin yet!

Supplies
Tube of choice - I am using the artwork of Dominic Marco which may be purchased from CILM
Scrapkit - a beautiful freebie kit from Kathy 'First scrapkit' here
Thanks Kathy!
Mask - wsl 286 here
My wordart here
Font I am using is CupieDoll
Ok -Open a new image in PSP 600x600 floodfill white
Copy Frame3 from the kit & paste as a new layer, resize & sharpen
Click inside the frame with magic wand & expand by 6
Copy & paste Paper7 as a new layer, selections, invert, delete & select none
drag the paper layer below the frame layer
drop shadow frame 0 0 70 5
Copy the square jewels, paste as a new layer above the frame layer
position and erase any overhang at the sides, drop shadow 0 0 70 5
Paste your tube as a new layer, move into position & drop shadow 5 5 70 9
Paste the hearts & resize, click inside the hearts a few times with magic wand until all bits are selected, expand by 3 and paste Paper8 as a new layer, selections, invert, delete & select none
move the paper below the hearts layer and drop shadow hearts 0 0 70 5
merge these 2 layers together and position at top of frame
Copy & paste the tag, resize & drop shadow
Add your name to the tag using the pink colour from the jewels
Resize the butterfly, sharpen & drop shadow and position below the tag
Add the word art I supplied, resize if necessary
Add a new layer above the background layer & select all
Copy Paper3 & paste into selection, select none
Apply mask, delete & merge group
Use your deform tool to push the mask layer in at the sides so the wordart is showing around the white frame
add your copyright info
resize & crop to your likng
delete background layer & save as a Png!

I got another award !

Thank you to WitchysHeart for this award!
Here are the guidelines for accepting the award:
1. Add the logo to your blog
2. Link to the person from whom you received this award
3. Nominate 7 or more blogs
4. Leave a message on their blog, letting them know they are One Lovely Blog!
I am giving this award to the following sites

Wednesday, 12 August 2009

Timeless

Supplies
Tube of choice - I am using the artwork of Jennifer Janesko available to purchase from CILM
Scrapkit - beautiful freebie kit from KatNDKA
Thanks Kat!
Masks - Babes mask 38 here
Edge fade round - this came with PSPx
Font I am using is Kingthings wrote
Ok - open a new image 600x600 floodfill white
Copy & paste element3 as a new layer
Copy element 4, paste as a new layer& resize so that it is just slightly smaller, sharpen more
Paste element13 as a new layer and position
Copy Paper 2 and paste as a new layer above the tag layer
Apply the round mask, delete and merge group
Use your deform tool to push in at the sides so that it is inside the frame
Copy element 1, paste above the paper layer, resize and sharpen more
Drop shadow 0 0 70 5
erase any bits at the sides
Paste your tube, position and erase any overhang at the bottom
Add a drop shadow of choice
Copy & paste element 16 and position to the side
Resize the leaves and flower, duplicate and mirror and position as mine above
Copy element 15, resize and position at the side of the frame
click inside the pendant and expand by 1
Paste a paper of choice as a new layer, resize by 50%, invert and delete
drag below the pendant and paste your tube again, resize and position
hit delete again and select none, lower the opacity of the tube slightly
Add a paper of choice as a new layer above the white background
Apply Babes mask, delete and merge group, add noise at uniform 40
Add your name & copyright info
delete background layer and save as a Png!

Tuesday, 11 August 2009

Pink Gingham


Supplies

Tube of choice - I am using the artwork of Ismael Rac which may be purchased from AMI
Scrapkit - 'strawberry cream' freebie kit from Scrappers Emporium here
Thank you!
Template by Melissa V which you can find here
Font of choice

OK - open the template in PSP, rotate all layers 90 degrees left
Select the large rectangle, float, defloat, resize Paper2 and paste as a new layer
selections, invert delete, select none, drop shadow 0 0 60 5
delete the original layer
Do the same on the next layer using Paper1
merge down the three frame layers so the are all in one layer
click inside the 3 frames with magic wand and floodfill with a pink gradient
paste your tube as a new layer, position, invert and delete
on the tube layer apply blinds 2 30 both boxes ticked and use a dark pink colour
add a drop shadow to the frame layer
lower the opacity of your tube slightly
decorate your tag using elements from the kit, sharpen & drop shadow all elements
0 0 70 5
Add your name to the tag
hide white background layer and merge visible all other layers
duplicate and on the bottomlayer adjust blur, gaussian blur 10
effects, texture effects mosaic glass
50 50 symmetric
50 0 2 50
Add your copright information
resize & crop to your liking
delete background layer & save as a Png!

Monday, 10 August 2009

Finity Awaits

Supplies
Tube of choice -I am using this beautiful tube by Carrie Hall which you can purchase from UpYourArt
Scrapkit - ptu kit from KatNKDA called 'Camelot' which you can purchase here
Thanks Kat for another beautiful kit!
Mask - I am using SL cloversdaydream by Sabre here
Plugins - xero porcelain
Cybia screenworks chainlink - here
eye candy gradient glow
Font I used is called Dundalk here
Ok - Open a new image 600x600 floodfill white
Copy element 11, resize and paste as a new layer, sharpen
click inside the frame with magic wand and expand by 5
Copy Paper11 and paste as a new layer, selections, invert, delete
drag this below the frame layer, do not deselect
resize Paper5, paste as a new layer, delete
copy element 25, resize and paste as a new layer, position at bottom of frame, delete
Now paste your tube, resize if necessary, delete and select none
Apply xero porcelain to the tube at default settings
Drop shadow frame layer 0 0 70 5
Copy element 1, resize and paste as a new layer on the frame, sharpen more and drop shadow as above, resize element 5, paste at the bottom corner, sharpen & DS
resize the harp, 10 and position to the side, sharpen & DS
Copy the sword 20, resize and paste as a new layer on left side of frame, sharpen & DS
Paste leaves 15, resize, duplicate & flip and position on bottom left
Copy the 2 flowers 18 & 19, resize and position over the leaves, sharpen & DS
Copy element 26, resize and position along the bottomof the tag
Add a new raster layer above the background layer and select all
Copy Paper1 and paste into selection, select none
Apply mask, delete & merge group, duplicate & merge down
Add noise at uniform 3o
Type your name using a dark green foreground and light green background
Apply cybia chainlink setting at 0
drop shadow 2 3 67 7
Apply a gradient glow using gold colour from the harp
Add your copyright information
Delete background layer, resize & crop
save as a Png!

Sunday, 9 August 2009

Born to Ride

Supplies
Tube of choice -I am using the artwork of Keith Garvey available to purchase from MPT
Scrapkit - gorgeous ptu kit from Kat called 'Born to Ride' which you can purchase here
Thanks Kat!!
Mask I am using - 0mask046 here
Plugins - both optional
Eye candy gradient glow
DSB flux linear transmission
Font I am using is Gothic texture quadrata here
OK - open a new image 700x600 floodfill white
Copy element 11 from the kit, paste as a new layer,resize, sharpen more
click in the centre with magic wand & expand by 5
Copy Paper13, resize by 30% and paste as a new layer, selections, invert, delete
select none and drag the paper layer below the frame layer
drop shadow the frame 0 0 70 5
Copy element 5, paste as a new layer, resize so it fits in the centre, sharpen more
use your dropper tool to select a pink colour from the bike
click on the frame layer and add a gradient glow using this pink
resize the wordart from the kit and paste at the top of the frame, sharpen more
Copy element 19, resize and paste as a new layer, position along the bottom, sharpen more and add above drop shadow
Resize element 37, paste as a new layer and position as above
Copy element 29, resize and position to the side of the fender, duplicate and mirror
Copy & paste element 7, resize, sharpen & drop shadow and position at the bottom
Now add your tube, position to the side of the tag and drop shadow 5 5 70 11
Add a new raster layer above the background layer & select all
copy Paper12 and paste into selection, select none
Apply mask, delete & merge group, add noise at uniform 25
Resize some doodles of choice from the kit and paste above the mask layer
position at the top and the side
Add your name using a purple gradient, add a black gradient glow
Duplicate your name and on the bottom layer apply linear transmission:
1 2 50 horizontal
Add your copyright info, resize and crop to your liking
Delete the white background layer & save as a Png!

Saturday, 8 August 2009

Kiss it!

Supplies
Tubes of choice -I am using the artwork of Ismael Rac available to purchase from AMI
Scrapkit - beautiful freebie kit from Melissa called 'Breezy' here
Thanks Melissa!
Mask - I am using Babes mask 32 which you can find here
Xero porcelain
Fonts I am using: hand of sean
Ok - open a new image 600x600 floodfill white
Copy Frame14 from the kit & paste as a new layer
with your selection tool set on rectangle, draw a selection around the inner frame
Copy Paper2 and paste as a new layer, selections, invert, delete and drag below the frame layer
Copy & paste your tube as a new layer, resize and position then delete again, select none
Add a drop shadow to the frame layer 0 0 70 5
Apply xero porcelain to the tube:
50 128 128 0 0 255
Hide white background layer and merge visible all layers
Duplicate and move down, use your deform tool to turn both layers slightly, top one to the left and bottom one to the right
Copy bow12, resize by 60% paste as a new layer, mirror, position between the 2 frames
sharpen & drop shadow as above
Open element 2 and draw a selection around the flower using your freehand tool, cop & paste as a new layer, resize and position at the bottom of the frames, sharpen & drop shadow as above
Now paste your main tube, position, drop shadow 5 5 70 11
Hide white background layer & merge visible all layers
Unhide background and add a new raster layer above it, select all
Copy Paper6 and paste into selection, select none
Apply mask, delete & merge group
Copy the sequins, element7, paste as a new layer above the mask layer
resize, duplicate, mirror & flip and position so some are showing at the sides
Copy element7, paste as a new layer above the sequins, duplicate a few times and position around the frames
Add your words of choice, name & copyright info
delete the white background layer, resize & crop to your liking
Save as a Png!

Precious Moments

Supplies
Tube of choice - I am using the artwork of Jennifer Janesko available to purchase from CILM
Scrapkit -'Potpourri' freebie from Wacky Scraps here
Wordart by Kelly here
Mask - I am using WSL 84 here
Thanks ladies!
Eye candy gradient glow
Font I am using is Adinekirnberg here
Ok this is a quickie
Open a new image in PSP 600x600 floodfill white
Copy the green frame from the kit & paste as a new layer
resize by 85%, click in centre with magic wand & expand by 6
Copy Paper cream1 and paste as a new layer, invert & delete, select none
Move the paper below the frame layer
Copy the diamond circle, paste as a new layer above the frame layer
resize by 95%, sharpen more, add a drop shadow 0 0 70 5 to the diamonds and the frame
Copy the fern and paste as a new layer, position
Add your tube and erase any overhang from bottom of frame
Drop shadow your tube 5 5 70 9
Copy the green ribbon, resize by 75%, sharpen & drop shadow
position at bottom of frame
Copy the cream ribbon, resize, mirror & flip and position
paste the pinecone on top of the ribbons, duplicate & mirror and move into position
Copy the green bow2 and paste on top of the cones, drop shadow
Open the wordart, colourise the word 'Always' by using the hue & saturation
Add a green gradient glow to the word 'precious'
hide the white layer & the copyright layer and copy merged
Paste as a new layer on your tag and resize by 60%
Add a new raster above the white background layer, select all
Copy Paper green1 and paste into selection, select none
Apply mask, delete & merge group
Add your name & copyright info
Delete background layer and save as a Png!

Wednesday, 5 August 2009

Rac 'n Roll

Supplies
Tube of choice - I am using the artwork of Ismael Rac which may be purchased from AMI
Scrapkit - 'Misfits Rock' by Kathy at Creative Misfits here
Template can also be found at Misfits here
Plugins - Tramages tow the line
Penta.com jeans
Toadies blast n blur
Eye candy gradient glow
Xero radiance
Font I am using is Cream regular here
OK - Open the template in PSP, delete the copyright layer
Add a new raster layer and bring to the bottom, floodfill white
Make a gradient using a dark and light colour from your tube: angle 36 repeat 3
Click on the top thin rectangle layer and merge down, merge down again so all 3 rectangles are on one layer, select all, float, defloat, add a new layer and floodfill with the gradient
select none and delete the original black layer
Duplicate this layer and on the bottom layer apply toadies blast n blur X5 Y17
On the top layer apply penta jeans 62 4
Drop shadow top layer 0 0 70 5
Click on the large oval layer, select all, float, defloat, add a new layer and fill with your gradient
Apply tramage tow the line: 50 15 45 9
delete the original pink layer
Click on the small circle layer, select all, float, defloat, add a new layer and floodfill with the gradient, paste your tube as a new layer, position then invert and delete
Apply xero radiance to the tube layer: 128 50 128 255
dlete the original pink circle
Add a pink gradient glow to the words
Open the beaded string from the kit, copy & paste as a new layer in the main frame, resize by 70%, sharpen and drop shadow 0 0 70 5, position in the frame, duplicate, image mirror, image flip, move into position, merge these 2 layers together and erase any overhang outside the frame
Paste your tube as a new layer, position on the tag and drop shadow 5 5 70 11
erase any overhang at bottom of frame
Copy a guitar of choice from the kit, resize and position, sharpen & drop shadow
add a button of choice and position
Hide white background layer and merge visible all other layers
resize by 85% and crop
Copy the glitter 2 from the kit, paste as a new layer, resize, sharpen, duplicate, image mirror, image flip, position below the tag
Add your name & copyright info
delete background layer & save as a Png!

Tuesday, 4 August 2009

Fantasy

Supplies
3 tubes of choice from same artist - I am using the artwork of Greg Horn available to purchase from CILM
Scrapkit - 'Olive Branch' beautiful freebie kit from KatNKDA here
Thanks Kat!
Mask of choice - I am using wsl84 here
Wordart by Sara you can find here
Thanks!
Xero porcelain
Font of choice
OK - Open a new image 600x600 floodfill white
Copy & paste Frame6 as a new layer, resize
Click inside the frames with magic wand & expand by 6
Copy Paper8 & paste as a new layer, selections, invert, delete and drag below the frames
select none and drop shadow frame layer 0 0 70 5
Click in the top frame with magic wand & expand by 6, paste your tube as a new layer, position, selections, invert, delete, select none and bring below the frame
Add porcelain to the tube at default settings
Repeat this step for the bottom frame
Copy element4, paste as a new layer, resize and mirror, position over the final frame
Paste your main tube, resize if necessary and drop shadow 5 5 70 9
Copy bow12, resize and paste in the middle of the frames, sharpen & drop shadow
Resize the bird3 and paste to the side of frames
Copy element19, resize, paste at the bottom below your tube and turn slightly with the deform tool, resize elements 7 & 9 and position at bottom right of frames
Copy elements 15 & 16, resize, sharpen & drop shadow and position on the frames
Hide white background layer & merge visible all other layers
Unhide background, resize tag by 85% and sharpen
Add a new raster layer above background layer and select all
Copy Paper10 and paste into selection, select none and apply mask
delete and merge group
Copy element2, resize and paste as a new layer above the mask layer
position to the side, duplicate and mirror
Colourize the wordart and paste as a new layer
Add your name and copyright info
Delete background layer & save as a Png!

Monday, 3 August 2009

Oasis

Supplies
Tube of choice - I am using the artwork of Greg Horn which may be purchased from CILM
Scrapkit - 'Oasis' ptu kit by Kat from KatNKDA which you can purchase here
thanks Kat for another beautiful kit!
Mask - wsl84 here
Font of choice - I am using Al Sandra
OK- open a new image in PSP 600x600 floodfill white
Copy element 17 and paste as a new layer, resize and sharpen more
Click in the centre with magic wand & expand by 5
Copy Paper3, resize by 50% and paste as a new layer, selections, invert, delete and drag below frame, copy element34, paste as a new layer, resize and position then delete again
drop shadow the frame layer 0 0 70 5
Copy element35 and paste as a new layer above the background layer, resize & position
Paste your tube as a new layer, drop shadow 5 5 70 11
Copy & paste the camel 15, resize, drop shadow, position to the right
Copy & paste the book 30, resize, sharpen more, drop shadow, use your deform tool to turn slightly, resize the beads 26, sharpen more, drop shadow, position on the middle of the book and turn using deform tool
Copy element 21, resize and paste as a new layer, position along the top of the book
Copy & paste a flower of choice from the kit, resize & drop shadow
Add any other elements from the kit, resize, sharpen & drop shadow & position around the tag
Add a new raster layer above the background layer, select all, copy Paper14 and paste into selection, select none and apply mask, delete & merge group
copy one of the doodles from the kit, resize and paste as a new layer above the mask layer, duplicate, mirror and flip and position
Add your name & copyright info, resize and crop your tag, delete the background layer and save as a Png!

Sunday, 2 August 2009

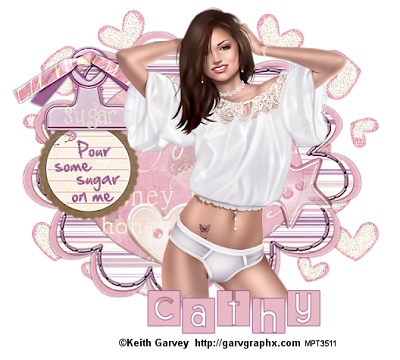
Some Sugar


Supplies
Tube of choice - I am using the artwork of Keith Garvey which you can purchase from MPT
Scrapkit - 'Confectioners Sugar' gorgeous freebie from Cupcake sprinkles here
Thank you!
Font I am using is 2peas wild child and hand of sean
Ok - Open a new image 600x600 floodfill white
Copy sugar frame1 and paste as a new layer, click in the centre of frame with magic wand and expand by 5, copy Paper 10 and paste as a new layer,resize slightly and position, selections, invert, delete and select none - move this below the frame layer and drop shadow Frame:
0 0 70 5
Resize one of the clips, sharpen & drop shadow position to the side, resize a knot of choice and paste as a new layer above the clip, copy the note doodle, resize and paste as a new layer below the clip, position, sharpen & drop shadow
Copy some of the buttons, resize by 50% and paste on the tag
Now add your tube,position and drop shadow
Using the hand of sean font, type your words of choice on the note paper, add noise at random 7
Add your name using the 2peas font
Copy the heart cluster, resize and position to the side, duplicate & mirror, merge down, duplicate again and move this layer down to the bottom, merge these 2 layers together, add noise at uniform 30, add your copyright information
Resize & crop to your liking, delete the background layer & save as a Png!

Saturday, 1 August 2009

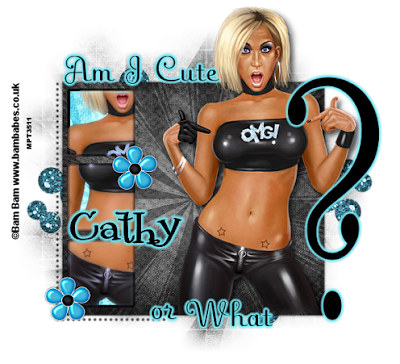
Cute or what?


Supplies
Tube of choice - I am using the artwork of Bam Bam which you can purchase from MPT
Scrapkit - 'Rock N Roll' by Bel Vidotti which you can find here at Misfits scrap challenge
Template by Melissa here
Thanks ladies for the fab freebies!
Eye candy gradient glow
Mask of choice
Font of choice
OK - open up the template in PSP, resize all layers 85%
Select the rectangle, float, defloat & add a new layer
Copy Paper5 and paste into selection, select none, drop shadow 0 0 70 5
delete the original rectangle
select the top frame and merge down to the middle one, merge down again
select all, float, defloat, copy Paper2 and paste as a new layer, selections, invert, delete
copy your tube and paste as a new layer, position in the frames how you would like it, hit delete again - apply a black gradient glow to the frames layer
Paste your tube again and position on the template, drop shadow 5 5 70 11
Add a blue gradient glow to the words using the blue colour from the paper and also to the question mark
Copy & paste the blue flower from the kit, resize and duplicate and position on the frames
Copy the gel glitter01, paste as a new layer, duplicate, mirror, flip - merge these 2 layers together and position below the template
Add a new raster layer above the background layer, select all, copy paper5 & paste into selection, select none and apply mask, delete & merge group
Add your name & copyright info
resize & crop your tag, delete the white background & save as a Png!