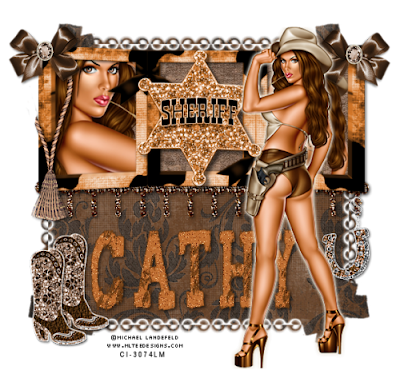
SUPPLIES
Tube of choice - I am using the artwork of Michael Landefeld which can be purchased from CILM
Scrapkit - 'cowchips' by Toni at Scraparoni Here under freebies...thanks Toni for this beautiful kit!
Mask - WSL mask 272 which can be downloaded from her site here
Font - Tiza here
OK - open a new image 600x600 floodfill white
Open frame 2 from the kit and colourize by using the change to target tool - hue & saturation 18 148
Paste as a new layer and resize by 80%
Click inside all the frames with your magic wand - open paper3 and paste as a new layer, selections, invert, delete and drag below the frame layer
Open the tubes you are using - make sure you are on the frame layer again and click inside the first one, paste your tube as a new layer - selections, invert, delete and drag below frame layer....do the same with the third frame
Open the badge and colourize as before, resize and paste in the middle frame, sharpen and add drop shadow 2 2 60 6
Open tassel 1 resize and paste as new layer on left side of frame, sharpen. drop shadow as b4 and then erase the outer side of the rope so it looks like its hanging over the frame
Open bow 1 resize by around 40% paste as new layer, sharpen & drop shadow, duplicate & image mirror
Open beads 2 paste as a new layer, resize by around 70% move them below the frame and using your raster deform tool, squeeze them in so they fit the frame, sharpen & drop shadow
You can now hide your white background and merge visible
Open paper 1 and paste as a new layer above white background, apply mask, delete & merge group, resize by 85%
Open boot2 from kit, resize, sharpen & drop shadow, place at bottom of tag, duplicate and position - see above tag - open charm 1 and resize by around 40% position as above
Add your tube, resize if necessary, sharpen and drop shadow
Now add your name using font supplied...add noise at random 12
Add any copyright information and you are done
save as a jpeg or png
©Michael Landefeld CI-3074LM. This tutorial was written on 18th November 2008 by Cathy. Any resemblance to any other tutorial is purely coincidental. Do not copy, rewrite or alter in any way.
